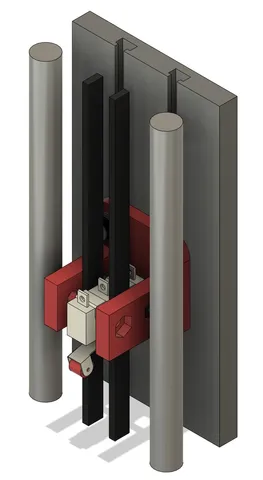
Monoprice Mini Delta Limit Switch Mount
prusaprinters
I replaced the controller board in my Monoprice Mini Delta with a BIGTREETECH SKR PICO V1.0 and had some trouble getting the optical endstops to work. I designed this mount for some Micro Limit Switches to replace the optical endstops. Note that you'll lose 10-20mm of Z travel depending on how compact you can make the switch wiring.To make three of these, one for each axis, you'll need the following hardware:6x 20mm M2.5 SHCS6x M2.5 Hex Nut6x 8mm M3 SHCS6x M3 Washer6x M3 Hex NutThe M2.5 hardware goes through the switch body, while the M3 hardware mounts to the aluminum extrusion behind the belts.You will likely need to remove the cap at the top of each axis to loosen the belt and replace the M3 hex bolt you lost when you removed the optical endstops.Install the rear M2.5 hex bolt through the limit switch.Put some heat shrink tubing on the wires and solder them to the switch.Thread the axis belt through the assembly. The belt will fit between the two M2.5 bolts.Slide the M3 hex nuts into the aluminum rail and bolt the assembly to the rail, using a M3 washer.Install the front M2.5 hex bolt through the assembly and switch body.Repeat for each of the three axes.The installation process is a pain, but I don't have a better solution.I printed in PLA at 0.15mm layer height, but a stiffer material like ABS, ASA or Nylon would probably be better if you have that capability.Category: 3D Printer Parts
With this file you will be able to print Monoprice Mini Delta Limit Switch Mount with your 3D printer. Click on the button and save the file on your computer to work, edit or customize your design. You can also find more 3D designs for printers on Monoprice Mini Delta Limit Switch Mount.
