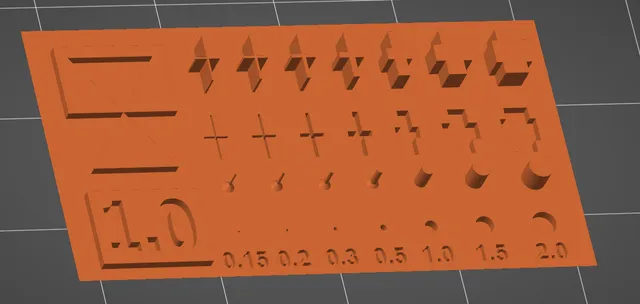
MONO RESIN EXPOSURE TEST
prusaprinters
Thank you to @Darragh for supplying a .step file for me to add another layer of resolution to their exposure test for my mono resin printer.Just for clarity, you will have to adjust the exposure time in your slicer to match the number on the model. The files I have loaded have nothing to do with time.I don't plan on printing all of the included files. I will print 2.0 first. From there I will determine if the exposure needs more time or less, and then I'll print 1.0 or 3.0 to compare. (lets say it's 1 and 2) I will then print 1.5 to compare against 1.0 and 2.0. (let's say it's 1.5 and 2.0) Depending on which of those two look best I'll print either 7 or 8.When I slice it (no pad or supports) with .05 layer height (that is what I will be printing) and 2 second layers it is less than 12 min and 1.02ml of resin per print ($0.03 per print if resin is $30/liter), just to give you an idea of how long it will take. If you follow the steps above you should be able to configure your mono printer exposure within .1 sec in less than 2 hours. Save your best print to compare to future resins that you will want to compare to.If you want to go one step further after you find your #.# setting, you can start adjusting by 0.01 increments. Just keep track of the number and time. Hopefully I will remember to upload a real pic after I go through the calibration.
With this file you will be able to print MONO RESIN EXPOSURE TEST with your 3D printer. Click on the button and save the file on your computer to work, edit or customize your design. You can also find more 3D designs for printers on MONO RESIN EXPOSURE TEST.
