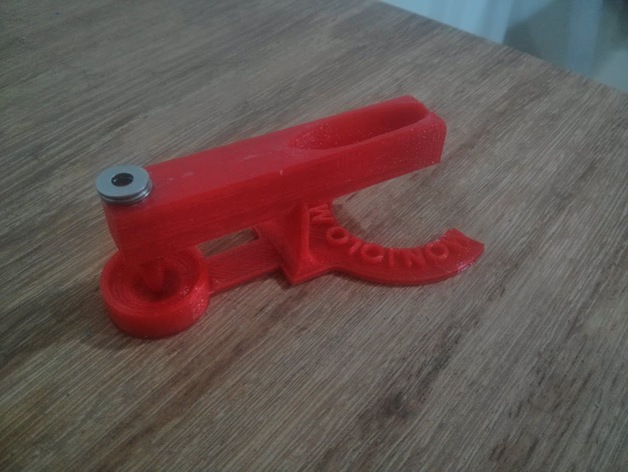
Monjolo: Primitive water mill
thingiverse
This is a basic water mill model. It's a straightforward machine that operates using just dripping water. It's an excellent practical lesson for kids. This model was created as an educational resource for teachers who want to discuss the physics involved in this machine's cycle. It also demonstrates how it was used in the past and is still being used today in some remote areas. Print Settings Printer Brand: RepRap Printer: Aluminum Mendel Rafts: No Supports: No Resolution: 0.2 Infill: 50% Notes: I printed at a 50% scale, but ideally it's designed to be built full scale so the inertia of the water flowing down doesn't prevent the monjolo from cycling. Project Project name: Monjolo: Basic Water Mill Overview & Background: You'll learn how torque works on a pivotal, free-moving machine with a seesaw-like design. No background is required to build this project. You can delve into the relationship between torque and the angles of the monjolo, explore why this machine design is so affordable, and discover why it's still used today in some places. Objectives: Students are expected to learn about torque and its applications in real-world scenarios. Audiences: This can be taught to any grade level, but to cover all details about the physics behind this machine, you'll need to teach at least 5th-grade students. You can also teach how to modify the monjolo by adding or subtracting weight. Additionally, you can discuss its origins and why it's simple and affordable, as well as why people continue to use it. Subjects: History, math, physics Lesson/Activities: Step 1: Print the base and monjolo, scaling down no more than 70% of the original size is allowed. Step 2: Create a dripping system using any method you prefer. Ensure that the speed and drop size are controlled and normal, similar to a medicine dropper. For a constant drop, use a soda PET bottle or a drip nozzle from 3DPonics (STL file and link provided). Connect this nozzle to an intravenous tube used in hospitals, which usually comes with a flow regulator that allows you to control the dripping. A picture of this device is attached if needed. Step 3: To activate it, sometimes you'll need to add extra weight as I did on my print, ensuring the hammer side is heavier than the bowl side of the monjolo. You can do it as desired for practical purposes; adding a layer of double-sided tape on top of the monjolo hammer allows you to stick and remove the counterweight. Step 4: If not using double-sided tape, now's the time to add another counterweight if you want to demonstrate how weight position affects the machine. Step 5: Finally, place something under the hammer in the base bowl for milling. Duration: Once the dripping mechanism is set up, simply place everything on a table and show it to your class. Preparation: This is an interactive presentation that requires only your students' attention and curiosity. References: * http://www.thingiverse.com/thing:376158/#files - 3DPonics link * http://www.antonine-education.co.uk/Pages/Physics_2/Mechanics/MEC_03/Mechanics_Page_3.htm - Torque basics link * http://www.ebay.com/bhp/iv-tubing - Intravenous tubing for dripping control * https://youtu.be/byhdEwHi3wo - Monjolo working video
With this file you will be able to print Monjolo: Primitive water mill with your 3D printer. Click on the button and save the file on your computer to work, edit or customize your design. You can also find more 3D designs for printers on Monjolo: Primitive water mill.
