Modular Wine Bottle Post and Bracket System
prusaprinters
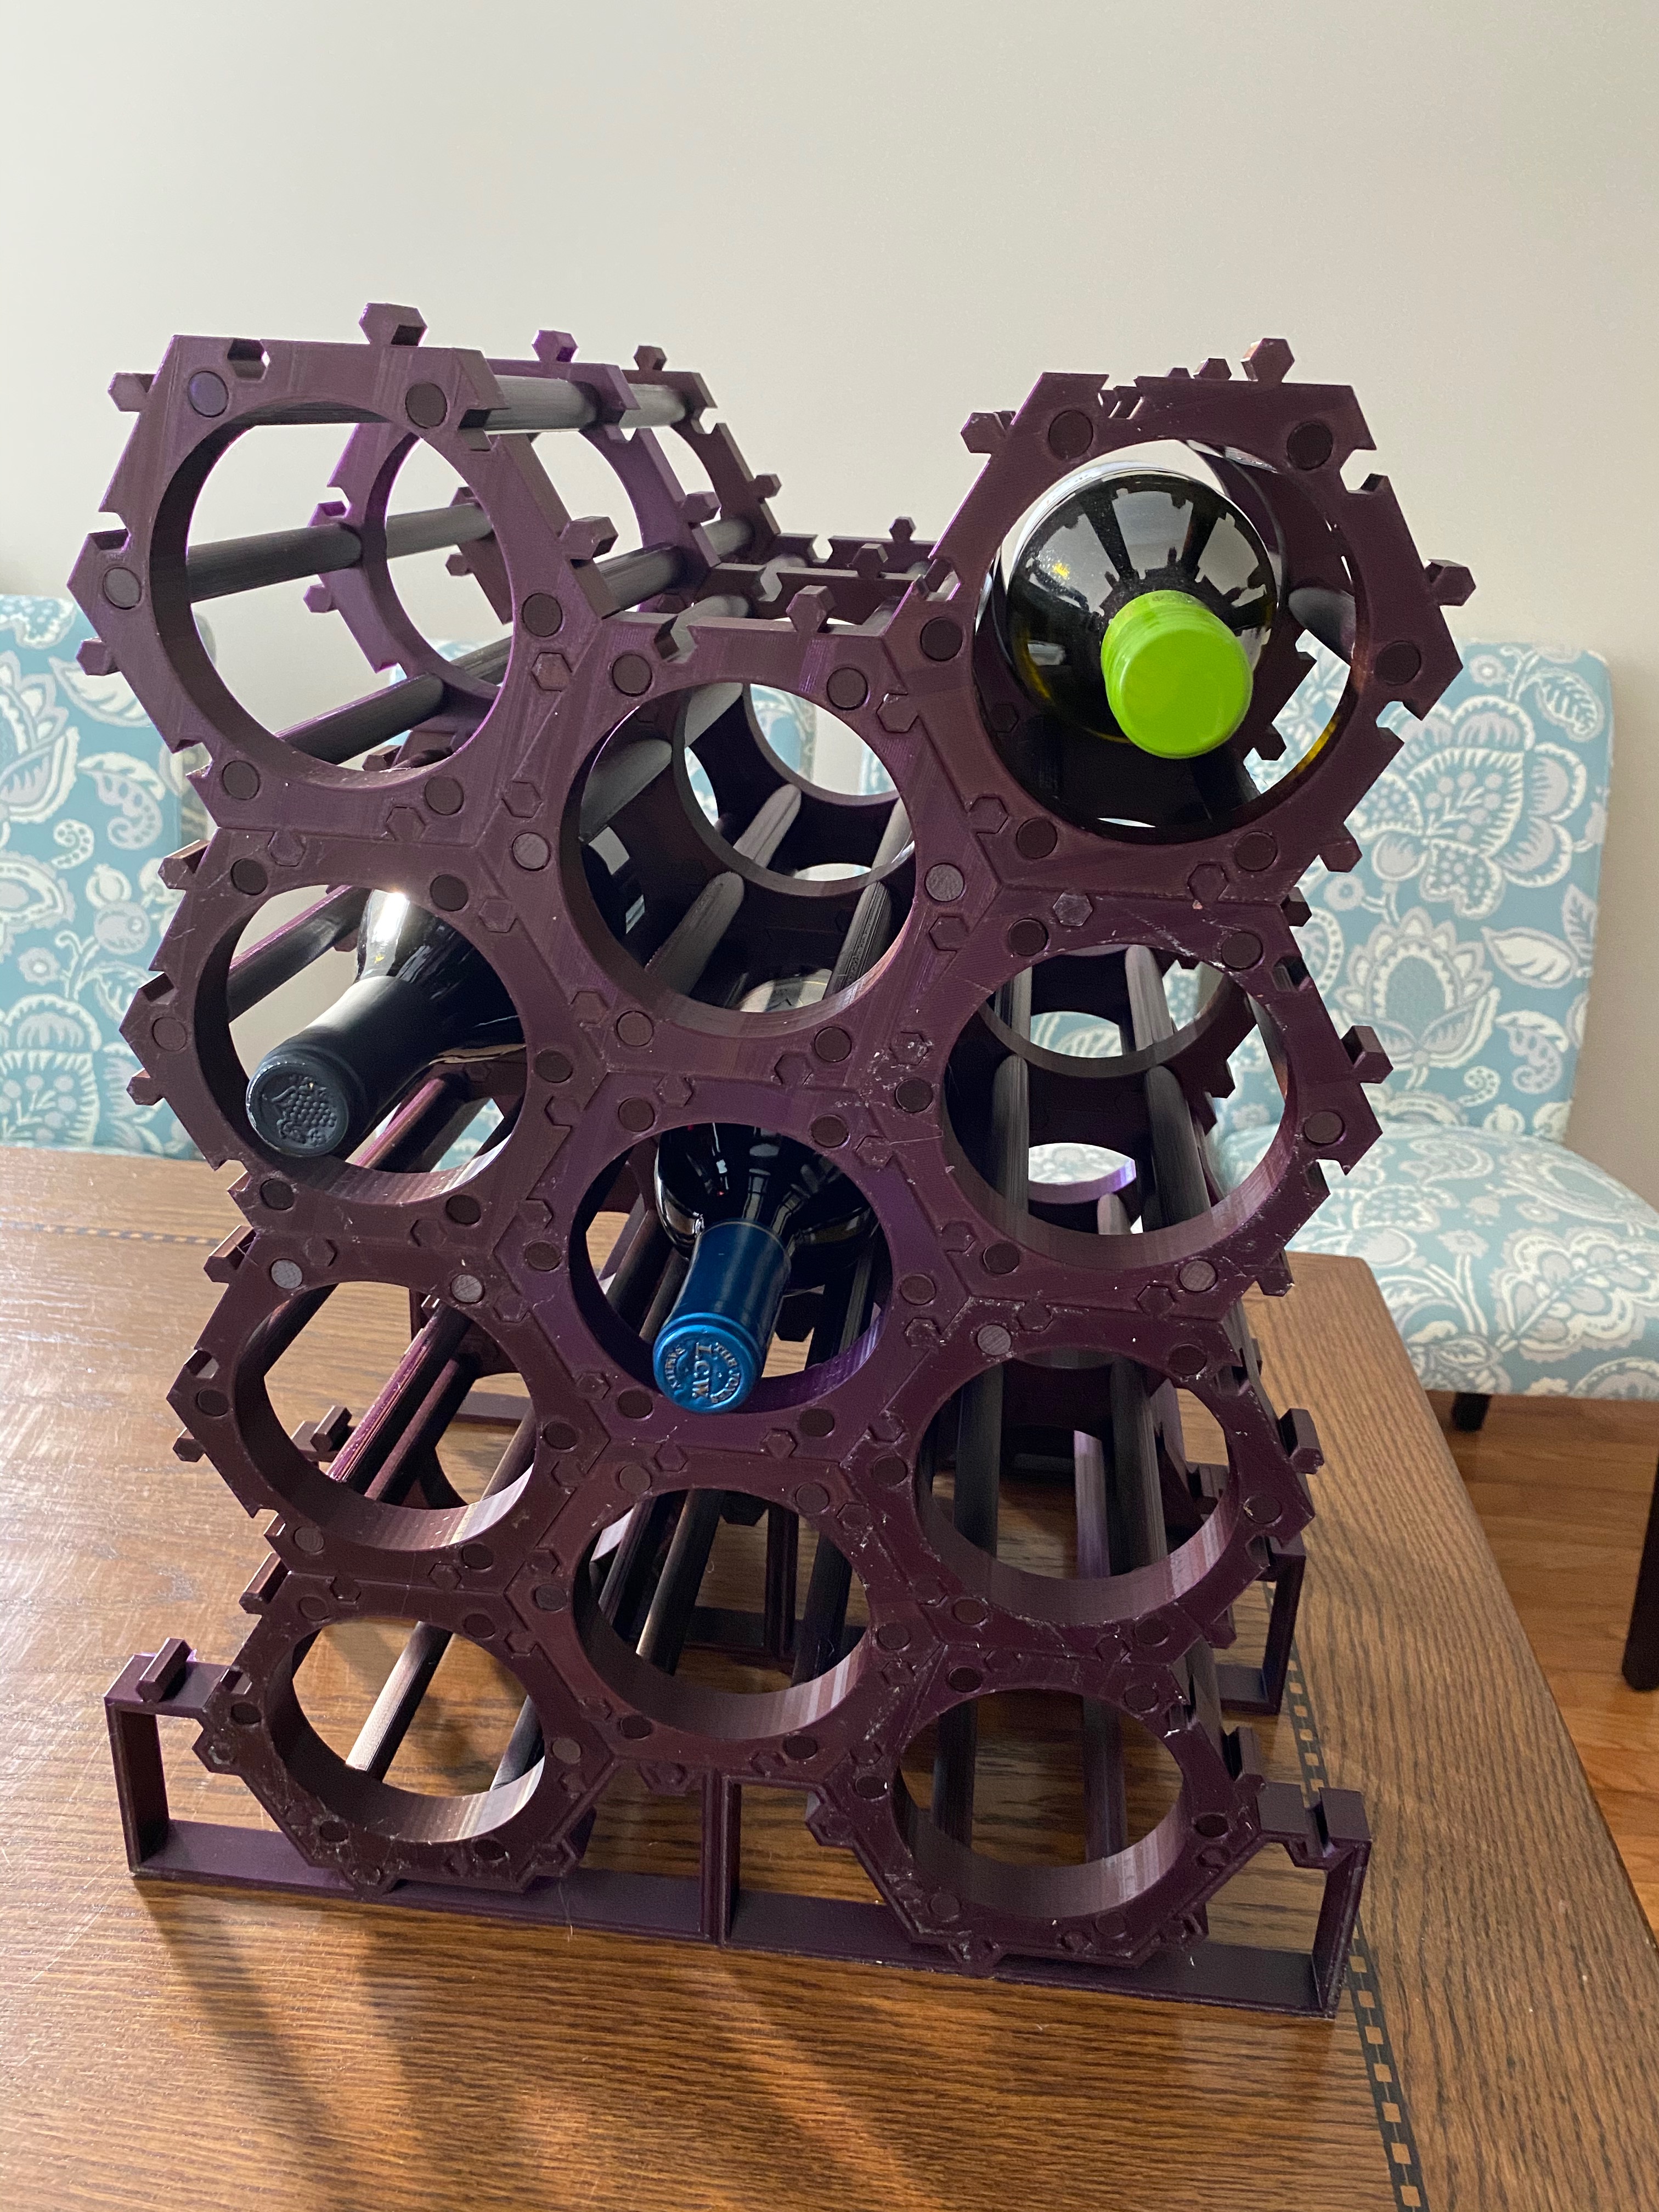
<p><strong>Update April 29th 2021: </strong></p><p>I've added a new post design (v25) to resolve multiple issues I had when printing larger numbers of posts for a larger wine rack (for 100 bottles). The original post had a cylindrical design which required a significant support raft to insure proper bed adhesion. This had the following outcomes:</p><ol><li>Generated a lot of waste material.</li><li>Added a lot of post processing work.</li><li>Made the print time unnecessarily long.</li><li>Bed adhesion was not consistent resulting an a number of failed prints. </li></ol><p>I redesigned the post to have a flat side that is pointed inwards which makes a smoother edge for the wine bottle. It also resolves these issues and allowed me to print several hundred posts in just a few days with only a little tab of support material to remove. </p><p><strong>Summary</strong></p><p>My family enjoys different types of wine and over the span of several years, we've somehow managed to collect quite a number of bottles…too many to drink in a weekend. I've typically kept them in a cheap wood wine rack but was always facing chronic frustration, as the wine rack was “rickety” and bottles would often fall out. I keep my wine in my basement and with the low humidity, the glue holding it together would shrink and allow the parts to come apart. To add more frustration, I couldn't even find replacement parts for the kit, and it has been difficult to repair. I had considered purchasing a better wine rack but found them to be equally “rickety”, too expensive, or require a lot of extra space.</p><p>I had wondered if I could solve this challenge by 3D printing a well-designed functional print model. I had searched Thingiverse and found some interesting models that the maker community had created. So, I tried out these models : </p><p><a href="https://www.thingiverse.com/thing:2625699">https://www.thingiverse.com/thing:2625699</a><br><a href="https://www.thingiverse.com/thing:3641393">https://www.thingiverse.com/thing:3641393</a></p><p>While I found the design and functionality of these models very useful, I found that they all had similar issues in that they took too long to print (some took > 2 days), took a lot of material, could only be printed in small batches (1 or 2 at a time on my Prusa MK3), or were too large to be printed on a Prusa Mini. I did find the designs to be elegant and useful, but given the size of my wine collection, I was concerned on the time and amount of filament used, and I wanted a design that I could scale with a print farm.</p><p><strong>Design</strong></p><p>With these challenges in mind, I created the “Modular Wine Bottle Post and Bracket System”. The design uses a series of separate components that can be printed independently and fit together to create a sturdy wine bottle rack. The design was modeled for the rack to be relatively light, while maintaining strength and rigidity, even as the size of the rack increased. Also its flexible to allow for each component to be printed by several printers in a print farm.</p><p>The components are as follows:</p><ol><li>Brackets - This is the core component which holds the bottle of wine and attaches to other brackets using a “jigsaw puzzle” type fit.<br> </li><li>Posts - These hold together multiple tracks to hold an entire bottle of wine and create the framework of the rack and add strength and rigidity. These are similar to cylindrical wood “dowels” in practice.<br> </li><li>Bases - These serve as footing for the rack and hold the rack flat on a floor.<br> </li></ol><p><strong>Materials, Settings, and Construction. </strong></p><p>The models use PLA since its fairly easy to print with reasonable quality and has more than adequate strength. I considered trying with PETG or other materials, but found the PLA has worked well. I've been printing with Mystic Brown PLA Prusament primary for its appearance as it has the color of a fine Burgundy wine and the “mystic” quality makes it hard to tell if its brown, purple or some shade of dark red. The components are printed with 4-5 perimeters for added strength especially for the posts and the holes in the brackets to resist cracking. 15% gyroid fill has proven to to be a good balance of strength while not using too much filament. </p><p>A single unit (e.g. holds a single bottle of wine) is comprised of 3 brackets and 12 posts. This will have a front, middle and rear bracket which are held together with the posts. The posts have reduced diameter fittings that are inserted into the brackets. These fittings have a long end and a shorter end. The long ended fittings go into the front and rear brackets, while the shorter ended fittings go into the middle bracket. Each bracket has a series of hexagonal extensions and spaces that are used to interconnect brackets to one another and to the base components. For a bottom unit, 3 base (aka "foot") components help to make make the unit stable and level on the floor</p><p>Here are some additional print details:</p><p>Brackets: A single bracket at a time can be printed on the Prusa Mini, or two at a time on the Prusa MK3. Each bracket takes about 5 ½ hours with the 0.20 mm quality setting on Prusa mini or double that for the MK3 .</p><p>Posts: From 6 up to 9 can be printed at a time on the Prusa Mini or more on the Prusa MK3. Note that the models are laid horizontally on the print bed for added strength to avoid any “shearing" between layers. It was found that printing vertically would create posts that were easy to snap without much force. I found the strength to be much greater when printing the parts horizontally along the print bed. Since the posts are cylindrical, brims and rafts are used to maintain adhesion to the bed. Six posts takes about 8 ½ hours with a 0.20 mm quality setting on a Prusa Mini.</p><p>Bases: The bases are too large to print on a Prusa Mini as they need to be long enough to link together multiple brackets. I've been able to print 2 at a time on an MK3 using the Smooth Spring Steel sheet. Two bases takes about 16 hours with a 0.20 mm quality setting on a Prusa MK3.</p><p>To put together the rack, the parts can be fit into each other with a little force, such as a rubber mallet. Try not to hit them too hard as PLA can be somewhat brittle and can crack at high levels of force. The parts hold to gather fairly well with the natural friction of the PLA but you can certainly use adhesives to hold the parts together. “Hot melt" glue works well or cyanoacrylate based glues like crazy glue also work, but are not required. </p><p> </p><p> </p><p> </p><p> </p>
With this file you will be able to print Modular Wine Bottle Post and Bracket System with your 3D printer. Click on the button and save the file on your computer to work, edit or customize your design. You can also find more 3D designs for printers on Modular Wine Bottle Post and Bracket System.