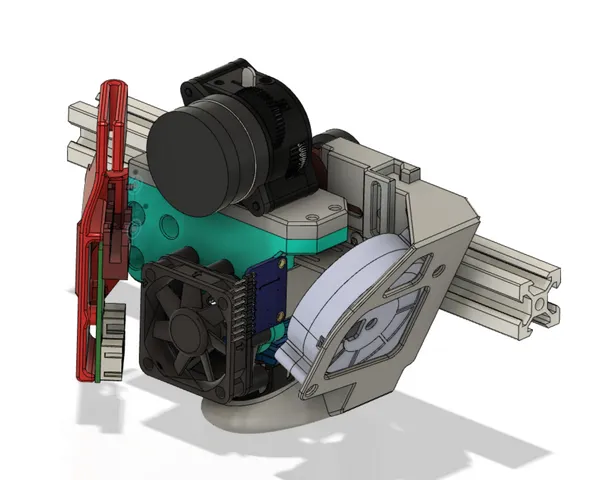
Modular version of CR-6 TAP Direct Drive Mount 2.0
prusaprinters
Here is my first disclaimer. I redesigned my CR6 TAP to this newer version but my previous one is working so well I have not upgraded to this new modular design. I plan on doing it in the future but it has not been done yet. For this reason this redesign is a prototype that I am more then happy to support and modify on request for anyone trying to use it.This is a mount for CF6SE style strain gauge printers that uses an MGN9H linear rail to mount the hot end and extruder assembly. This allows for a rigid mount of these components while allow a very well controlled up and down movement of the setup to trigger the strain gauge. Using this method the strain gauge calibration becomes trivial. The more rigid mount also allows for the printer to go faster using firmware like Klipper while minimizing ringing more effectively using features like input shaper. The description of the original design may also provide some information beyond this one.My CR 6 is working great with my previous CR6 TAP design but I've now modified my design again for these improvementsModularity to add support for Mosquito, Dragon, Dragonfly BMS and other future hot ends. Modularity to add support for Orbiter v1.5, Sherpa Mini, LGX Lite and other future hot ends.Moved PTFE tube forward by 4mm to allow the Sherpa Mini to be closer to the hotend allowing for a shorter tube.The move forward by 4mm will also allow me to fit in the future the Orbiter v2.0 and other extruders that need a bit more clearance to the carriage plate.I've already included the design pieces needed for the Sherpa mini, LGX Lite and Orbiter v1.5. I also included mounts for the Mosquito, Dragon and Dragonfly BMS. Also added were blank templates for the extruder mounting plate and the hot end mounting bracket.I've included a STEP file that includes every part I currently have available along with STL files for each individual component. This design uses hot melt inserts all of which should be M3 size. Many location will allow for 5.7mm inserts but a few would be better with 5 or even 3mm inserts for something like the light ADXL board.The top extruder mount uses 3 of these M3 bolts to mount it to the top of the main body. For cooling the original 3010 will work but I included an adapter to upgrade to a 4010 as well.The model does not show all the bolts needed since I am still learning Fusion 360. As I improve I may add more details As mentionned before I'm more than happy to try and enhance this setup based on your needs.Happy PrintingMarch 6th 2023 Update: I have now added a Bowden setup mount. It is a simple flat top that can easily be printed upside down and has an included thread to put in a typical Bowden tube fitting. Please the picture and the model for more information.March 7th 2023 Update: Looking at the design I realized the hot end mount front bolts could conflict with the 4010 fan so I added an inset to them so the bolts won't stick out. This is only a change to the main body. I also see that the cable placement could be a challenge between the 4010 fan and the daughter board wires going to the strain gauge. I'm looking to buy a second CR6SE to prototype on because my original TAP is working so well I don't want to take it apart.
With this file you will be able to print Modular version of CR-6 TAP Direct Drive Mount 2.0 with your 3D printer. Click on the button and save the file on your computer to work, edit or customize your design. You can also find more 3D designs for printers on Modular version of CR-6 TAP Direct Drive Mount 2.0.
