Modular small parts organizer
prusaprinters
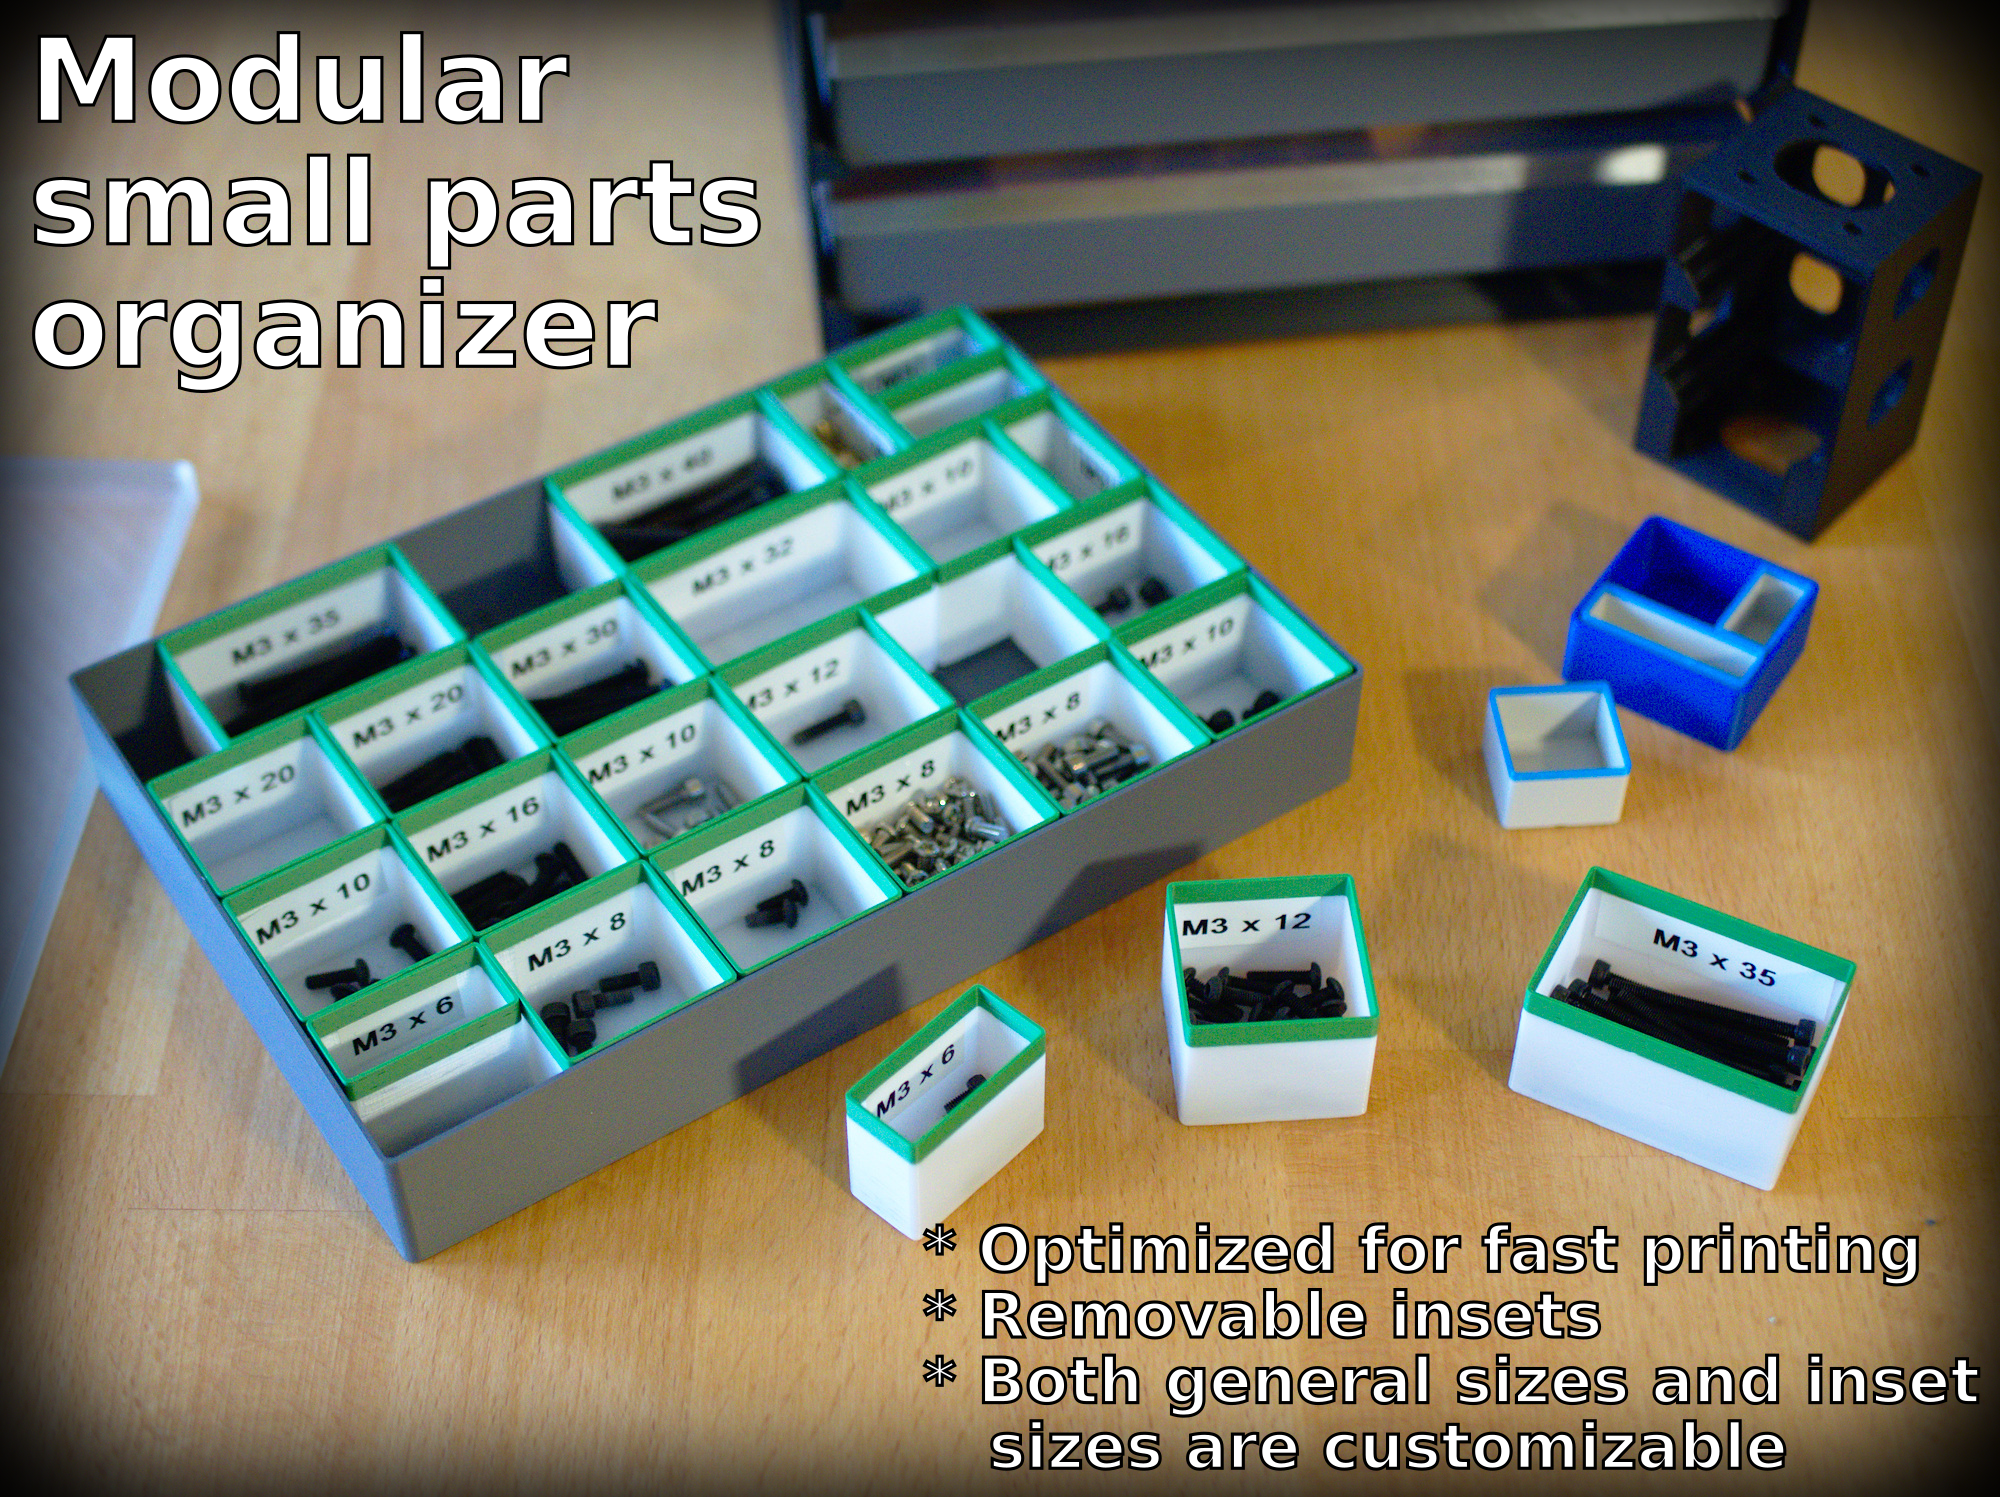
<p>The goal of this storage system was to have</p> <ul> <li>individually removable bins</li> <li>a size reasonable for small mechanical / electronic parts (large enough for m3 screws, small enough that m2 nuts don't waste a lot of space)</li> <li>a space efficient way to store multiple boxes</li> <li>relatively fast / efficient printing options</li> </ul> <p><strong>File naming</strong><br/> There are 2 different base sizes available: 10mm x 10mm and 15 mm x 15 mm. These base sizes determine the sizes of the different insets.</p> <p>I.e. for 10 mm x 10 mm the insets can be:</p> <ul> <li>10 mm x 10 mm</li> <li>10 mm x 20 mm</li> <li>10 mm x 30 mm</li> <li>20 mm x 20 mm</li> <li>...</li> </ul> <p>Whereas for 15 mm x 15 mm it would be:</p> <ul> <li>15 mm x 15 mm</li> <li>15 mm x 30 mm</li> <li>15 mm x 45 mm</li> <li>30 mm x 30 mm</li> <li>...</li> </ul> <p>All other measurements are based on these base sizes.<br/> A shell of <code>size-10x10-shell-6x4</code> will be roughly 60 mm x 40 mm big and fit for example 3 2x4 insets.</p> <p>The racks have an additional parameter <code>height</code> which is the maximum height a shell can have and still fit into a slot and <code>levels</code> which is the number of shells that can fit into the rack.</p> <p><strong>Custom sizes</strong><br/> For custom heights you can cut off the top of the outer shell and the bins using the <code>cut</code> tool in PrusaSlicer. Don't just rescale them, since this will mess up the pattern on the bottom of the bins/shell, that aligns the bins in a grid if there are gaps.<br/> The bins should be about 1.2mm less tall than the outer shell</p> <p>You can also use the included openscad file to create your own custom sizes. The code is a bit messy (especially for the rack), but it should work for most reasonable settings.<br/> This way you can also increase the resolution of the 3D models, Due to size constraints they had to be rendered a bit low.</p> <p>Using this bash script you can auto generate all files included in this print from the openscad source.</p> <p>``</p> <h3>!/usr/bin/env bash</h3> <p>set -eu</p> <p>outputDir=${1:-"./out"}</p> <p>declare -A names=(<br/> [0]="inset"<br/> [1]="shell"<br/> [2]="lid"<br/> [3]="rack"<br/> )<br/> sizes="10 15"<br/> heights="15 30"</p> <p>binary="openscad"<br/> if command -v openscad-nightly &> /dev/null<br/> then<br/> echo "Found nightly build of openscad, using it instead"<br/> binary="openscad-nightly"<br/> fi<br/> if ! command -v $binary &> /dev/null<br/> then<br/> echo "No openscad binary found"<br/> exit<br/> fi</p> <p>function callOpenscad {<br/> local baseSize=${1}<br/> local height=${2}<br/> local type=${3}<br/> local length=${4}<br/> local width=${5}<br/> local levels=${6}</p> <p>declare -a typeName=(${names[$type]})<br/> local outputName="${typeName}-${length}x${width}-${levels}.stl"<br/> local outputFolder="${outputDir}/size-${baseSize}"</p> <p>if [ ${type} = 3 ]; then<br/> local outputName="size-${baseSize}x${baseSize}-${typeName}-${length}x${width}-h${height}-${levels}-levels.stl"<br/> else<br/> local outputName="size-${baseSize}x${baseSize}-${typeName}-${length}x${width}.stl"<br/> fi</p> <p>mkdir -p ${outputFolder}<br/> nice -n 15 $binary \<br/> -D "invokedFromShell=1"\<br/> -D "baseSize=${baseSize}"\<br/> -D "height=${height}"\<br/> -D "type=${type}"\<br/> -D "length=${length}"\<br/> -D "width=${width}"\<br/> -D "levels=${levels}"\<br/> -o "${outputFolder}/${outputName}" modularBoxes.scad<br/> echo ""<br/> sleep 1<br/> }</p> <p>function generateInset {<br/> local baseSize=${1}<br/> local height=${2}<br/> local length=${3}<br/> local width=${4}</p> <p>callOpenscad "${baseSize}" "${height}" 0 "${length}" "${width}" 0<br/> }</p> <p>function generateOuterParts {<br/> local baseSize=${1}<br/> local height=${2}<br/> local type=${3}<br/> local levels=${4:-0}</p> <p>callOpenscad "${baseSize}" "${height}" "${type}" "3" "3" "${levels}"<br/> callOpenscad "${baseSize}" "${height}" "${type}" "4" "4" "${levels}"<br/> callOpenscad "${baseSize}" "${height}" "${type}" "6" "4" "${levels}"<br/> callOpenscad "${baseSize}" "${height}" "${type}" "6" "6" "${levels}"<br/> callOpenscad "${baseSize}" "${height}" "${type}" "8" "6" "${levels}"<br/> callOpenscad "${baseSize}" "${height}" "${type}" "8" "8" "${levels}"<br/> callOpenscad "${baseSize}" "${height}" "${type}" "12" "8" "${levels}"<br/> callOpenscad "${baseSize}" "${height}" "${type}" "12" "12" "${levels}"<br/> callOpenscad "${baseSize}" "${height}" "${type}" "16" "8" "${levels}"<br/> callOpenscad "${baseSize}" "${height}" "${type}" "16" "12" "${levels}"<br/> callOpenscad "${baseSize}" "${height}" "${type}" "16" "16" "${levels}"<br/> }</p> <p>function generateInsets {<br/> local baseSize=${1}<br/> local height=${2}</p> <p>generateInset "${baseSize}" "${height}" "1" "1"<br/> generateInset "${baseSize}" "${height}" "1" "2"<br/> generateInset "${baseSize}" "${height}" "1" "3"<br/> generateInset "${baseSize}" "${height}" "1" "4"<br/> generateInset "${baseSize}" "${height}" "2" "2"<br/> generateInset "${baseSize}" "${height}" "2" "3"<br/> generateInset "${baseSize}" "${height}" "2" "4"<br/> generateInset "${baseSize}" "${height}" "3" "3"<br/> generateInset "${baseSize}" "${height}" "3" "4"<br/> generateInset "${baseSize}" "${height}" "4" "4"</p> <p>}</p> <p>function generateSet {<br/> local baseSize=${1}</p> <p>generateInsets "${baseSize}" "30"<br/> generateOuterParts "${baseSize}" "30" 1<br/> generateOuterParts "${baseSize}" "30" 2</p> <p>for height in ${heights}<br/> do<br/> for i in 2 3 4<br/> do<br/> generateOuterParts "${baseSize}" "${height}" 3 "${i}"<br/> done<br/> done<br/> }</p> <p>for size in ${sizes}<br/> do<br/> generateSet "${size}"<br/> done<br/> ``</p> <h3>Print instructions</h3><p>The wall and bottom thickness are optimized for 0.2mm layer height and 0.45mm line width (default for the 0.4mm nozzle). 0.3 mm layer height should also work well.</p> <p>Since the lid and the outer box have a 3 line wall thickness, it is recommended to the switch on the advanced option <strong>detect thin walls</strong>, this will speed up the printing process, and should result in a nicer finish.</p> <p>If the lid is printed in a clear material (For example Colorfab XT or FormFutura HD Glass) it should be thin enough to make out some details through it.<br/> A good way to group the bins is by adding a manual color change for the last few milimeters.</p> <p>Since the lid is friction fitted, you might have to scale it a bit up or down, depending on your printer and the shrink factor of your material. These adjustments shouldn't be more than a militmeter, and shouldn't affect the print quality.</p>
With this file you will be able to print Modular small parts organizer with your 3D printer. Click on the button and save the file on your computer to work, edit or customize your design. You can also find more 3D designs for printers on Modular small parts organizer.
