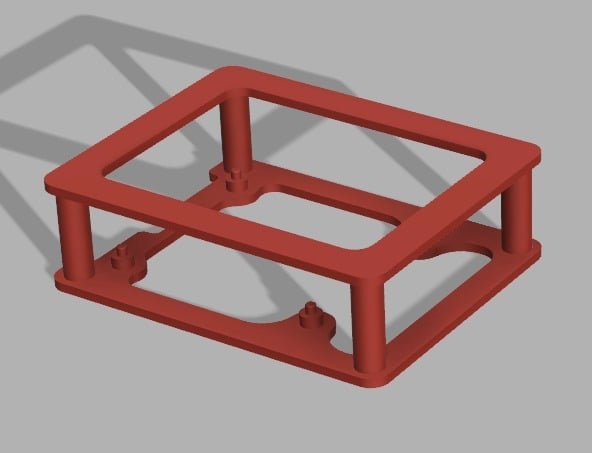
Modular Raspberry Pi Cluster Case
thingiverse
Here's yet another Raspberry Pi case! This one is a little different. There are several requirements I made for myself, and this design hits (almost) all of them: 1. *No hardware required*—everything should snap together, no screws/nuts required. The design is optimized for easy assembly without any tools. 2. *Modular*—can print 1, 2, 3 or more and stack them together. This case is designed to be flexible and accommodate different configurations. 3. *Open for airflow*—I prioritized air flow and cooling over a completely hard shell. A well-ventilated design ensures your Raspberry Pi stays cool even during intense usage. 4. *Fits most HATs*—each module is 30mm tall, which should be enough room for most common HATs. The compact design allows for seamless integration with popular HATs. 5. *Quick to print*—most printers should be able to print any one part in less than 2 hours. This case is designed to be fast and efficient to print, saving you time and effort. 6. *No supports when printing*—like most people I prefer not having to print supports and then remove them later (often leaving behind ugly evidence of where the supports were). I was almost able to achieve this, although you'll see from the images that 2 tiny supports are required where the fan mount pegs are (but they break off cleanly). 7. *Can mount a fan when stacked*—in the 4 Pi configuration there is a special base and cap print that includes mounting pegs for a 120mm fan. This feature ensures your Raspberry Pi stays cool even in demanding applications. Coming off of a Prusa MK3S, all mounting pegs are press fit and don't require any additional shaping/sanding/filing for a good fit. Your results may vary, but the pegs that hold the Pi are pretty fragile because they're so small. You may want to take one corner of your Pi and twist the mounting hole on and off each of the pegs a couple of times to break them in a little bit. If you don't do this, and if you need to pull your Pi off the mounts later, try holding the top of the peg down with a small screwdriver while pulling up on the Pi, otherwise you might snap the peg right off. # Configurations Here's a guide for how many of each part to print depending on how many Pis you have. ### Single Pi | Qty. | Part | |----|----| | 1 | cap.stl | | 1 | base.stl | That's it! ### Multiple Pi | Qty. | Part | |----|----| | 1 | cap.stl | | X | base.stl | Where X is however many Pis you have. ### 4 Pi Cluster with Fan | Qty. | Part | |----|----| | 1 | fan_cap.stl | | 3 | base.stl | | 1 | fan_base.stl | This is the configuration I designed this case for in the first place. You put the `fan_base` at the bottom, three more `base`s on top and then finish off with the `fan_cap`. A standard 120mm PC case fan should fit on the protruding pegs at the top and bottom. See the images for the recommended support structures when printing `fan_base` and `fan_cap`.
With this file you will be able to print Modular Raspberry Pi Cluster Case with your 3D printer. Click on the button and save the file on your computer to work, edit or customize your design. You can also find more 3D designs for printers on Modular Raspberry Pi Cluster Case.
