Modular drawer divider
prusaprinters
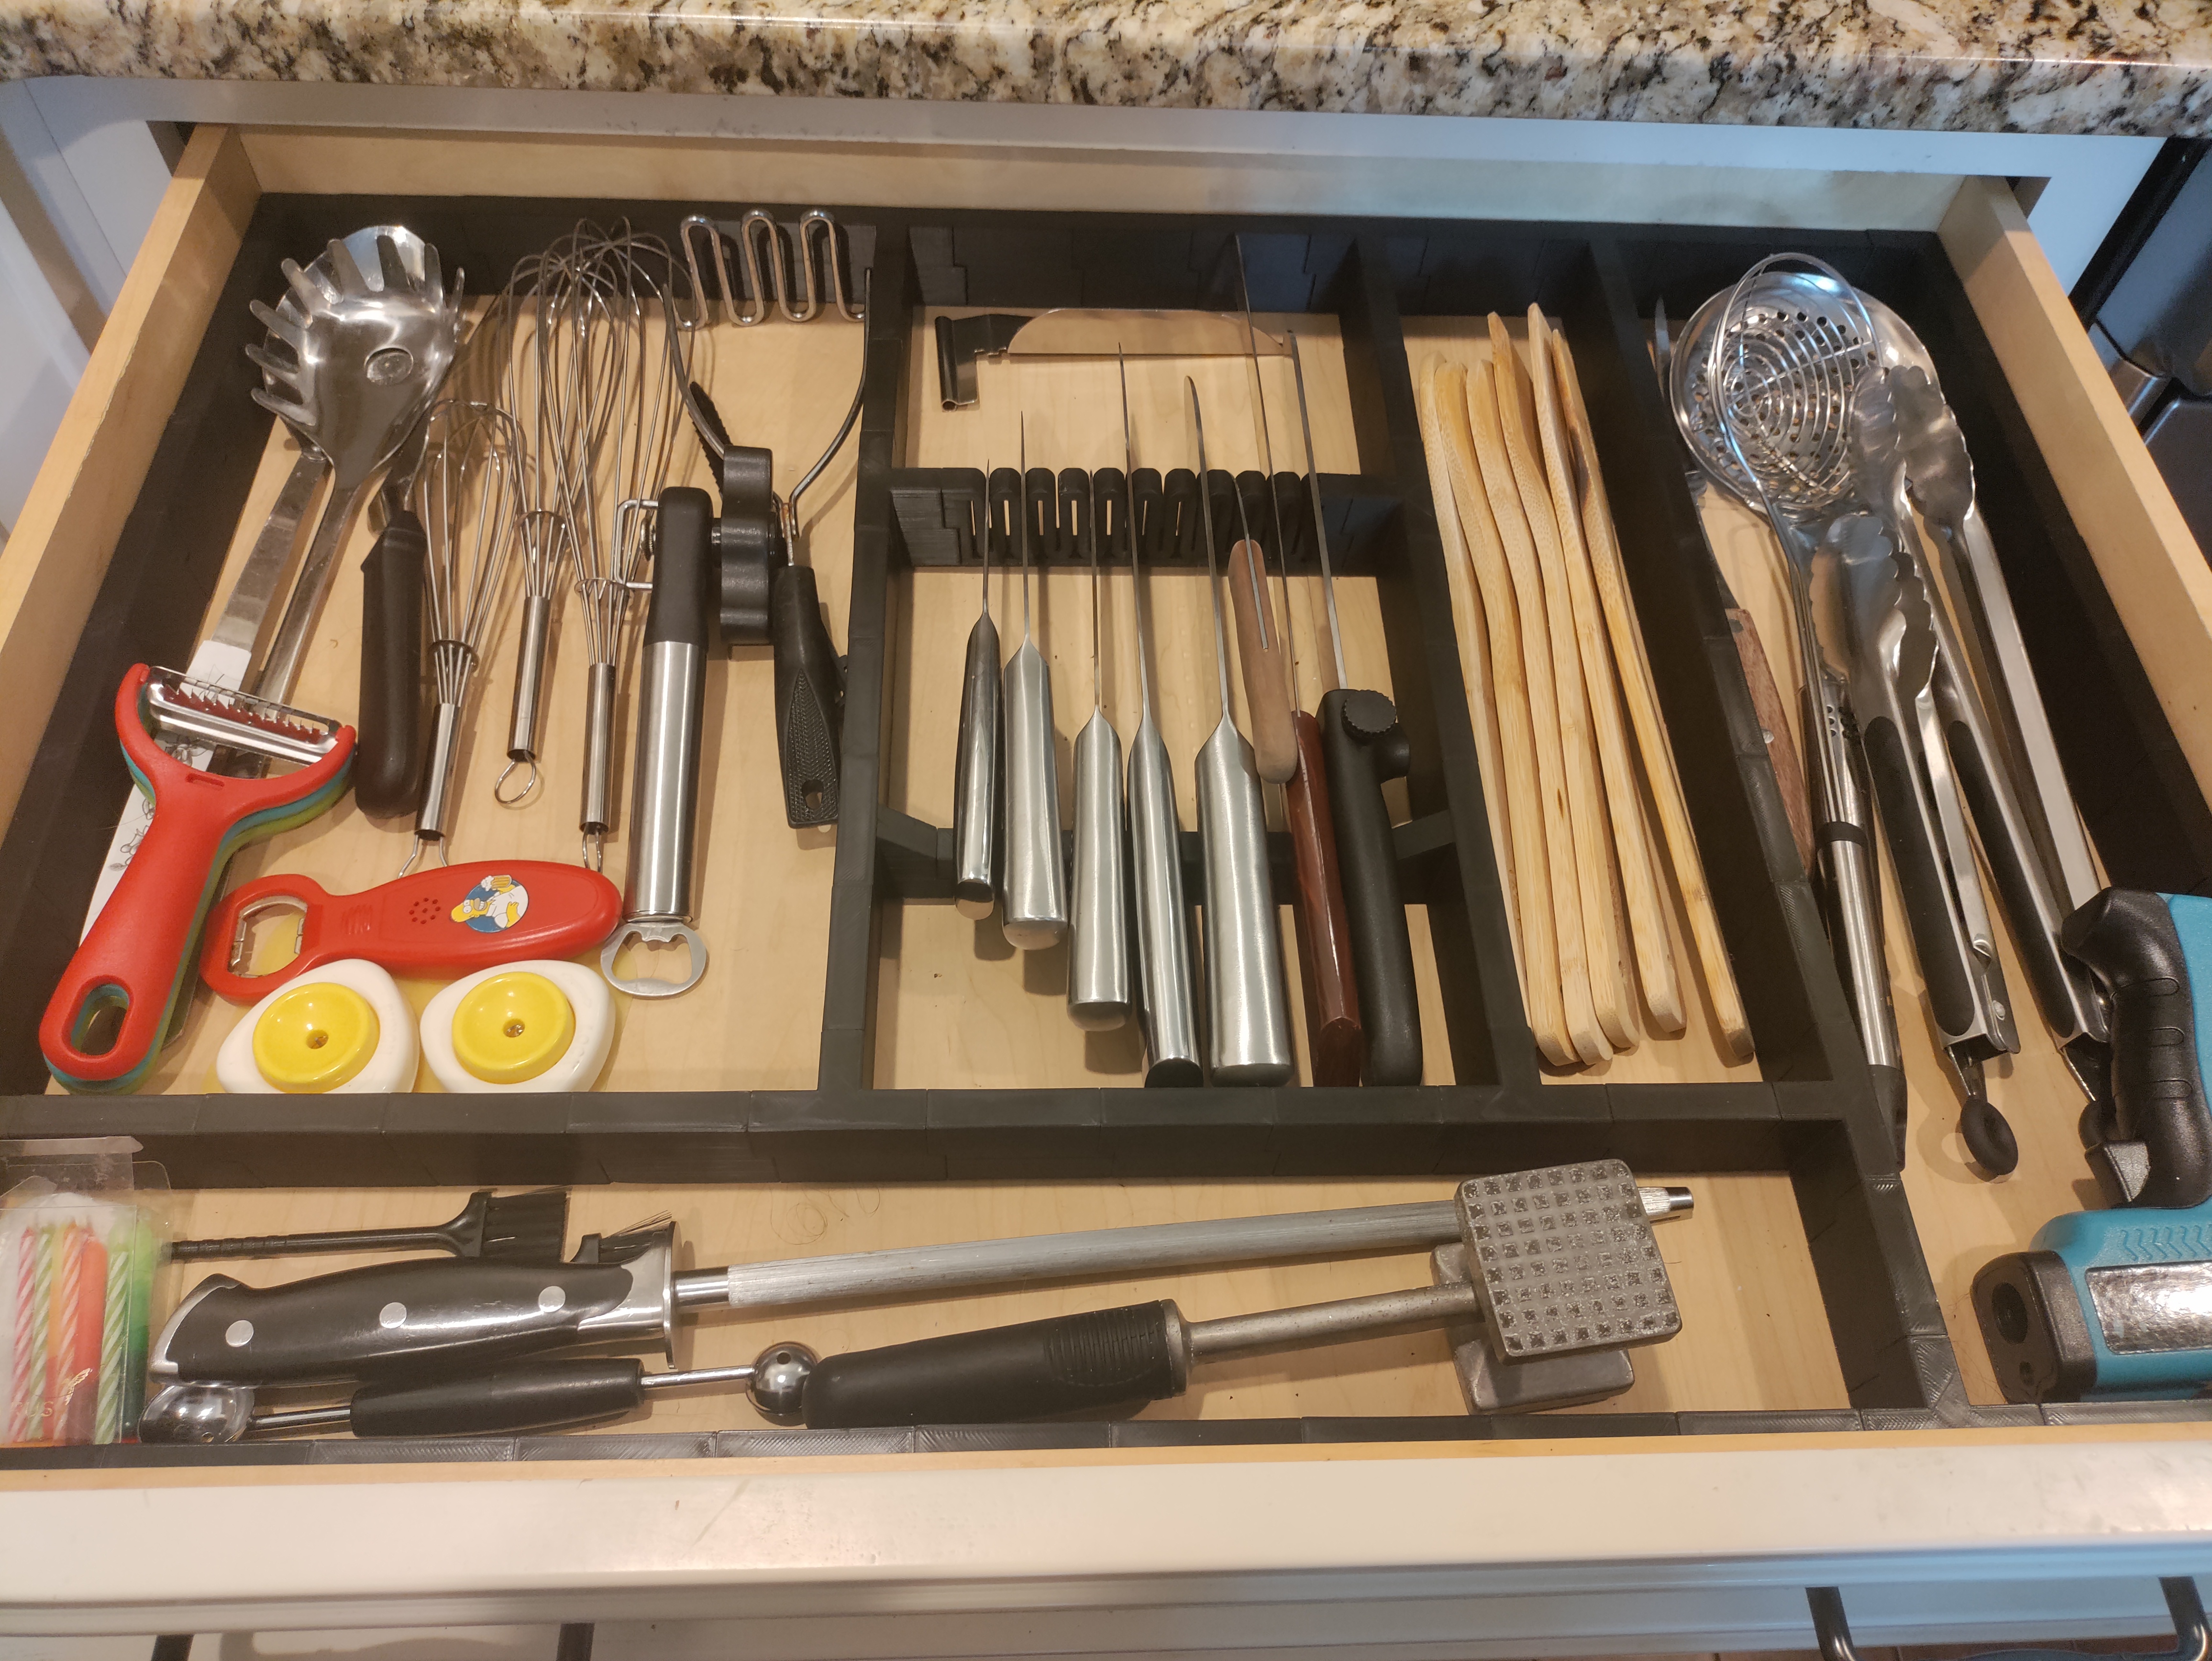
<p><strong>Why another one?</strong><br>When I started my drawer dividing journey I came upon many a divider I liked, even really liked but there was always something to turn me off. Here are the reasons I chose to build my own:</p><ul><li>Measuring and planning. Most dividers have long pieces and short pieces and my poor printer has a bed that's smaller than my drawers (curse you printer manufacturers for not considering my drawer needs) ... now I have to plan out my drawer before I start printing. If this was my only gripe I probably would've settled for an existing one but wouldn't it be nice that if you want to change the layout a little you don't need to reprint half your dividers?</li><li>Flex ... Most dividers are thin and for most situations this is fine. It does look nice but when you have really long deep drawers and print long thin pieces everything starts to bend one way or the other. You can still print thin pieces with this system but you can also make them a little thicker when you're less concerned with using every millimeter of space you can, and more concerned with creating a steady functional layout.</li><li>Connections. Some alternatives do OK, others not so much. I thought long and hard about whether to make the individual pieces asymmetrical or not and I came to the conclusion that this is the downfall of many a system. Other systems keep the pieces symmetrical and let the junctions do all the heavy lifting. The pieces in this system are meant to be connected, no long straight pieces just short uniform ones.</li><li>Adaptability. A short piece a long piece, two more short pieces another long and a short one. The lack of being able to take a piece and swap it out for another piece is problematic. If my needs change my drawers should be able to change too.</li><li>Failed pieces ... Don't we all love it when we get a nice big bowl of spaghetti instead of that part we were waiting for? You don't even get the courtesy of a nice sauce. Well I'd rather have a small piece fail than a piece the length of my build plate.</li></ul><p>... there are more issues but I think these are the main ones that started me on my journey.</p><p><strong>So what's the solution?</strong><br>Building blocks, all compatible, all the same length and width (or in the case of T junctions exactly half the width on one side, same with corners) and height. No complicated shapes so you can print them pretty quickly (unfortunately they do require a little support but that has been included in the generation and can be disabled if you really do love spaghetti).</p><p>You want to add a T junction? Take out a piece and swap it for a T. Want to connect that 4th wall? Turn it into an X. Every part can be connected to every other part quickly and easily.</p><p>With the exception of the knife block which if properly sized could be replaced by multiple pieces, there is no limit to the arranging and rearranging you can do. Print them nice and wide so they're sturdy or a little finer if you don't like the aesthetic (I initially wasn't sure how it would turn out but I'm actually quite surprised by how nice they look being a little wider).</p><p><br><strong>OK great but what about the cons?</strong><br>The junctions ... you will have to think about the orientation (some tips on this near the bottom). In general it won't be much of an issue but you may have to reprint a junction if you're changing your layout.</p><p>The connectors, They work well and stay in place and you can adjust the tolerances if you like but they're a little hard to get apart (you can always adjust the tolerances in the .scad file).</p><p>The last pieces ... you can either measure your drawer beforehand and divide by some number to get your piece size or you can do as I do: get a quick measurement to affirm the last pieces won't be too different, build 90% of the drawer and adjust the second to last row and column (that way you need not concern yourself with resizing the corners in one direction only and any connectors you may have near the ends).</p><p>Supports. Sorry my friends but the female connectors have supports, I did my best to make them as painless as possible but they're there.</p><p><strong>Other uses</strong><br>When printing a few samples to test the connector tolerance my kids got hold of them (they were little, 10mm height/15mm length - I really need to feed them more) and they were a big hit. I might play around with them some more to see if I can add a third dimension and turn this into a building toy. Thinking about this though you could probably use these to build d&d type dungeons as well.</p><p> </p><p><strong>Your new dividers</strong></p><p>If you're still reading this I'm guessing you're considering printing this thing. You can make this as simple or as complicated as you want but if you're like me you'd rather not spend a lot of time figuring out the best way to connect everything.</p><p><i>Here are some rules to make things easy:</i></p><ul><li>Keep your junctions and straight pieces the same size (if you only change length in the .scad file this is taken care of for you). You will be able to move things at will like some sort of organizing wizard and/or sorcerer.</li><li>Pick an orientation for male and female connectors. Point all male ones right and down for example, this will cut down on the types of connectors you need (4 types of T connectors and only 1 type of X connector)</li><li>Build in the direction of the males, if you picked right and down, start in the upper left corner, that way you will always be able to click in the next pieces from above.</li><li>Measure when you're about 2 pieces removed (length wise) from the edge both horizontally and vertically. The length of the pieces does not include the male connector! When you've measured that distance make one row and column that uses the shorter/longer pieces and then another row and column of normal pieces.</li></ul><p>You don't need infill for this and they can be printed quite thin. I used 2 walls, 3 top/bottom layers on .16mm layer height (has become my new standard instead of .2, no real reason beyond that) and used PLA+ but I see no reason why it wouldn't work in any other filament. Total weight for 1 piece was 11 grams.</p><p>I generated stls for 50mm pieces and junctions. I also added 40mm, 30mm, 20mm pieces. Oh and why 12.7mm thick you may wonder … it's half an inch and I may one day decide to replace these with wooden ones. Where I live we insist on using fractions because who doesn't like fractions? If your drawers are not a precise size though you'll need the scad file. There are many options but changing the length should be enough to generate a simple piece to size. Happy puzzling!</p>
With this file you will be able to print Modular drawer divider with your 3D printer. Click on the button and save the file on your computer to work, edit or customize your design. You can also find more 3D designs for printers on Modular drawer divider.