Modular Automata
pinshape
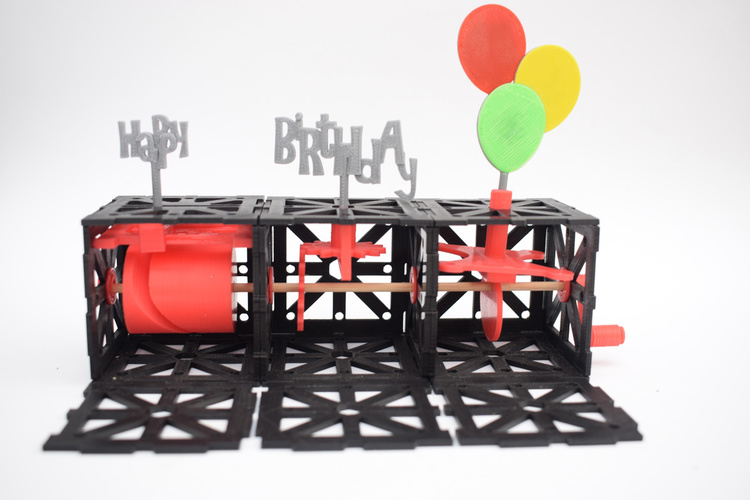
You can now create your very own automata using this Modular Automata kit. Pick and combine motion types to craft a custom automata that suits your unique vision. This kit offers three distinct mechanisms, each providing rotational, sliding, and vertical movement options. Assembling the kit requires patience, as it's an easy print but can be finicky to put together. Take your time, stay calm, and assemble it methodically for the best results. This project was one of my most complex endeavors yet, and surprisingly, it works remarkably well, as you can see in the video. I hope that after reading this description, you'll be able to assemble it with minimal trouble. To aid in your build, I've provided a link to the Fusion 360 design, which allows for a better view of the entire project: http://a360.co/2pUvkFa. Here are the simplified steps to complete this build: 1. Decide on how many cubes you'll need. 2. Create your own signs using Fusion by designing them and adding a cylinder with at least 2cm of height and a diameter of 3mm at the bottom. 3. Choose the mechanisms you want to use, noting that the sliding mechanism requires a different top face for each cube. 4. Print all the required parts. 5. If available, substitute wooden 3mm chopsticks or skewers for the axle provided, as it simplifies the assembly process. As you assemble the cubes, start adding small drops of glue to prevent them from falling apart if accidentally dropped. Also, apply a bit of lubricant (I use a PTFE-based one) at key points to ensure smooth motion. Print Settings: * All pieces were printed in PLA at 205°C with a 0.2mm layer height and 10% infill.
With this file you will be able to print Modular Automata with your 3D printer. Click on the button and save the file on your computer to work, edit or customize your design. You can also find more 3D designs for printers on Modular Automata.
