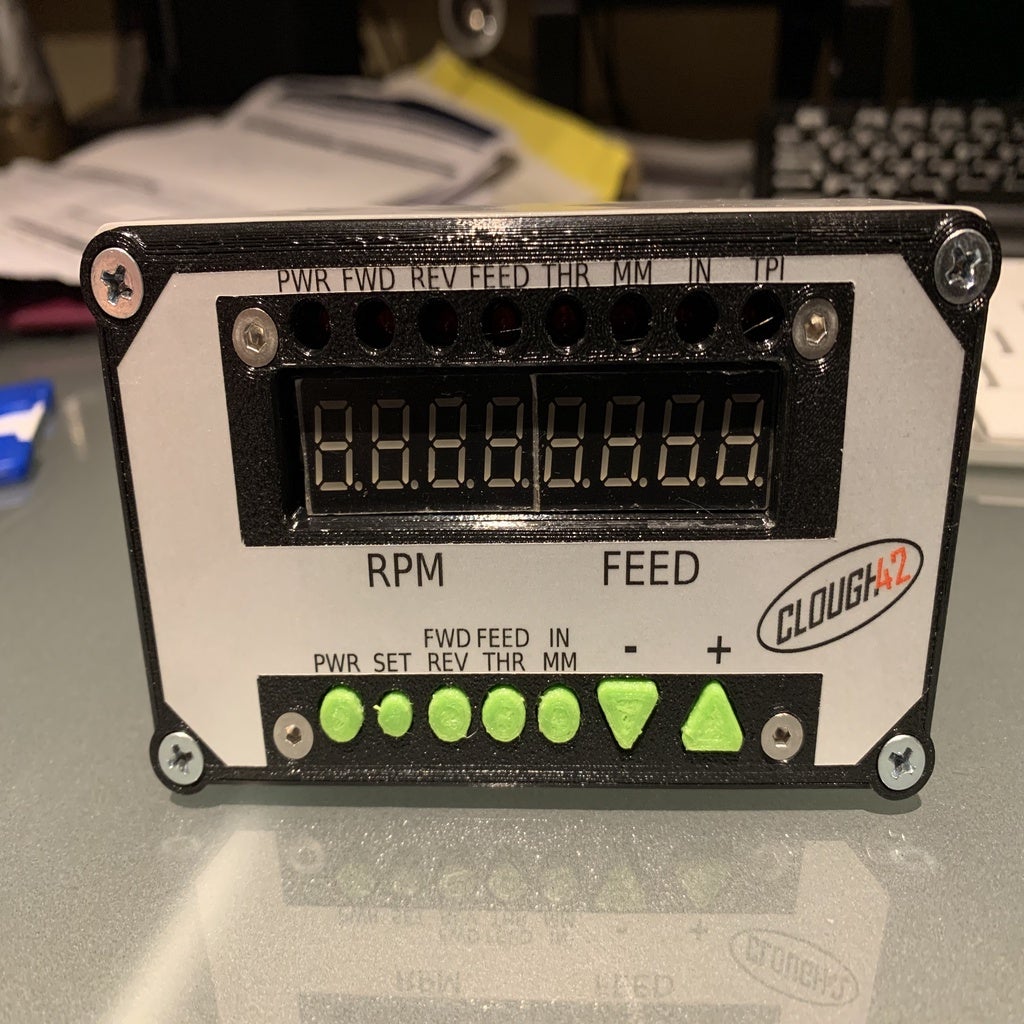
Modified Clough42 ELS Panel
prusaprinters
<p>Remixed lid and spacer for the ELS project, as the LED&KEY TM1638 module I purchased from eBay had different hole spacing. Also the LEDs along the top are too close to the 7 segments to allow the top mounting holes to align with the spacer.</p> <p>These parts fit this module:<br/> <a href="https://www.ebay.co.uk/itm/1X-8-Bit-Digital-LED-Tube-8-Bit-TM1638-Key-Display-Module-For-AVR-Arduino-T-A6B1/232998927941?ssPageName=STRK%3AMEBIDX%3AIT&_trksid=p2060353.m1438.l2649">https://www.ebay.co.uk/itm/1X-8-Bit-Digital-LED-Tube-8-Bit-TM1638-Key-Display-Module-For-AVR-Arduino-T-A6B1/232998927941?ssPageName=STRK%3AMEBIDX%3AIT&\_trksid=p2060353.m1438.l2649</a></p> <p>All that has changed is that the LED holes in the spacer have been shifted down by .5mm, and the lower mounting holes in both parts have moved down by 2.4mm</p> <h3>Print instructions</h3><p>Unassociated tags: Electronic Lead Screw</p> <h3>Category: Machine Tools Summary</h3> <p>Remixed lid and spacer for the ELS project, as the LED&KEY TM1638 module I purchased from eBay had different hole spacing. Also the LEDs along the top are too close to the 7 segments to allow the top mounting holes to align with the spacer.</p> <p>These parts fit this module:<br/> <a href="https://www.ebay.co.uk/itm/1X-8-Bit-Digital-LED-Tube-8-Bit-TM1638-Key-Display-Module-For-AVR-Arduino-T-A6B1/232998927941?ssPageName=STRK%3AMEBIDX%3AIT&_trksid=p2060353.m1438.l2649">https://www.ebay.co.uk/itm/1X-8-Bit-Digital-LED-Tube-8-Bit-TM1638-Key-Display-Module-For-AVR-Arduino-T-A6B1/232998927941?ssPageName=STRK%3AMEBIDX%3AIT&\_trksid=p2060353.m1438.l2649</a></p> <p>All that has changed is that the LED holes in the spacer have been shifted down by .5mm, and the lower mounting holes in both parts have moved down by 2.4mm</p> <h3> Print Settings</h3> <p><strong>Printer Brand:</strong></p> <p>Prusa</p> <p><p class="detail-setting printer"><strong>Printer: </strong> <div><p>I3 MK3S</p></div><strong>Rafts:</strong></div></p> <p>No</p> <p><p class="detail-setting supports"><strong>Supports: </strong> <div><p>No</p></div><strong>Resolution:</strong></div></p> <p>0.2mm</p> <p><p class="detail-setting infill"><strong>Infill: </strong> <div><p>10%</p></div><br/> <strong>Filament:</strong><br/> [</div></p> <h3> REAL Filament PETG ](http://www.amazon.com/s?url=search-alias&field-keywords=REAL+Filament+PETG&tag=tvad0304-20) Black <br/> <p class="detail-setting notes"><strong>Notes: </strong> </p><div><p>Sliced with Prusa Slicer 2.1 with Pretty PETG V3 (7x7) config.</p></div> Post-Printing</h3> <p>If required, you can print out the decal svg file and stick to the front of the case. Use a light behind the decal once printed out on a label (I suggest Avery heavy duty laser labels as they are oil and water proof) to align it to the lid. Then use a craft / xacto knife to cut along the dotted lines and the perimeter to remove the unwanted parts.</p></p></p></p>
With this file you will be able to print Modified Clough42 ELS Panel with your 3D printer. Click on the button and save the file on your computer to work, edit or customize your design. You can also find more 3D designs for printers on Modified Clough42 ELS Panel.
