Modeling Week 2 - Activity 6 Car Completion
sketchfab
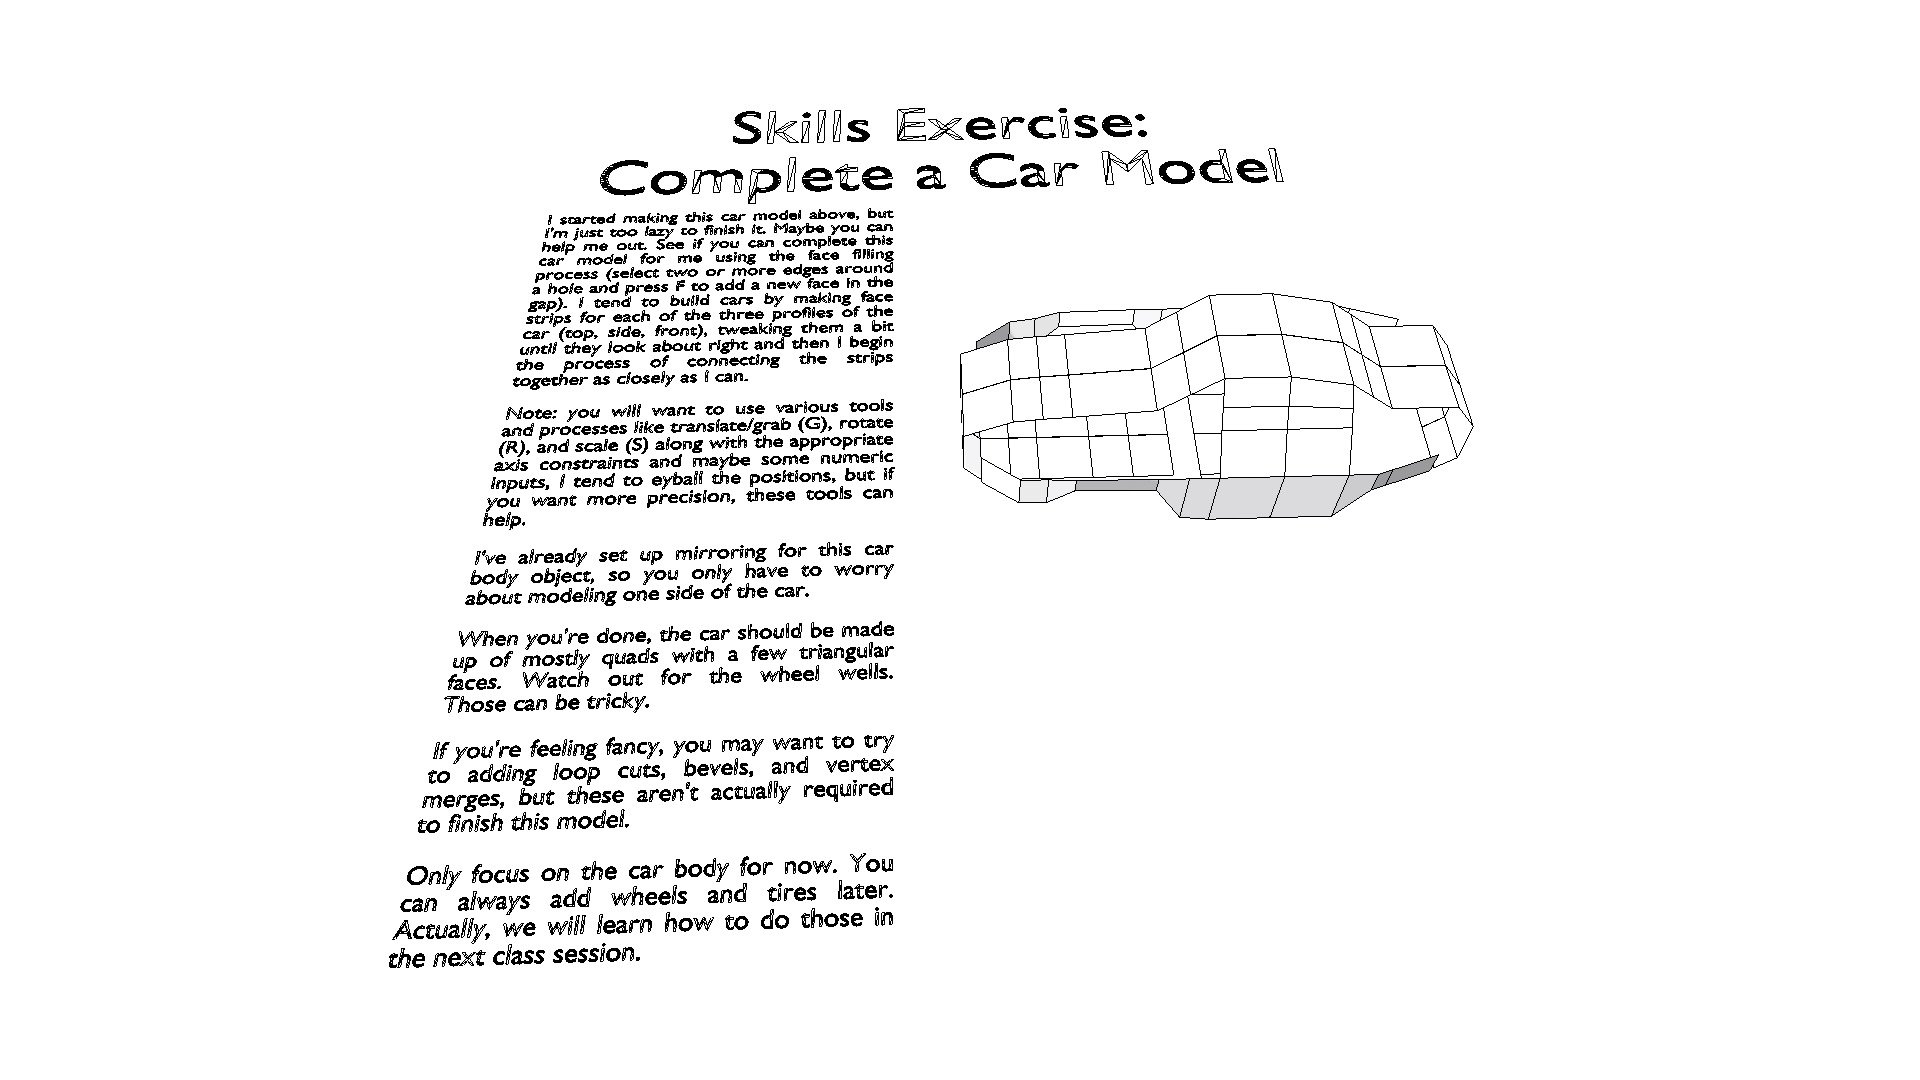
MODELING WEEK 2 - ACTIVITY 6 I'm stuck on this car model above, and I need your help. Please finish it for me using the face filling process. To do that, select two or more edges around a hole and press F to add a new face in the gap. I usually build cars by making face strips for each of the three profiles: top, side, and front. I tweak them until they look right and then connect the strips together as closely as possible. This car body object has already been set up with mirroring, so you only need to worry about modeling one side of the car. When you're done, the car should be mostly quads with a few triangular faces. Be careful around the wheel wells - they can be tricky. If you feel confident, try adding loop cuts, bevels, and vertex merges for an extra touch.
With this file you will be able to print Modeling Week 2 - Activity 6 Car Completion with your 3D printer. Click on the button and save the file on your computer to work, edit or customize your design. You can also find more 3D designs for printers on Modeling Week 2 - Activity 6 Car Completion.