Modeling Week 1 - Activity 1 Pushpin
sketchfab
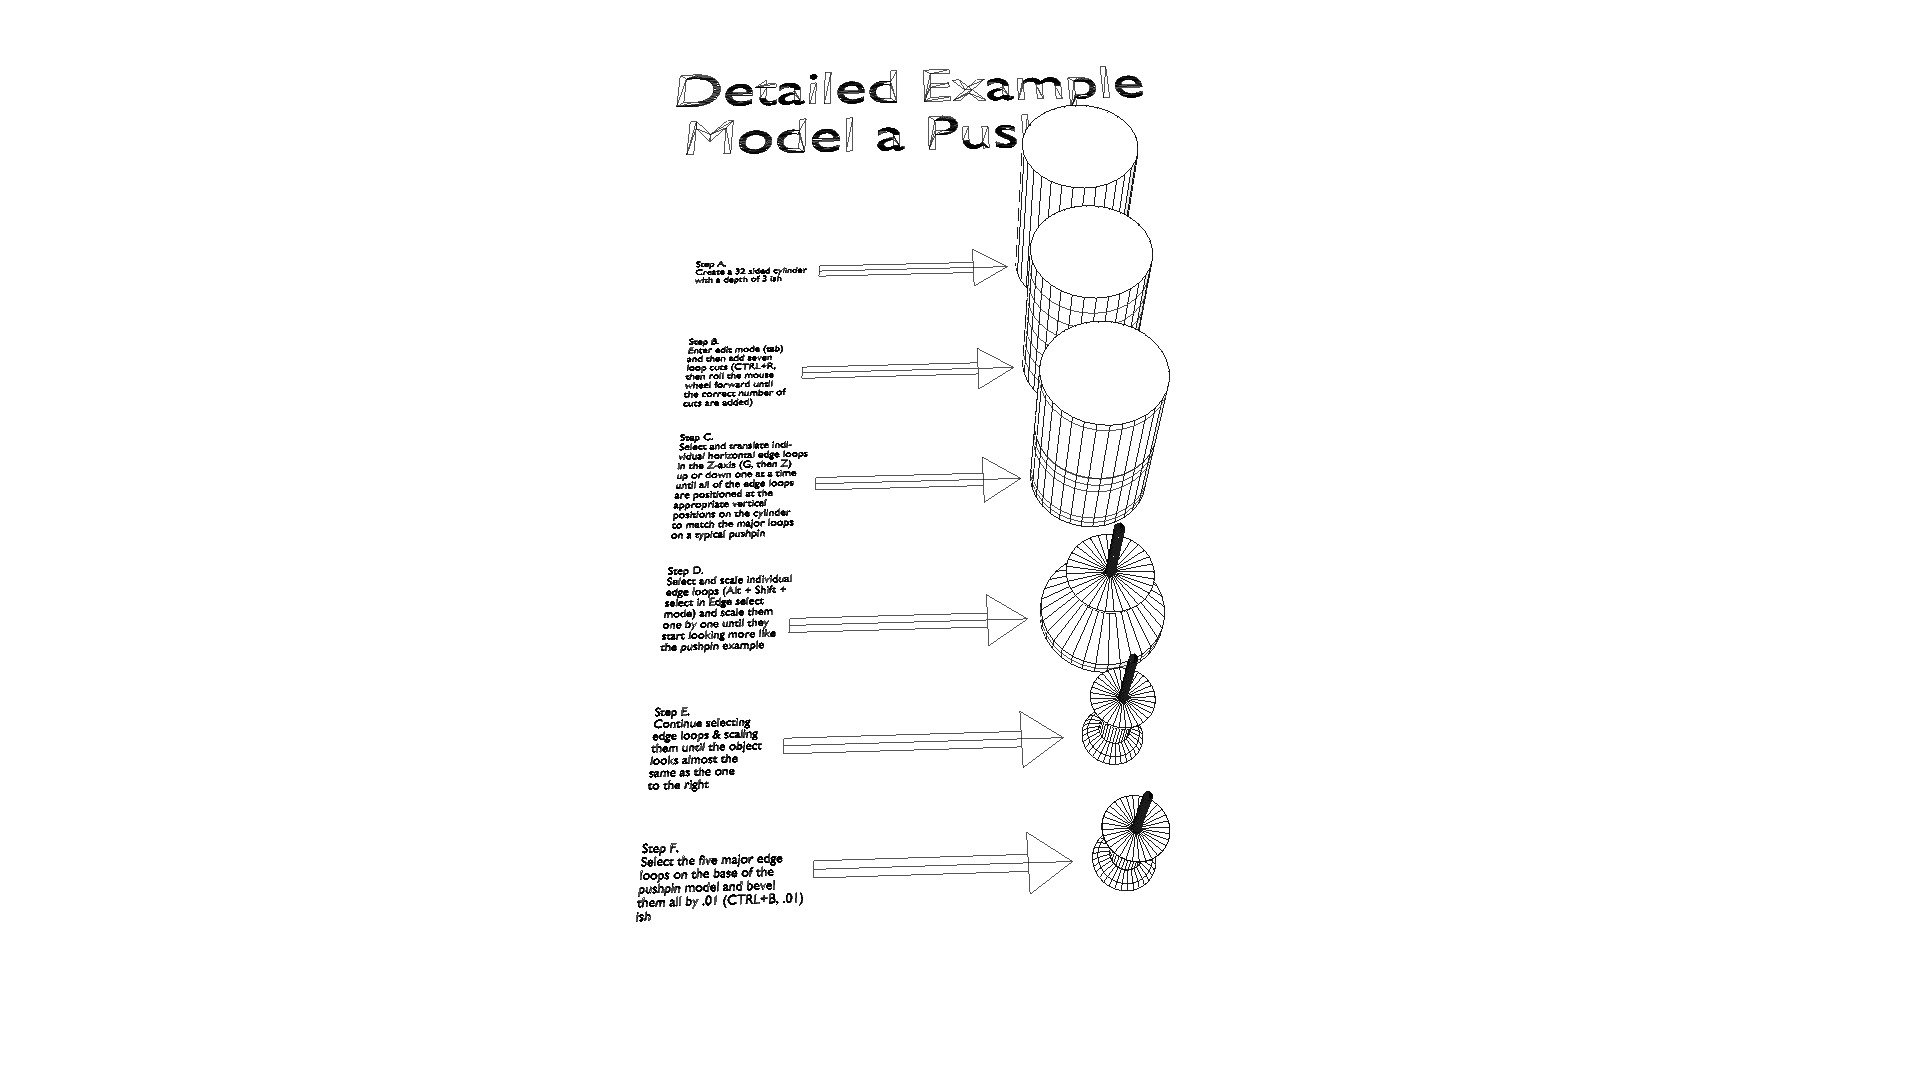
MODELING WEEK 1 - ACTIVITY 1 Let's start by using a cylinder primitive object as the foundation for a push pin thumbtack creation, leveraging loop cuts (CTRL + R), edge loop selection (ALT + SHIFT + select click one edge on a loop), movement and grabbing (G, followed by an axis letter, then wiggling the mouse and clicking to set the position), and scaling (S, followed by an axis letter or inverse axis letter, then wiggling the mouse or typing in a number for precision 'scaling'). To create a pushpin that resembles mine, you'll need to work through several steps. Zooming in may be necessary to read all of the step-by-step instructions. As you progress through the steps, remember to save your work frequently to avoid losing progress if anything crashes. My numerical values are merely suggestions; feel free to eyeball the position and scale of various elements if you prefer.
With this file you will be able to print Modeling Week 1 - Activity 1 Pushpin with your 3D printer. Click on the button and save the file on your computer to work, edit or customize your design. You can also find more 3D designs for printers on Modeling Week 1 - Activity 1 Pushpin.