Model Rocket Parachute Squad
thingiverse
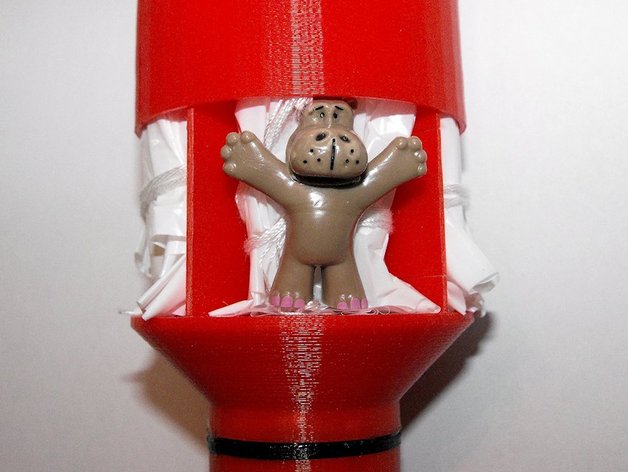
UPDATE: No need to print this thing for flight, Epic fail in video at http://youtu.be/27vNgNWPca4. It turns out way too heavy for the Type C motor and I don't think even a Type D would help either. I'm going to redesign this for fewer paratroopers and try a Type D next time. I originally designed this for the little green Army paratroopers, but the local store only had these animals. This thing is meant to launch and deploy 12 parachute creatures. It mounts on the earlier rocket base and was included in the files. If you want to recover all the para-men, use the Type C motors unless you have a large area for recovery. Also, I'm loading these guys with the parachutes outward to minimize friction with the outer sleeve. The fit was tighter than expected. Will post the first-flight results when the weather clears. Instructions: Print all the parts and two of the Carriers. Tie off a shock cord three times the length of the tube to the nose cone, then glue the nose cone to the tube. Glue up the Base, carriers, and carrier cap. Test fit the tube. Tie off the lanyard to one hole of the carrier cap, and tie off the parachute to the other hole in the cap. Place a rocket engine into the Motor Type C/D and insert it into the Rocket Base. Slide the Motor Block with the tapered side down into the tube of the rocket base until it holds the engine centered firmly in place. Apply a liquid Acrylic glue with a needle to hold it there. Glue the rocket base to the army men base using the tie-down insert as a coupling.
With this file you will be able to print Model Rocket Parachute Squad with your 3D printer. Click on the button and save the file on your computer to work, edit or customize your design. You can also find more 3D designs for printers on Model Rocket Parachute Squad.