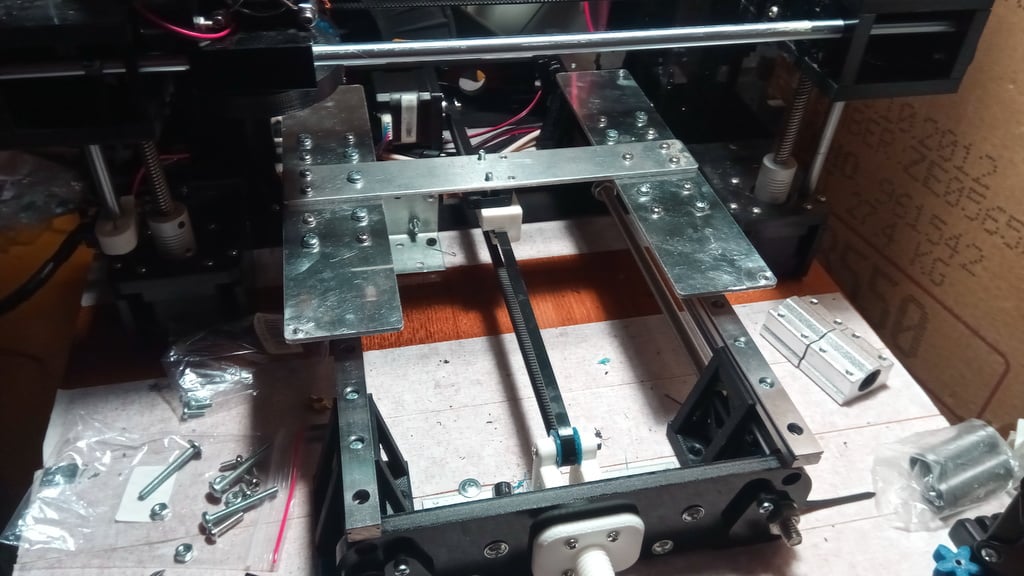
Mod anet a6 Y-Axis mgn12
thingiverse
Models were made in Tinkerkad, but when checked in the repetier-host, they had defects. However, they printed out from Simplify3d perfectly. I'm currently working on a fix. I hastily made supports for the transition to the MGN12H rails of my Anet A6 printer. To install them, you'll need screws M3x12 and nuts with a nylon ring (self-locking) M3. The supports are twisted with the rail and stand on top of the shaft and studs without disassembling the printer. This ensures straightforwardness. After installing all the supports and rails, I assembled the table on such an adapter: https://www.thingiverse.com/thing:2877621. To check the smoothness, I fastened the support to the board. Then, I unscrewed the Y-axis sensor from its bracket, attached it to a new bracket on the other side, and secured it into the hole from the shaft damper (as seen in the photo). Since the table became higher, I needed to modify the belt fastener to the table to align the belt's linearity. In the near future, I plan to make the X-axis also run on an MGN12 rail. Follow my project. I modified the Y-belt tensioner brackets slightly by removing excess material so that the wheel can rotate freely. I strengthened the grooves for nuts on one side, which prevents them from falling out during installation and adds a little strength to this joint. The fastening now allows the belt to give even tension. You'll need the following materials: * MGN12H rails (400mm) - 2 pieces * Additional carriages * M3 * 12 bolts - 8 pieces * M3 * 8 bolts - 16 pieces * M4 * 8 bolts - 16 pieces * M3 nuts - 16 pieces * M3 nuts with nylon ring (self-locking) - 8 pieces * M4 * 35 bolts - 2 pieces, M4 * 45 bolts - 2 pieces.
With this file you will be able to print Mod anet a6 Y-Axis mgn12 with your 3D printer. Click on the button and save the file on your computer to work, edit or customize your design. You can also find more 3D designs for printers on Mod anet a6 Y-Axis mgn12.
