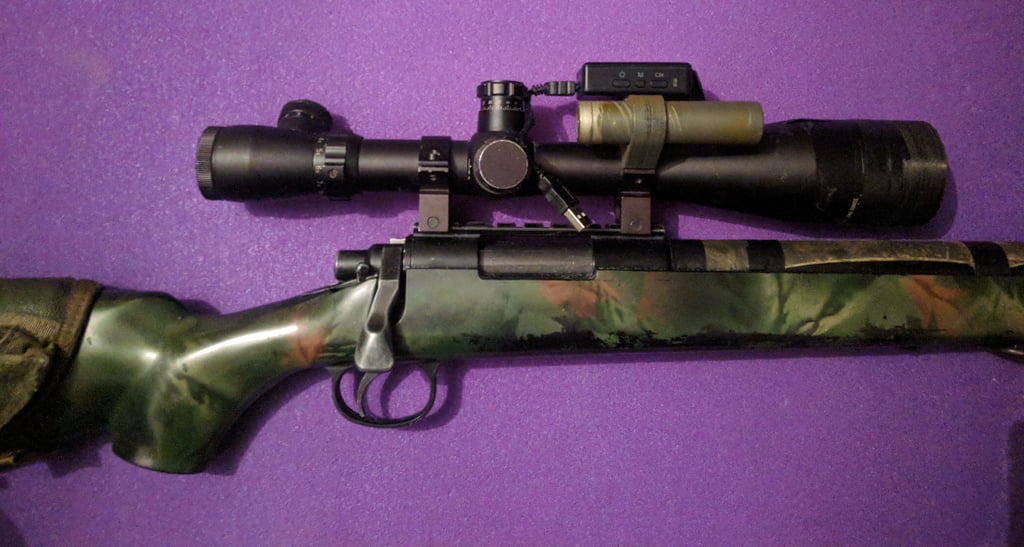
Mobius 2 Scope Cam | Airsoft
thingiverse
Human: Convert your Mobius 2 into a scopecam ! Move the lens from the cam to the scope, and add support for an 18650 like battery pack. # Requirements During this project, you will have to manipulate electronic components. Your cam can die quickly and silently if you don't handle it properly. As material, you need: - A Mobius 2 action cam, with its long range lens - A longer 24p flex cable (mine is 20.1 cm long) - A x50 opening scope, threaded on front - A cylinder battery pack, based on 18650 battery (optional) - Some 2.5 mm plexiglass (optional) 45% infill is enough. You will need small layers if you intend to print the threaded scope extender. If not, you can go with 0.2 mm layers without problems. # Beware Do not handle electronics as is. Be aware of static electricity. Carefully look at the way the cable has to connect. Do not invert polarity from cam to lens. Do not force on lens. Also, try not to touch the captor. # Howto Once printed, you firstly have to pass the cable through the hole provided for on the scope extender. Then, connect it to the lens inside the scope extender. Screw it into place. Screw the extender onto your scope. Make the captor be in the correct position. Take the mount, and screw the cam (opened in half) onto it. The screw holding it must be kinda short. Screw it to your scope mount. Connect the cable onto electronic. Once again, beware of the direction. Connect the battery pack (test if cam still turns up), and if so, screw back the two parts of the cam together (a small screwdriver will fit). If you are using the battery bank version, push it onto the holder (it's very tight so it won't slide from it). You can then add a 2.5 mm plexiglass as protection on the front after cleanup. Make it tight so it won't slip. You're now good to go! # Tips If you don't know what you do, ask for help. If you lose your cam, blame yourself. Adjust lens focus beforehand (you should have received a special usb cable with it: you can connect it to a tv and do the focus, it's easier than taking shots, watch them, move the focus a bit...). Before putting the plexi on, take some shots to see if the camera is aligned with what you're targetting at. The operation is reversible. # Parts The scope extender is in two versions: threaded and non-threaded. The thread is difficult to print. The mount is also presented in two versions: with and without the battery bank holder.
With this file you will be able to print Mobius 2 Scope Cam | Airsoft with your 3D printer. Click on the button and save the file on your computer to work, edit or customize your design. You can also find more 3D designs for printers on Mobius 2 Scope Cam | Airsoft.
