
MMU3 Tool: Tip Sharpener
prusaprinters
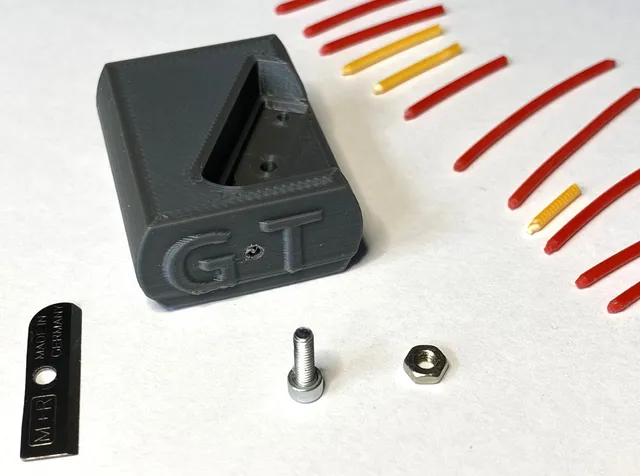
My tip for good MMU tips:Haven't we all been waiting toooo long for the MMU3?Since I have my MK4+MMU3 Set running I need to care of pre-cut filament, so it does not get stuck in Nextruder.Cutting each end of filament two or more times to get a tip that most likely passes the MMU3 or MMU2 can be a PITA. So I tried to design a sharpener based on a pencil sharpener. I used TinkerCad for design. Simple to print (20 minutes) without no support. I printed PLA with IS structural settings, 3+3+3 (perimeters, top, bottom layers). What you need is a hex screw M2.5x6mm and M2.5 nut. Then a pencil sharpener blade (e.g. Amazon) 0.75mm thick, 6.65mm wide and 24mm lang, one edge rounded. When you are lucky you'll find pencil sharpeners with these blade, just remove from sharpener. Ridiculous that spare blades are more expensive than a set of 12 sharpeners with double (two) blades. I will put an stl-file of the blade to the files.Part is quite simple, but contains a lot of gadgets and features:Slot for inserting the M2.5 (2mm high) nut, in this channel a Ø2mm bore goes through for removing or setting to correct position. Channel is 5mm, so the nut should be self locking when tightened.Slot (Ø2mm) on the side for removing the blade in case it doesn't come out easy.Chamferings in the filament tunnel for guiding the filament when inserting.After printing maybe verify the bores Ø2mm of the filament tunnel and Ø2.5 for the screw. With same print settings I found out the 0.15mm LH performed better than LH0.2mm for some reason. 01.5LH had no rework at all, but what is a Ø2 and Ø2.5mm drill?Explore my other Printables: https://www.printables.com/de/@Tritschi

With this file you will be able to print MMU3 Tool: Tip Sharpener with your 3D printer. Click on the button and save the file on your computer to work, edit or customize your design. You can also find more 3D designs for printers on MMU3 Tool: Tip Sharpener.
