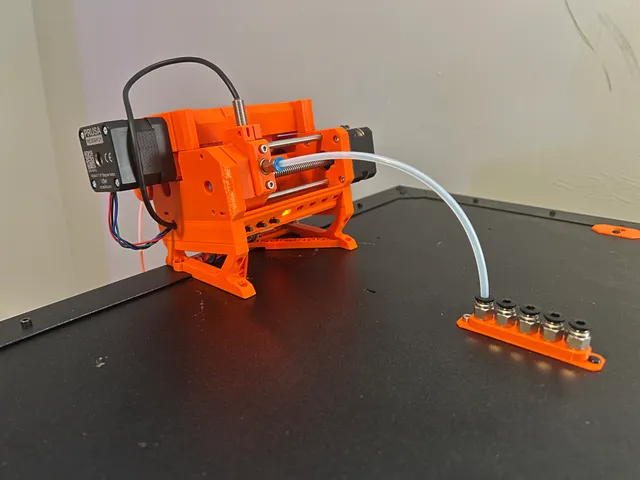
MMU2S Original Prusa Enclosure Top Mount
prusaprinters
This is designed to be used with MMU2 Underslung control panel mount, Original Prusa Enclosure Top Plug PTFE x5 Pass Through, and by utilizing the parts that came with the enclosure that has the threaded brass insert in it/threaded PTFE fitting. Use the info in the description of the linked files above for instructions on what new fasteners (M3x30MM x4) you'll need for this conversion (everything was excess from the MK3s+/MMU2s).I used two M3x8mm on the outside holes and one M3x4mm on the inside hole. I only did a couple of turns on each screw because it's extremely hard to get to them at that angle with an Allen wrench, even with the balled-end one that Prusa included with MK3s+/MMU2s. I left enough room for an adhesive strip to go on the feet if you felt so inclined.This will be useful when you're plugging the cables back into the PCB: Here is a good resource on recalibrating the standard feed and retract distance for the MMU2 This is my improvised solution while I wait for Prusa to release their answer to the mmu2 utility issues with the original Prusa enclosure. A handle with a passthrough for the power cable and PTFE M10 fittings may come next. Also, a better top center fitting with just one PTFE pass through and better integration of the top threaded brass fitting in the printed part that came with the enclosure where I'm currently through-bolting it from the inside and swiveling it to line up with the top fitting… it's a work in progress…
With this file you will be able to print MMU2S Original Prusa Enclosure Top Mount with your 3D printer. Click on the button and save the file on your computer to work, edit or customize your design. You can also find more 3D designs for printers on MMU2S Original Prusa Enclosure Top Mount.
