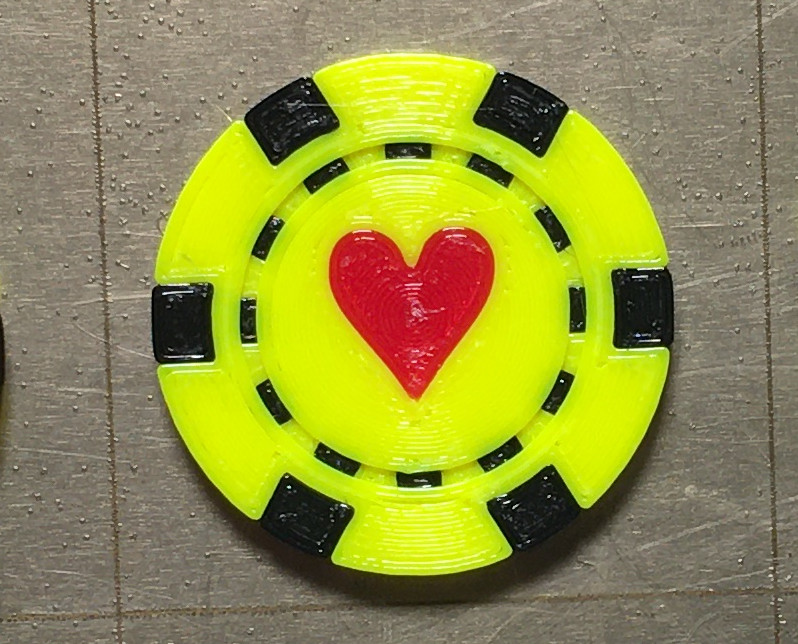
MMU Test Chip
prusaprinters
<p><strong>Personalized swag</strong>. Follow the example described below and customize with .STLs of your own.</p> <p>An ideal test for the MMU; a print with just enough printing between tool changes.</p> <p>The MMU Test Chip:</p> <ul> <li>Two (or more) colors on every layer</li> <li>Quick to print</li> <li>Easily customized</li> </ul> <h3>Print instructions</h3><p>Files:</p> <ul> <li><p><strong>mmutestchip_favorite.3mf</strong></p> </li> <li><p>ChipBody.stl</p> </li> <li>OuterInlays.stl</li> <li>InnerInlays.stl</li> </ul> <p>Modifiers: (identified by leading underscore)</p> <ul> <li><em>[0 to 9]</em>.stl - Top or face up</li> <li>_[0 to 9]_fd.stl - Bottom or face down</li> </ul> <p>I provided 'modifiers' 0 to 9 for testing.</p> <p>Modifiers can be resized and positioned within PrusaSlicer so try loading your logo or any STL that might work (has a good silhouette at that size) and see what it looks like.</p> <p>Instructions:</p> <ul> <li>Load the project file in PrusaSlicer<br/> <img alt="" src="https://media.prusaprinters.org/thumbs/cover/640x480/media/prints/23478/images/235925_68f266ba-9e86-424a-b677-bc5b8fe91c67/prusaslicer_chip.jpg"/></li> <li>Make changes to settings as you see fit</li> <li>Start print and observe MMU operations</li> </ul> <p>Customize:</p> <ul> <li>Delete one or both heart modifiers</li> <li><p>Right click on the container and select<br/> <strong>'Add modifier' -> 'Load...'</strong><br/> <img alt="" src="https://media.prusaprinters.org/thumbs/cover/640x480/media/prints/23478/images/235926_a703175e-6884-4997-a42a-42db6299ffb2/prusaslicer_addmodifier_load.jpg"/></p> </li> <li><p><strong>Load</strong> one (or two) of the provided number modifiers normal and/or face down (_fd). In this example I selected <em>4</em> and _5_fd.<br/> <img alt="" src="https://media.prusaprinters.org/thumbs/cover/640x480/media/prints/23478/images/235924_59b91bf3-8023-43ae-806b-184029acdde5/selectmodifiers.jpg"/><br/> <img alt="" src="https://media.prusaprinters.org/thumbs/cover/640x480/media/prints/23478/images/235927_e1b9e77b-3cff-4b7c-95c5-cd7cfb5b074a/prusaslicer_fivecolor.jpg"/></p> </li> <li><p><strong>Set the extruder values</strong><br/> <img alt="" src="https://media.prusaprinters.org/thumbs/cover/640x480/media/prints/23478/images/239464_a141c6a3-311c-4bb2-a33f-282acb41405d/fivecolorchip_extruders.jpg"/></p> </li> </ul> <p><img alt="" src="https://media.prusaprinters.org/thumbs/cover/160x120/media/prints/23478/images/235993_56bdbcd3-d8d6-41c5-bbd6-1f54a97e25b4/fivecolorchip_preview.jpg"/> <img alt="" src="https://media.prusaprinters.org/thumbs/cover/160x120/media/prints/23478/images/235995_3968a864-aacf-4de6-af1a-428660201777/fifthcolor_preview.jpg"/></p> <h3>Review</h3> <p>The intent is to streamline the testing effort and add some excitement as well. The number modifiers were provided as an example. You can load any STL as a modifier with the ability to resize and position it within the slicer.</p> <p>So experiment with the modifier feature and make testing more interesting. Print swag for a business or poker chips that are unique.</p> <h3>History</h3> <p>When I installed the MMU I looked for a quick print that would demonstrate the MMU. I ended up using a two colored lizard and I spent a lot of time watching it print between changes.</p> <p>The MMU was new technology and I appreciate that Prusa fully supported stabilizing the printing with updates. I joined them on this journey and have spent time researching, testing, and innovating to get to the point that I start a long running MMU print with confidence.</p> <p>I was looking to make something unique for Valentines day for the kids and decided make a simple little token. That prompted a request for alphabet tokens from a preschool teacher to help the kids learn how identify the letters in their names.<br/> <img alt="" src="https://media.prusaprinters.org/thumbs/cover/640x480/media/prints/23478/images/239643_0ad40077-5b44-473f-8826-0576a62afbfb/az_chips.jpg"/></p> <p>Chips are fun and with PrusaSlicer using 'Modifiers' makes it is easy to create unique memories, useful markers, and personalized swag.</p> <p>I realized it was also the test print I had been looking for. Quick to print and potentially useful.</p> <h3>Use Case</h3> <p>I print with PETG and the MMU and have been dealing with long stringy tips after retraction.</p> <p>I installed an experimental dual-blade cutter that did a good job of cutting off the tips, and there were a lot fewer issues. Now the issues were cut off tips getting sucked into the path and stuck in sensors. I had fewer issues but they were more difficult to diagnose and fix.</p> <p>I saw a couple of posts on the PrusaSlicer GitHub site related to stringy filament tips so I downloaded and compiled a copy of PrusaSlicer with the 'Dribbling' pull. <strong>What a difference dribbling made!</strong></p> <h3>Using the MMU Test Chip</h3> <p>I was able to capture the pictures by simply pushing some filament from the buffer to the idle filament. <strong>Make sure it is pulled back into the MMU</strong>.</p> <p><strong>Without Dribbling</strong> the tips have long strings.<br/> <img alt="" src="https://media.prusaprinters.org/thumbs/cover/640x480/media/prints/23478/images/239465_d498a41a-9728-4d42-a7ff-ff71400e9fc6/tippics_nodribble.jpg"/></p> <p><strong>With Dribbling</strong> the tips are clean.<br/> <img alt="" src="https://media.prusaprinters.org/thumbs/cover/640x480/media/prints/23478/images/239466_0b2e81ad-7e8f-42c3-b84c-85c865ff4cb1/tippics_dribble.jpg"/></p> <h3>Test for yourself</h3> <p>I've included two GCode files, one with dribbling and one without. Load up some PETG on 1, 3, and 5 and examine your tips between retractions.</p> <h3>Summary</h3> <p>The use case presented here is real. I was looking at the RC of PrusaSlicer (2.2.0-alpha) to see if tips were cleaner. The pictures tell the story.</p> <p><strong>If you are looking at stringy tips</strong> without dribbling but <strong>see clean tips with dribbling</strong> be sure to leave a comment on the <a href="https://github.com/prusa3d/PrusaSlicer/pull/2743">'Dribbling' pull</a>. Let them know that you have verified 'Dribbling' works and would like to see it in a future release. Thanks!</p>
With this file you will be able to print MMU Test Chip with your 3D printer. Click on the button and save the file on your computer to work, edit or customize your design. You can also find more 3D designs for printers on MMU Test Chip.
