MK7 NinaFlex Adaptor
pinshape
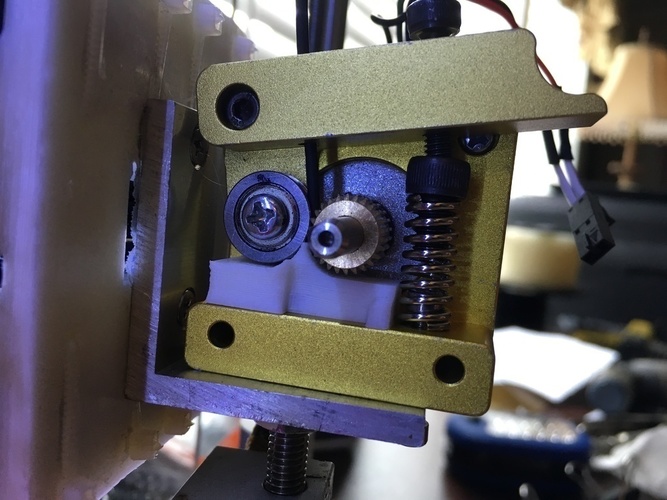
I have a Prusa i3 with an MK7 extruder which I want to use for printing Ninjaflex. If you've ever tried printing this stuff, you know it's like pushing a wet noodle through the extruder! The filament is very flexible and the distance between the gear and barrel causes it to go anywhere but through the nozzle. I decided to see if I could fix that problem, so I created the Wet Noodle Adapter. This thing looks pretty simple, but the tolerances are really tight, so before you start, make sure your bed level is correct (it goes without saying, but too many people skip this part). Slice the STL file with a layer height of 0.15mm with support. Bring your bed up to temperature - I use 115C on PEI. After that, set your Z axis so that you can slip a sheet of paper under it and it touches the bed and nozzle easily. The first layer height is critical for this part! Heat your extruder to 210C and load your ABS filament (don't use PLA because the temperatures inside the extruder get too warm for it). After printing, remove the little extra plastic covering the top hole for the filament and clean out the rest of the filament hole with a manual drill bit. Remove the fan on your MK7 extruder - I have mine set up with a connector and the fan, heatsink, and spacers are glued in place so I can easily remove it to get to the inner works. Slip the Wet Noodle Adapter under the gear and idler with the long side under the gear. You may have clearance problems with your grub screws holding the gear in place - if so, you can file a little more flat spot on the shaft and turn the gear around to put the grub screws on the side closest to the extruder. Again, the tolerances are tight, so the adapter should fit snugly under the gear and idler with the idler lined up with the filament hole. You may or may not need to put a larger washer behind the idler - its center must line up with the filament hole in both the adapter and barrel. While pressing on the adaptor, make sure you can insert a piece of filament down through the adapter into the barrel. Put the fan back on and test extrude a piece of any filament you like. If you got this far, you're ready to print Ninjaflex. I found it prints best at 10mm/s or 600mm/min - slow is good. Use an extruder temperature of 240C and reduce your flow rate to 95% and dial down the speed to around 7.5mm/s for a nice shiny finish. Before starting the print, let about 15mm of Ninjaflex extrude and start the print while it continues to ooze - if you wait too long, the filament will blob up inside the nozzle. You can remove it after the print gets underway. I hope this helps some of you who have tried and failed to print Ninjaflex on your Prusa i3. See it in action at https://youtu.be/2pkTmWo1C0w or https://youtu.be/2c8DDbqSJDQ
With this file you will be able to print MK7 NinaFlex Adaptor with your 3D printer. Click on the button and save the file on your computer to work, edit or customize your design. You can also find more 3D designs for printers on MK7 NinaFlex Adaptor.