MK4 Hyperpixel 4
prusaprinters
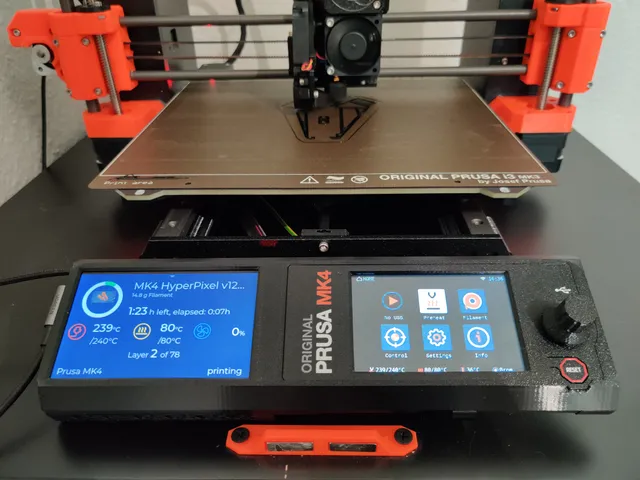
I wanted to use Octoprint/Octodash again on my new MK4, but there was no hyperpixel version out, to fit the new MK4. So i remix the old version so it will fit the new MK4, also did so you can reused the LCD part, because i like the sticker they have added to it :)I know that Octoprint is not yet supported for the MK4, and some gcode command don't work, like (M601 pause print) but most work like filament change and everything else i tried, so i used it like before on the MK3 :)Made it to fit the printer itself or a enclosure, so you can chose what you want.Also the same print fit pi3 or pi4, also fit the old/new screen from the MK4.So you don't have to know what file to print because there are only 1 set to make it easy.All print, can be printed without support :)USB cable for power the pi, i use a “UGREEN USB C 90 Degree”, but think most 90 degree will fit, or really short ones, because there is not alot room for the cable.Hope you will like it and here is a small guide on how to assemble it :)Print the set you want. Here i show the Prusa version to add it directly to the Printer.First take apart your LCD from the printer, so you have all lose part.Step 1:Add the printed part of the screen to the “MK4 HyperPixel Front” and then add the screen.Step 2:Now slide the “LCD Back Plate” in place, be sure it's clip in on both sides.Step 3:Remember to add the PE Faston before you screw in the back plate.If you have the old screen, you should add the PE Faston later.Step 4:Assemble your Hyperpixel 4.0 and Pi stack.Remember to added your pi-cam cable now, if you want to use a pi-cam later.I also added this copper cooler to the pi: https://www.aliexpress.com/item/1005001691525070.htmlAlso this small fan:https://www.amazon.de/-/en/WINSINN-3007-Hydraulic-Bearing-Turbine/dp/B08MKRL4GSStep 5:Slot in the Hyperpixel 4.0 stack into the front panel.And screw it in the front panel.If you have the old screen, now you should add the PE Faston aswell.Step 6:Now add the right and left arm for the printer or enclosure.Step 7:Now add the LCD cable and the PE cable.Step 8:New screw it on to the printer. Remember to add the spacer on the left side.Step 9:You have now added the Hyperpixel 4.0 you your printer :DIt should be right below the print bed and right above the table :)Happy printing :DBonus:All the prototypes i made before the final print was done :)
With this file you will be able to print MK4 Hyperpixel 4 with your 3D printer. Click on the button and save the file on your computer to work, edit or customize your design. You can also find more 3D designs for printers on MK4 Hyperpixel 4.
