MK3S Y-Axis bearing blocks
prusaprinters
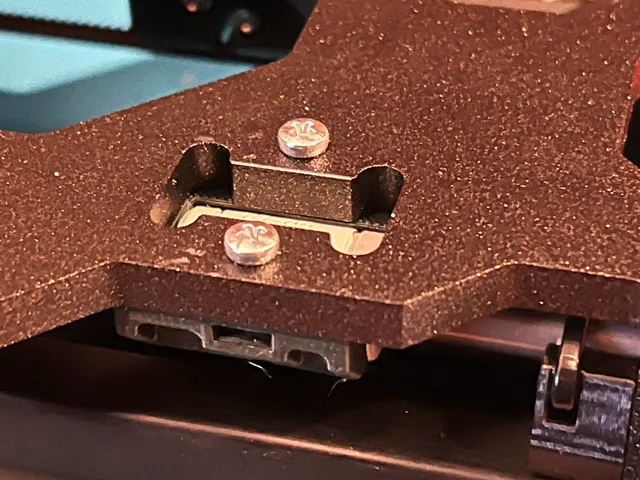
My Y axis got noisy and eventually started giving errors, so I needed to replace bearings. I read a lot about bearings. I found out that there are a lot of fake bearings out there. If buying “RJ4JP” without going through an actual Igus distributor they are probably not made by Igus. Quality varies widely. I got in touch with the local distributor through the Igus web site and it wasn't fast or cheap but I eventually got exactly the right things, rods perfectly cut to size. For the Y axis I bought RJ4JP-01-08 bearings and AWMP-08 hard anodized aluminium rods. Designing the block took a few revisions because if the bearing is compressed incorrectly it will distort and clamp down on the rod, and then not run freely. If the block is too large then the narrow cutouts for the MK3S frame will not allow the bearing to pass through as the carriage slides. If the block protrudes beyond the edge of the bearing at all then there will be a length error on the Y axis during self-test as the carriage can not move far enough, the bearings are the stops.The requirement to fit through the narrow frame cutouts made the inserted nut necessary. I wanted to use heat inserts but there is not room given the position of the carriage bolt holes and the bearing between them. The nut could not go on top because it is too wide for the frame when positioned high enough to clear the bearing. Then with the test print of a block that fastened nicely I found it failed the Y axis test after rest because the printer detected the axis as shorter.So this is the result. The two halves of the block are joined by the narrow bridge, which must face inwards on the carriage side with two bearings - remember if it hits the stops during calibration there is an error. The other side (single bearing) can be either way around. The bridge allows the assembly to flex so the bearing can be inserted easily. As the bolts tighten the block down against the base of the carriage it clamps evenly around the bearing and unless something is very wrong with your printer, holds it with more force than the friction of the bearing on the rod so it should not move relative to the carriage. The block fastens to the carriage with 12mm M3 bolts that mate with the M3 hex nuts that are inserted into the slots in the side of the block. Do not tighten the bolts until the rods are in the printer, the bearings are on the rods and the carriage is running smoothly, to make sure it is all aligned before being fixed in place. Then tighten it gently and make sure it still runs smoothly when the bolts are tight. If they are then reattach the bed, level as usual, and enjoy your very quiet Y axis.The bearings pictured in the photos of the block out of the printer (beige) are not Igus bearings though they work reasonably well, they were good enough for testing dimensions. At least they were not branded Igus like some other fakes I received from an Amazon seller and returned. The bearings pictured in the printer (gray) are genuine bearings and have a definite soapy, slippery feel to the plastic.No supports required, printed in Prusa recycled PETG .20 Speed setting.
With this file you will be able to print MK3S Y-Axis bearing blocks with your 3D printer. Click on the button and save the file on your computer to work, edit or customize your design. You can also find more 3D designs for printers on MK3S Y-Axis bearing blocks.