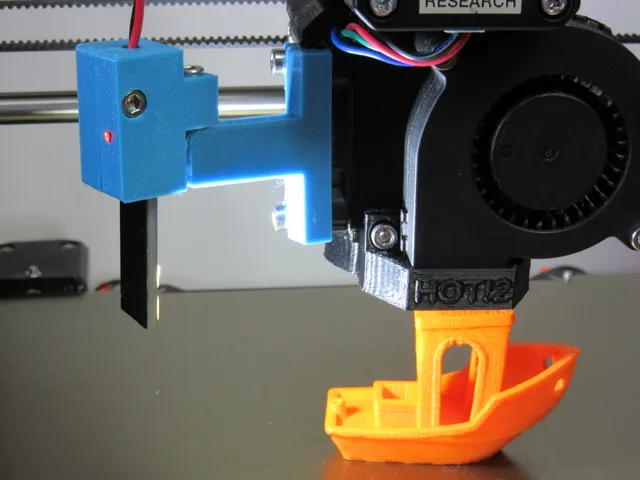
MK2.5 Nozzle Light (and MK3)
prusaprinters
This Nozzle Light for the Prusa i3 MK2.5 was inspired by Maximpulse's floating LED light (https://www.thingiverse.com/thing:2237352). It allows you to shine light directly on the nozzle so you can see your print as it is printing. This version holds the LED and the 5V converter in the same holder mounted on the extruder and is sized for the MK2.5 (and should fit the MK3). You can find my MK2 version at https://www.thingiverse.com/thing:2506110). The mount and hinge are combined and simplified so you can use the original fan screws and, because there is only one hinge, the light holder cannot be moved so it can hit the Z-screw. The hinge allows you to direct the light where you want. The LED light is dimmable and turns on or off with a touch to the back side. The little tab on the end serves no purpose and can be cut off (use a Dremel). This allows you to get the actual LEDs 5mm closer to your work. Print the "Extruder Mount MK2.5 uncut LED" if you don't cut yours (it simply mounts the light 5mm higher). If, after installing, you decide the LED is too close to the printbed, just add a nut on the bolt between the LED-Buck Holder and the Extruder Mount. The buck converter has a small red LED indicating it has power. The small hole in the back of the left side of the Holder is to allow you to insert a short piece of clear 1.75mm filament so the light shines. It's not important but we all like little shining red lights.:-) The USB LED touch light costs only £0.99 from China and can be found at: https://www.ebay.co.uk/sch/i.html?\_from=R40&\_sacat=0&\_nkw=Touch%20LED%20USB&rt=nc&LH\_BIN=1&\_trksid=p2045573.m1684 The 12V to 5V USB buck converter is also only £0.99 from China and can be found at: https://www.ebay.co.uk/sch/i.html?\_from=R40&\_trksid=p2380057.m570.l1313.TR1.TRC0.A0.H0.X12V+buck+converter+USB.TRS0&\_nkw=12V+buck+converter+USB&\_sacat=0 Print instructionsUnassociated tags: MK2.5, prusa_i3_MK2.5 Category: 3D Printer Accessories Post-Printing Wiring the buck converter to your Prusa power supply Solder a pair of wires to the converter, the negative connects to what I'm calling the "left" side (the side with the led -- see photo). After mounting, run the wire over the top of the extruder and down the grove on the back with the filament sensor wires. Wrap the wire around and along the main cable bunch then down, under the printer, to the main power supply. I chose to use connectors so I could easily remove the light if necessary. If you wish, you could remove the spiral wrap and include the wire with the bundle. Connecting the converter to the power supply is simple:DISCONNECT THE POWER! Unscrew the PS from the printer (4 screws), unscrew the plastic cover (3 screws), slide the PS out leaving all wires connected. It will only slide a few inches but that's enough. Attach wires onto the spare 12VDC +/- terminals. Make sure you get your positives and negatives right!
With this file you will be able to print MK2.5 Nozzle Light (and MK3) with your 3D printer. Click on the button and save the file on your computer to work, edit or customize your design. You can also find more 3D designs for printers on MK2.5 Nozzle Light (and MK3).
