MJW Octopi Mount for Raspberry Pi Zero W with Camera - Wanhao Duplicator i3 / i3 v2 / i3 v2.1 / i3+
thingiverse
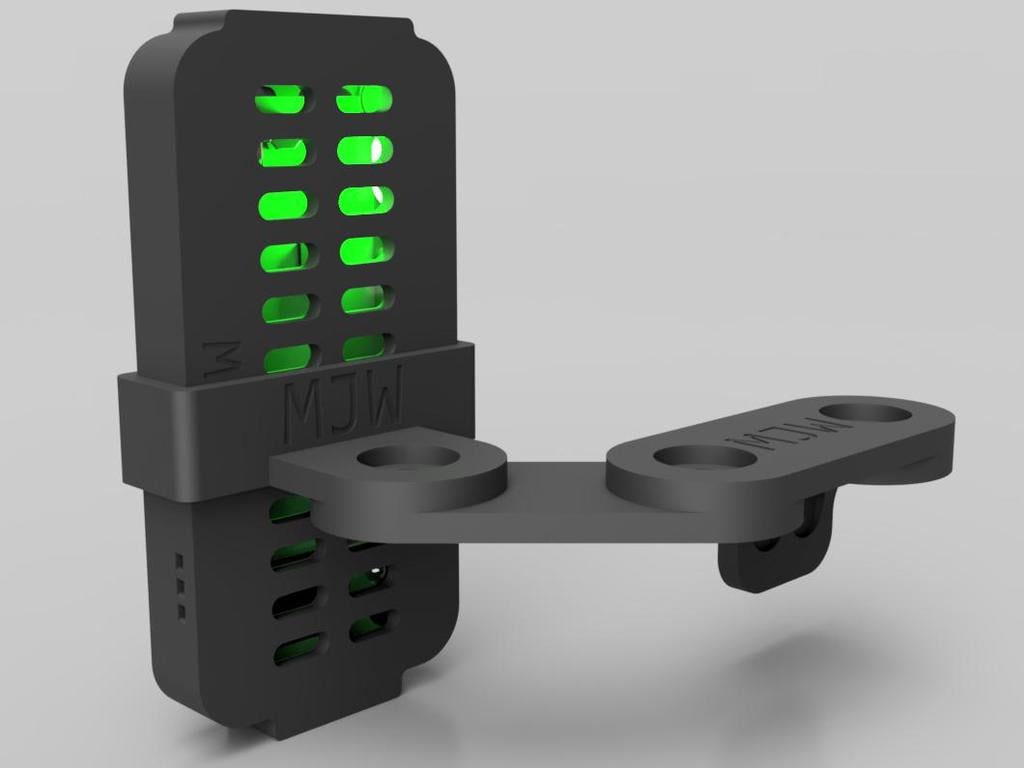
<p><strong>*Updated* Altered pins to improve fit, added extra instructions.*</strong></p> <p>This is a DIY guide to build a smart camera mount for your 3D printer. The mount is adjustable and can be used with the Raspberry Pi Zero W camera module.</p> <h2>Materials Needed:</h2> <ul> <li>Raspberry Pi Zero W</li> <li>Raspberry Pi Camera Module</li> <li>M6x5 Bolts and Nuts</li> <li>Arm Piece Bolt and Nut</li> <li>Z-Stop Locations (4)</li> <li>PiCam Case Holder</li> <li>DS18B20+ Temperature Sensor (optional)</li> <li>4.7k Resistor (optional)</li> </ul> <h2>Step 1: Assemble the PiCam Case Holder</h2> <p>Using the M6x5 Bolts and Nuts, attach the Arm Piece Bolt to the i3 Frame Bracket. Then, using another M6x5 Bolt and Nut, attach the Arm Piece Nut to the Arm Piece Bolt.</p> <h2>Step 2: Attach the PiCam Case Holder to the Mount</h2> <p>Using the M6x5 Bolt and Nut, attach the Arm Piece Bolt to the Pi-Cam-Case-Holder assembly you completed in Step 1.</p> <h2>Step 3: Adjust the Mount</h2> <p>The mount is adjustable by loosening/tightening the M6 Bolts. The nuts should be retained in the arms. You can also adjust it in the Z direction by using either of the 4 spare Z-Stop locations, and by sliding the Pi Case up and down inside the Holder.</p> <h2>Optional Step: Monitor Enclosure/Room Temperature</h2> <p>This is an optional step that requires additional materials. Please see the instructions below:</p> <ol> <li>Solder Pin 1 of the DS18B20+ to a piece of wire. Heatshrink over the connection for added strength.</li> <li>Connect this Wire to the Ground GPIO Pad/Pin on your Pi Zero W.</li> <li>Solder the 4.7k resistor between Pins 2 and 3 on the DS18B20+, Heatshrinking over the connections if desired.</li> <li>Connect a length of wire to Pin 2 of the DS18B20+. Heatshrink over the connection for added strength.</li> <li>Connect this wire to the GPIO4(GPCLK0) Pad/Pin on your Pi Zero W.</li> <li>Connect a length of wire to Pin 3 of the DS18B20+. Heatshrink over the connection for added strength.</li> <li>Connect this wire to the 3V3 Power Pad/Pin on your Pi Zero W.</li> <li>Install the "Room Temperature" Plugin by Frederic Moutin, detailed here: https://github.com/l00ma/OctoPrint-roomTemp.</li> <li>Run the three wires through the three channels in the Pi Zero W case, and install your sensor in a location of your choosing.</li> </ol> <h2>Links:</h2> <ul> <li><a href="https://github.com/l00ma/OctoPrint-roomTemp">https://github.com/l00ma/OctoPrint-roomTemp</a> - OctoPrint Room Temperature Plugin by Frederic Moutin.</li> <li><a href="https://github.com/guysoft/OctoPi">https://github.com/guysoft/OctoPi</a> - OctoPi Build by Guy Sheffer and the community.</li> <li><a href="https://shop.pimoroni.com/products/raspberry-pi-zero-camera-module">https://shop.pimoroni.com/products/raspberry-pi-zero-camera-module</a> - Camera Module for the Raspberry Pi Zero W.</li> </ul> <p>Don't forget to flip your PiCam Stream from inside the OctoPrint Web UI!</p>
With this file you will be able to print MJW Octopi Mount for Raspberry Pi Zero W with Camera - Wanhao Duplicator i3 / i3 v2 / i3 v2.1 / i3+ with your 3D printer. Click on the button and save the file on your computer to work, edit or customize your design. You can also find more 3D designs for printers on MJW Octopi Mount for Raspberry Pi Zero W with Camera - Wanhao Duplicator i3 / i3 v2 / i3 v2.1 / i3+.