Mix G1 Extruder - JHead
thingiverse
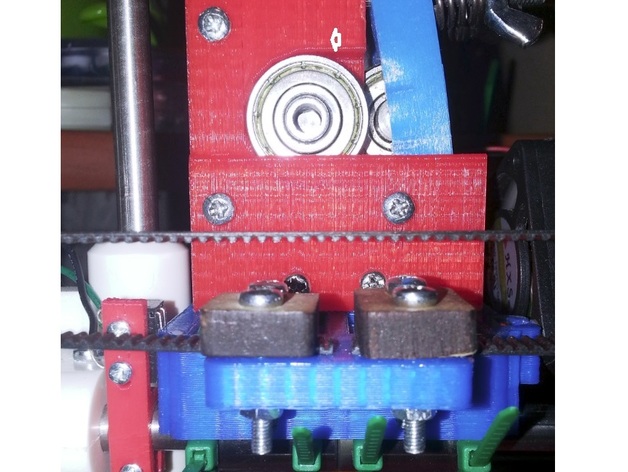
I upgraded my MIX G1 printer with a jhead and made some modifications to accommodate the new hotend. I installed a jhead as an upgrade to my MIX G1 printer but encountered difficulties. Fortunately, I had previously applied modifications on my machine, which now prints beautifully! To enable installation of the JHEAD, follow this modification for your MIX G1 extruder: enlarge the opening for the hotend, add holes for two screws, and make body bigger. In order to fit my hobbed bolt inside, I made the body even bigger. Then I narrowed down the depth to allow these screws to work. Lastly, I added a mounting hole for an exhaust fan (a future project). Instructions: Make sure you have a modified X Cartridge with an increased opening to J-HEAD. If you're working with a pre-existing MIX G1 printer, those screws that originally connected the parts will still function (I reused them too). Just line up the holes on your X cartridge and the extruder part shown here; secure them together. This is sufficient for installing JHEAD, as two front middle screws are required to keep the head securely in place within the machine. In doing so, ensure a snug fit for JHEAD.
With this file you will be able to print Mix G1 Extruder - JHead with your 3D printer. Click on the button and save the file on your computer to work, edit or customize your design. You can also find more 3D designs for printers on Mix G1 Extruder - JHead.