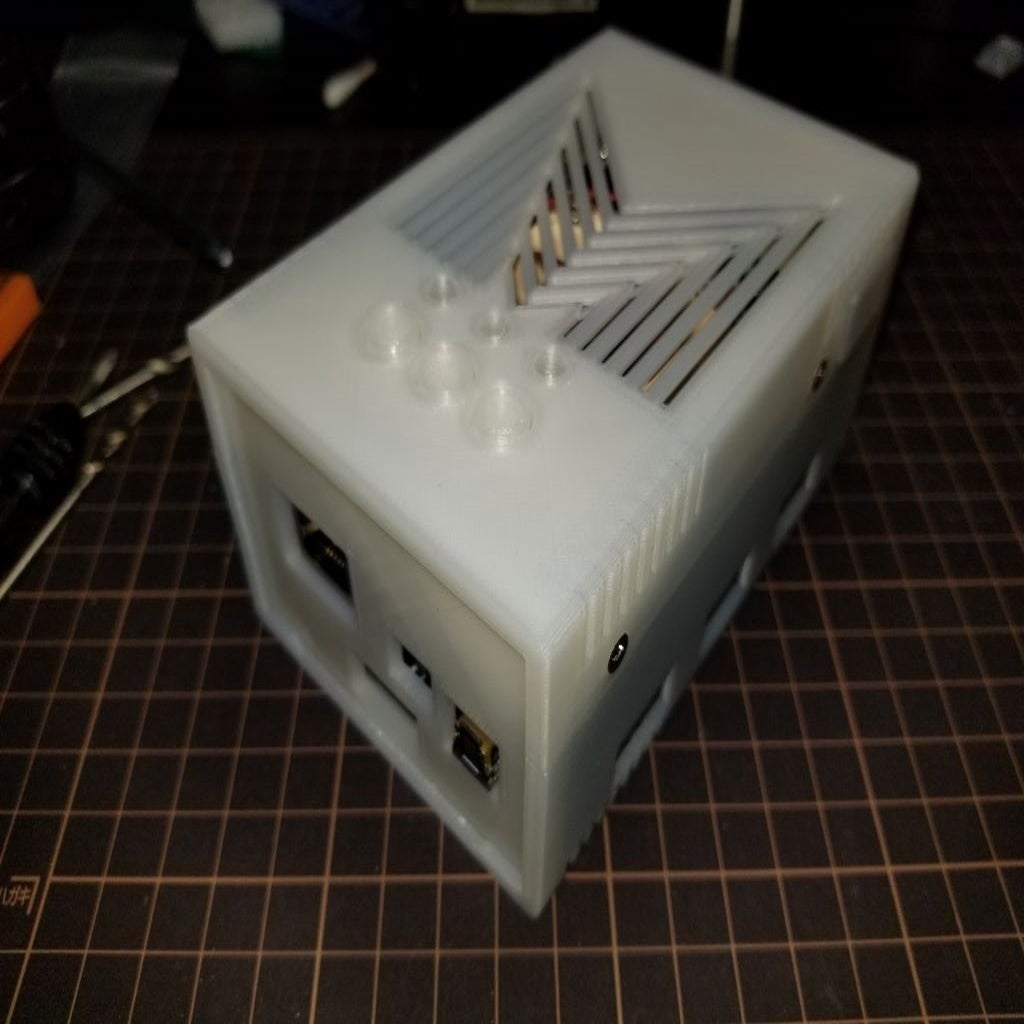
MiSTer V2 - Extended Bottom
prusaprinters
<p>This is an extended bottom for the MiSTer V2 case by MiSTerAddons.com. I was never too happy with how the "sidecar" attached to the main case and the need for a clunky cable looping down. Luckily the designer of that case is a great person and gave me his blessing to fiddle with the original design files.</p> <p>This is only a replacement bottom shell and covers. You will need to print a top shell and buttons from the original MiSTer V2 case. <a href="https://www.thingiverse.com/thing:3647626">https://www.thingiverse.com/thing:3647626</a></p> <p>This case is designed to contain the following:</p> <ul> <li>Official USB Hub v1.2 or v2.1</li> <li>Terasic DE10-Nano</li> <li>Official IO Board v6.0</li> <li>Official SDRAM XS Board</li> </ul> <p>There are two versions attached. The one you print depends on how you connect to your USB Hub. If you use the pin header PCB, print those files with four copies of the M3 washer. In addition to these prints, you will need four 14mm M3 standoffs.</p> <p>Tolerances are tight. Take your time and don't force anything. Getting the IO board seated properly can be tricky. You may need to flex the rear cover a bit while maneuvering the board into position. WATCH YOUR PINS! Again, you should <strong>not</strong> need to force anything.</p> <h3>Print instructions</h3><p><strong>Printer Brand:</strong> Prusa</p> <p><strong>Printer:</strong> I3 MK3S</p> <p><strong>Rafts:</strong> No</p> <p><strong>Supports:</strong> No</p> <p><strong>Resolution:</strong> Doesn't matter. 0.4mm nozzle.</p> <p><strong>Infill:</strong> 100%</p> <p><strong>Filament:</strong> 3D Solutech PLA Natural Clear</p> <p><strong>Notes:</strong></p> <p>I printed mine in draft mode with a translucent material. There are a lot of LEDs on these boards and using a translucent material looks very cool in the dark.</p> <h3>Post-Printing</h3> <p>The holes have been sized for M3 hardware.</p> <p>Some minor post processing is required for a good fit.</p> <ul> <li>The mounting holes on the bottom are sized to run an M3 tap through them. Clean up the holes with a 2.5mm drill before tapping.</li> <li>The countersunk holes on the side should be drilled out to 3mm to clear the threads of the screws.</li> <li>The holes on the tabs on the top should be drilled out to 2.5mm and then tapped with an M3 tap.</li> <li>The fit on the front and rear covers is tight. You may need to deburr the edges that touched your build plate. The edges should be perpendicular and without any lips.</li> </ul> <p>I used some leftover hard drive mounting screws to secure my case. Mine happened to seat flush with the case. When choosing yours, be mindful of the length. The clearance is tight on the side with the SDRAM module. Be sure not to use a screw that would short any of the pins.</p>
With this file you will be able to print MiSTer V2 - Extended Bottom with your 3D printer. Click on the button and save the file on your computer to work, edit or customize your design. You can also find more 3D designs for printers on MiSTer V2 - Extended Bottom.
