Minolta SR/MC/MD Lens To Leica M Body (Techart Pro LM-EA7) Adapt
pinshape
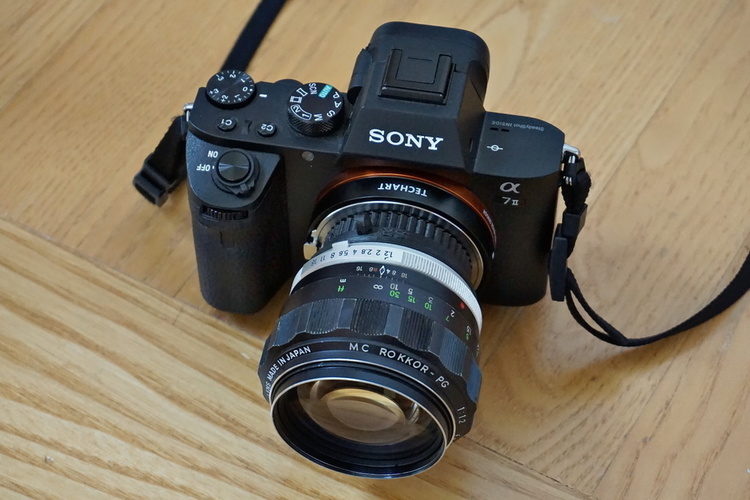
Human: Summary Minolta was once a leading brand for 135 film SLRs and lenses. They were known for making their own glass and producing high-quality lenses that even Leica used. Minolta introduced their SR bayonet lens mount in 1958, which they continued to use until 2001 with minor variants. However, this mount is different from the autofocus mount used by Sony's Maxxum line starting in 1985. The short flange distance of the SR mount made it difficult to find adapters for other bodies, but some are available for mirrorless mounts like Leica M. Using a 3D printer, we can create an adapter that allows these manual lenses to autofocus on the latest Sony E mount bodies via the Techart Pro LM-EA7 adapter. This adapter is lightweight and has a weight drive limit of 700g, making it ideal for use with Minolta SR lenses. The last two photos were taken using this setup on a Sony A7II with a Minolta Rokkor 58mm f/1.2 lens wide open. They are vertical shots that look better in their original orientation. Printer Settings Brand: MakerGear Model: M2 Rafts: No Supports: No Resolution: 0.25mm Infill: 25% Notes: This print is straightforward and requires no supports or post-processing. We used dishwasher-safe high-temperature black PLA, which should be a bit tight. Work the lens into the mount before attaching it to a camera to clean any shards that may form. There are three files available for printing: 1. sr_20160814.stl: This file contains the adapter body and two copies of the small lens locking pin. 2. sr_20160814adapter.stl: This file contains only the adapter body. 3. sr_20160814lockpin.stl: This file contains only the lens locking pin. Post-Printing Usage Notes The M side of the adapter has a dot in the bar-patterned grip portion that aligns with the M locking pin for mounting and turning clockwise to lock. To unmount, depress the M mount release lever/tab on the body (or LM-EA7) and turn counter-clockwise. The SR side of the mount is marked "Minolta" on the bottom and "SR" on the top. To mount a lens, align the red dot with the top of the adapter, push the lens in, and turn clockwise until the lens focus mark is at the top. The lens should turn freely, allowing you to insert the locking pin into the slot on the right side after the "SR" marking. This will seal against light leaks and rotationally lock the lens. To remove a lens, simply pull the locking pin back a couple of mm to rotationally release it. Minolta SR/MC/MD lenses default to stop-down operation, so you control the aperture by turning the aperture ring on the lens.
With this file you will be able to print Minolta SR/MC/MD Lens To Leica M Body (Techart Pro LM-EA7) Adapt with your 3D printer. Click on the button and save the file on your computer to work, edit or customize your design. You can also find more 3D designs for printers on Minolta SR/MC/MD Lens To Leica M Body (Techart Pro LM-EA7) Adapt.