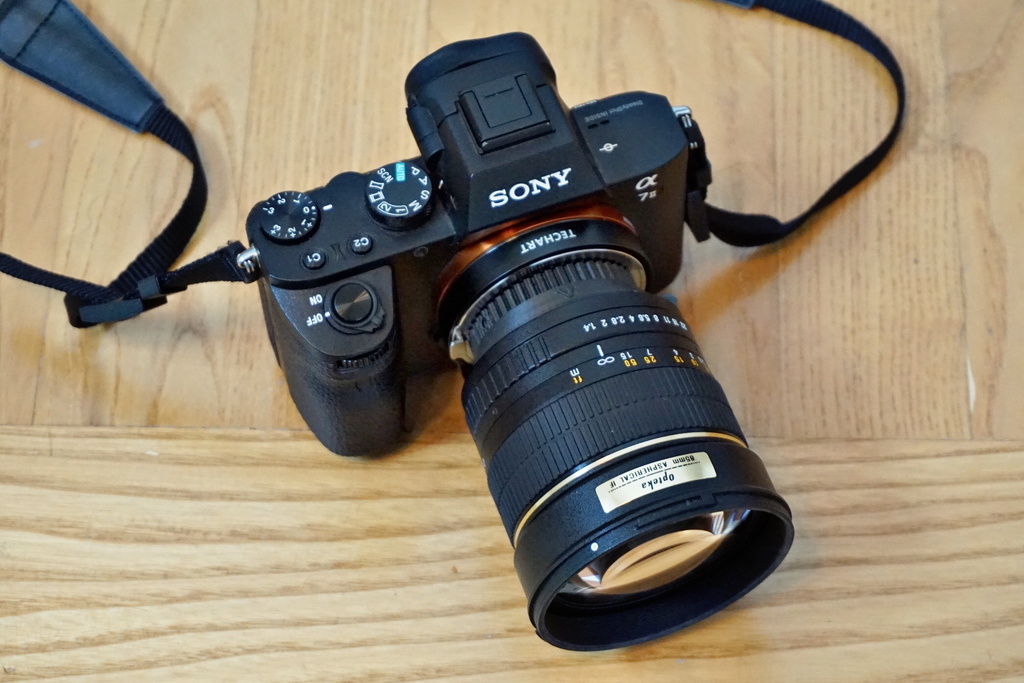
Minolta/Konica-Minolta/Sony A Lens To Leica M Body (Techart Pro LM-EA7) Adapter
prusaprinters
<p>In 1985, Minolta became the first company to produce a body-driven autofocus 35mm SLR -- the Maxxum 7000 -- and with it, the new A (also called Alpha or AF, replacing the incompatible manual-focus SR/MC/MD) mount became the camera system to have. Unfortunately, lawsuits soon followed: Exxon sued over the typography of "xx" in Maxxum and Honeywell (Pentax) sued claiming the autofocus technology infringed on their patents. It's a long story, but that began a slow fade; Minolta became Konica Minolta in 2003, finally giving their camera business to Sony in 2006. Although A mount is now second to E for Sony, by my counting, more autofocus lenses have been produced in A than any other mount, so there are plenty of reasons to want to adapt A-mount lenses... and there are various adapters available -- including the LA-EA1/2/3/4 from Sony itself.</p> <p>Ok, so why 3D print this one? Because we can seems like a decent answer -- this is an easy print in 2 pieces, the adapter itself and a little locking pin. Certainly, this adapter fits nicely on a Techart Pro LM-EA7 autofocus adapter and uses only about 12g of the 700g drive limit for the LM-EA7. It's great for manual A-mount lenses. The catch is that it doesn't yet incorporate an aperture control for autofocus lenses... which are the vast majority of A-mount lenses. Hopefully, I'll find a good way to implement that soon... but the LA-EA4 adapter already implements aperture control and native autofocus using those lenses on Sony E bodies, and I own an LA-EA4 as well as an LM-EA7.</p> <p>The last two photos were taken using the LM-EA7 on a Sony A7II, autofocusing a manual-focus Samyang (Opteka) 85mm f/1.4, both shot wide open. In fact, it's the only manual A-mount lens I own. Exceptionally smooth bokeh from that lens, but that super smooth transition to out-of-focus makes it hard to focus manually. By itself, it also has a rather long minimum focus distance, which isn't a problem combining manual focus with autofocus tweaking by the LM-EA7. I think this lens by itself is enough to justify making this adapter, although there are some other great manual lenses in A mount from companies including Samyang and Zeiss.</p> <h3>Print Settings</h3> <p><strong>Printer Brand:</strong></p> <p>MakerGear</p> <p><strong>Printer:</strong></p> <p>M2</p> <p><strong>Rafts:</strong></p> <p>No</p> <p><strong>Supports:</strong></p> <p>No</p> <p><strong>Resolution:</strong></p> <p>0.25mm</p> <p><strong>Infill:</strong></p> <p>25%</p> <p><strong>Notes:</strong></p> <p>A very straightforward print. I used "dishwasher safe" high-temp black PLA. It should be a little tight, so work a lens in the mount a bit before attaching to a camera -- that way, you can clean any little shards that the flange might cut the first time you fit a lens to it. The bayonet wings are designed to print in the given orientation without supports or post processing. There are three files. Just printing a_20160820.stl will give you the adapter body and two copies of the rather small lens locking pin (one and a spare). Alternatively, the adapter body by itself is a_20160820adapter.stl and a_20160820lockpin.stl is the lens locking pin.</p> <h3>Post-Printing</h3> <p><strong>Usage Notes</strong></p> <p>The M side of the adapter has a dot in the bar-patterned grip portion of the adapter that you align with the M locking pin for mounting and then turn clockwise to lock. To unmount, you simply depress the M mount release lever/tab on the body (or LM-EA7) and turn counter-clockwise, lifting the adapter out when the dot aligns.</p> <p>The A side of the mount is marked "SONY" on the bottom and "A" on the top. To mount a lens, simply align the red dot on the lens with the dot on the adapter, push the lens in, and turn clockwise until the lens focus mark is at the top. The lens should turn very freely... so now it is time to insert the locking pin. The locking pin fits into the slot at the 3 O'clock position. Although the pin is straight, the slot is actually curved to help seal against light leaks and to hold the pin better, so it might feel tight the first time you put the pin in, and you might have to file your pin a touch if your printer was at all sloppy in making it. You might have to wiggle the lens a bit to perfect the alignment with the pin, but the pin should push in to have the tab nearly flush with the outside of the adapter -- and, more importantly, to rotationally lock the lens so it cannot move. To later remove the lens, you shouldn't need to pull the locking pin all the way out, but merely a couple of mm to rotationally release the lens.</p> <p>This adapter does not have any aperture-control mechanism, so you can only control the aperture on manual A-mount lenses that have an aperture ring.</p> Category: Camera
With this file you will be able to print Minolta/Konica-Minolta/Sony A Lens To Leica M Body (Techart Pro LM-EA7) Adapter with your 3D printer. Click on the button and save the file on your computer to work, edit or customize your design. You can also find more 3D designs for printers on Minolta/Konica-Minolta/Sony A Lens To Leica M Body (Techart Pro LM-EA7) Adapter.
