Minolta/Konica-Minolta/Sony A Lens To Leica M Body (Techart Pro
pinshape
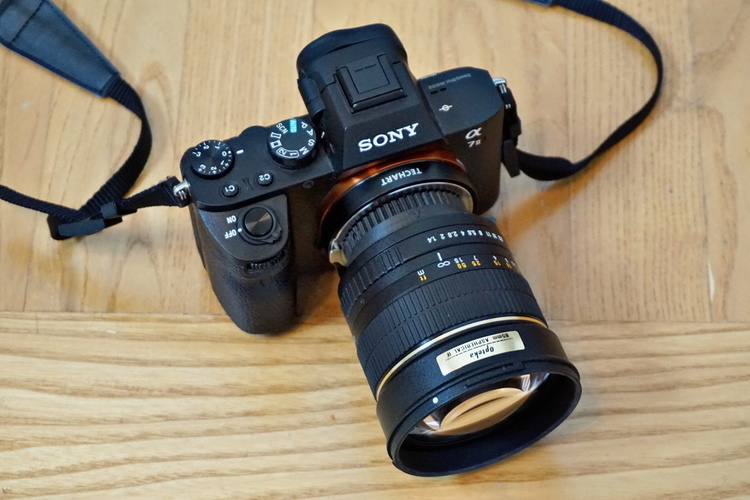
In 2006, Sony made history by acquiring Konica Minolta's camera business, thus gaining access to the legendary Alpha (A) mount system. The Maxxum 7000, released in 1985, was a groundbreaking body-driven autofocus 35mm SLR that set the standard for future cameras. Unfortunately, lawsuits and patent disputes soon followed, marking the beginning of Minolta's decline. The A mount system remained popular, with Sony eventually adopting it as its own. Today, more autofocus lenses have been produced in A mount than any other, making adapters a must-have for many photographers. Fortunately, various adapters are available, including the LA-EA1/2/3/4 from Sony itself. That's why I decided to 3D print this adapter - because we can! It's an easy print in two pieces: the adapter body and a small locking pin. The adapter fits perfectly on my Techart Pro LM-EA7 autofocus adapter, using only about 12g of the 700g drive limit. This adapter is ideal for manual A-mount lenses, which are the majority of lenses available in this system. However, it doesn't currently incorporate aperture control for autofocus lenses - a feature that I hope to implement soon. Fortunately, the LA-EA4 adapter already offers this functionality and native autofocus using those lenses on Sony E bodies. I recently used my LM-EA7 on a Sony A7II to autofocus a manual-focus Samyang (Opteka) 85mm f/1.4 lens, which produced exceptionally smooth bokeh. However, the super-smooth transition to out-of-focus makes it challenging to focus manually. The long minimum focus distance of this lens isn't an issue when combining manual focus with autofocus tweaking by the LM-EA7. This lens alone is enough to justify making this adapter, and there are many other great manual lenses available in A mount from companies like Samyang and Zeiss. I printed this adapter using my MakerGear M2 printer with high-temp black PLA. The print settings were straightforward: no rafts, no supports, and a resolution of 0.25mm with an infill of 25%. I used a dishwasher-safe material to ensure the adapter is both functional and durable. When attaching a lens to the adapter, work it in a bit first to clean any shards that might be cut by the flange. The bayonet wings are designed to print without supports or post-processing, making this a very easy print. There are three files available: printing only the adapter body (a_20160820.stl) will give you the adapter and two spare locking pins. Alternatively, you can print the adapter body separately (a_20160820adapter.stl) or just the lens locking pin (a_20160820lockpin.stl). Post-printing usage notes are as follows: to mount a lens, align the red dot on the lens with the dot on the adapter and push it in. Turn clockwise until the lens focus mark is at the top, then insert the locking pin into the slot at the 3 O'clock position. Although the pin is straight, the slot is curved to help seal against light leaks and hold the pin better. You might need to file your pin a touch if your printer was sloppy in making it. To later remove the lens, simply pull out the pin a couple of mm to rotationally release the lens. This adapter does not have an aperture-control mechanism, so you can only control the aperture on manual A-mount lenses with an aperture ring.
With this file you will be able to print Minolta/Konica-Minolta/Sony A Lens To Leica M Body (Techart Pro with your 3D printer. Click on the button and save the file on your computer to work, edit or customize your design. You can also find more 3D designs for printers on Minolta/Konica-Minolta/Sony A Lens To Leica M Body (Techart Pro.
