Minimal Mechanical Digital Clock with Network Time Acquisition
prusaprinters
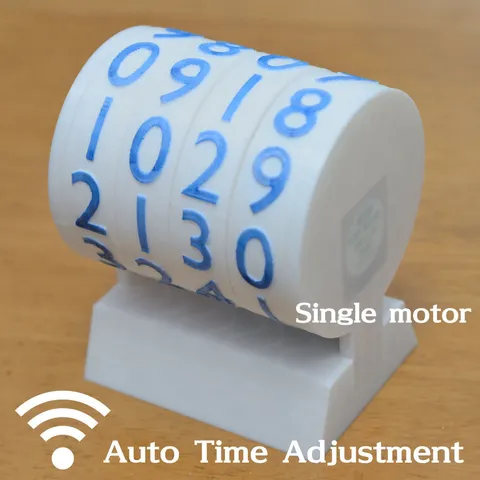
Jan 8, 2021 : Improved version is released, https://www.thingiverse.com/thing:5242321 Mechanical digital clock with network time acquisition. Minimal, attractive floating design Complex and interesting motion It consists of only 7 types, 8 printed parts (4 digits version). Easy to print and assemble By using ESP32 microcomputer, it acquires current time through WiFi (ntp : network time protocol) You can increase the number of digits without adding motor. 8-digits version is added. Origin sensor can be attached (optional) You need 28BYJ-48 geared stepper motor and driver board comes with. I used https://ja.aliexpress.com/item/32869969097.html (around 2USD per unit) ESP32 microcomputer with WiFi. I used ESP-WROOM-32 D1 mini, https://ja.aliexpress.com/item/4000650306925.html (around 5USD per unit) (optional) ROHM RPR-220 reflective photosensor for detecting origin Operation If origin sensor is not installed, adjust (rotate) rightmost digit wheel to zero by your hand (against the drag force of stepper motor while power off). Power on. It automatically reset all digit to zero by 3 (or 7) full turns. Then it shows current time. Update Jan 17, 2022 : WiFi setting from your smartphone is now possible. Use smartConfig.ino for your ESP32 microcomputer. This is based on the code by airtcp, https://github.com/airtcp/esp32_demo_for_lolinlite and I added some motions to show the current status of the clock. Video How to make Printing Print all parts with supplied posture. Only "cyl-first.stl" needs support to print. Otherwise you can print them without support. Print two copies of "cyl.stl" (for 8-digits version, 6 copies are necessary). Paint numbers with markers. If you are making 8-digits version, use "leftlend-8digit.stl" and "base-8digit.stl" instead. Attach stepper motor to "rightend.stl" as shown above. Hide cables with "rightend-cap.stl" and fix it by plastic welding with soldering iron. Assemble, and fix "leftend.stl" and "rightend.stl" to "base.stl" by plastic welding. At the top of the source code, you should configure parameters if optional features are used. You should modify source code to use your WiFi infrastructure. SSID and password Timezone Optional 8-digit version is added. Use STL files named "8digit" (leftend-8digit.stl and base-8digit.stl) instead. Program is common, and change the settings at the top of the code. Now reflective photosensor is installed to find origin automatically.It is optional, but without it, shown time would be incorrect after power blackout or unintended reset. It assumes to use ROHM RPR-220 Reflective Photosensor. Data sheet of RPR-220 at https://www.rohm.com/products/optical-sensors/reflective-type-photosensors/rpr-220-product#productDetail SmartConfig You can set SSID and password of your WiFi using smartphone app. This code is a back-ported version of newer "Rotary Digital Clock", https://www.thingiverse.com/thing:5191668 This function is named SmartConfig. The apps for setting are at Android: https://play.google.com/store/apps/details?id=com.khoazero123.iot_esptouch_demo&hl=ja≷=US iOS: https://apps.apple.com/jp/app/espressif-esptouch/id1071176700 The status of WiFi connection is indicated by the motion of the rotor. Large reciprocal motion : connecting to WiFi of previous setting stored in non-volatile memory. Small reciprocal motion : SmartConfig mode. If 30 seconds of WiFi connection trial fails, it automatically moves to the the smartConfig mode (waiting for the setting from smartphone app.) Please not that your smartphone should be connected to 2.4GHz WiFi. Thanks to airtcp. Original source code is at https://github.com/airtcp/esp32_demo_for_lolinlite Category: Gadgets
With this file you will be able to print Minimal Mechanical Digital Clock with Network Time Acquisition with your 3D printer. Click on the button and save the file on your computer to work, edit or customize your design. You can also find more 3D designs for printers on Minimal Mechanical Digital Clock with Network Time Acquisition.