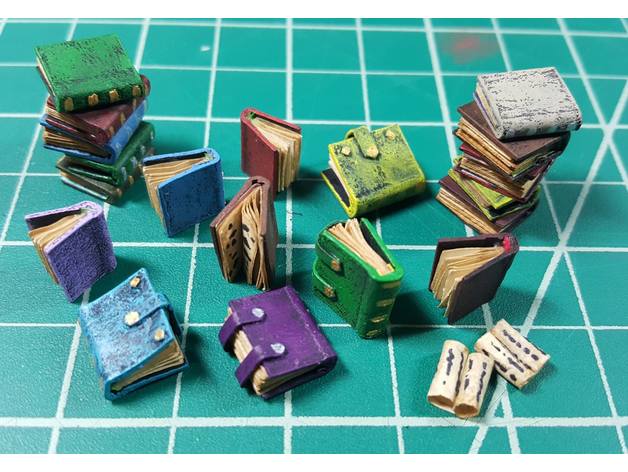
Miniature Tome Tutorial
thingiverse
This is a detailed guide on how to create handmade book covers and add magical elements to the pages, making it a unique and enchanting "Tome." Here's a summary of the process: 1. **Preparing the Pages:** * Soak strips of paper in coffee until they are stained. * Bake the strips in the oven until they curl and become rigid. 2. **Cutting and Bundling the Pages:** * Cut the curled pages in half, keeping track of which end is the "show" end. * Bundle a number of cut pages together with the "show" ends even with each other. 3. **Adding the Secret Sauce:** * Dip the pages into a mix of water and glue (50/50). * Squeeze out excess water when the pages are tacky but not wet. * Leave the bundle in a clothespin to dry. 4. **Fitting the Pages to the Book:** * Insert the "show" ends into the book and mark where they need to be cut. * Cut the pages to finished size, leaving them slightly recessed. 5. **Binding the Book:** * Gather up the pages and smooth glue along the spine side. * Place a strip of colored paper along the spine. * Wrap the binding around the sides, tacking it down with 50/50 glue. 6. **Finishing Touches:** * Flair the pages to push them back against the covers. * Anchor the pages with 50/50 glue inside the book. * Lock up any spells or loose ends with glue. 7. **Final Adjustments:** * Add drops of 50/50 glue to the pages near the spine for extra strength and stiffness. * Balance the weight of the book to achieve the desired splayed open position while it dries.
With this file you will be able to print Miniature Tome Tutorial with your 3D printer. Click on the button and save the file on your computer to work, edit or customize your design. You can also find more 3D designs for printers on Miniature Tome Tutorial.
