Miniature Painting Handle
prusaprinters
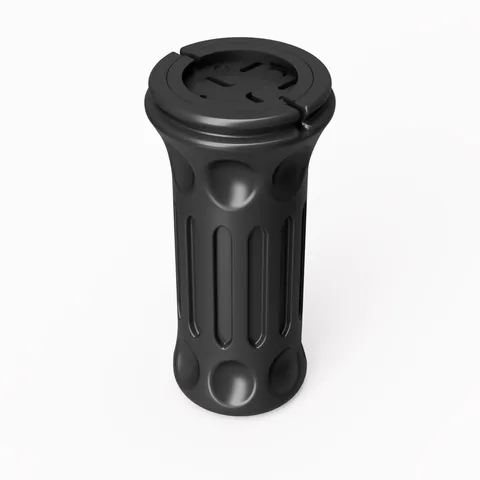
FeaturesGives you a solid grip on your miniature while paintingEasily switch between various Base sizes without producing any waste or having to reprint anything Quickly switch out MiniaturesEasy to print, no supports neededMinimal additional material required (some glue and a rubber Band)FunctionalityI designed this painting Handle as I was dissatisfied with various alternative options, who were either not keeping the miniature stable enough or were low in modularity or required a complex assembly and much additional hardware.My goals were to design a pleasant to grip Handle which fully encloses the base of the miniature and keeps it completely stable. Additionally I wanted it to be easy to print and assemble and use (besides some glue) just a rubber band. Som alternatives used screws to keep the miniature in place which definitely worked but switching out miniatures was quite time consuming, so this handle was designed to make switching out miniatures fast and comfortable.A note on base sizesThe current adapters are designed to work for the most common Games Workshop bases of the appropriate size. If you want more specialized adapters you can create them yourself (this is quite an easy CAD project suitable even for a beginner) or you can write me a message and I will see what I can do. Please include in the message some precise measurements, e.g. for a round base please include the radius or diameter and the angle of the sides.What to print?The parts you will need depend on what size the bases of your miniature are.In all cases: You will need to print all parts of the main handle40mm Base: No additional parts required32mm Base: In addition to the main handle you will need the 32mm adapter25mm Base: In addition to the main handle you will need the 25mm adapterOther Base sizes: Please see the section on base sizes, currently there are not other adapters available. but feel free to create them yourself or wirte me a message.If you want multiple different sizes: Print the parts for all desired base sizes. They can easily be swapped around.PrintingMain HandleIn general you should use the flattest side of the model on the print bed. Your settings shouldn't be adjusted too much, the standard high quality settings of your printer (or whatever tuning works best for you) should work reasonably well, but disable support material if your slicer wants to insert it. I recommend printing all parts at 0.2mm layer height, except for the Main Handle, where you might want to sacrifice a little bit of smoothness for a much lower printing time.Print the Main Handle upside down with the flat side on the print Bed. Please make sure that your settings are appropriate and that your printer is functioning well as this is by far the longest printPrint the Pins upright on the print bed. I recommend printing them together or, even better, with some other parts, as they are very smallPrint the Rails with the flat sides on the print bed. I recommend enabling ironing for themPrint the Jaws with the flat sides on the print bed. I recommend enabling ironing for all top surfaces for them32mm AdapterPrint the Jaws upside down, such that the pins at the bottom are turned upwards. I recommend enabling ironing.25mm AdapterPrint the Jaws with the flat sides on the bed, again I recommend ironing. You will additionally need to print the 4 Pins, they should not be printed individually. Print them all at once or, even better, together with some other parts.AssemblyMain HandleInsert the Pins into the main handle with some glue. If they are too tight (they weren't for my tests, but they may be for you) you can either print them again, scaled down.Slide the Fixed Jaw on to the pins and glue them in place. Press fitting them might be enough, depending on the tolerancesInsert the Rails into the Sliding Jaw such that the thinner part is inside the Jaws and the thicker part is pointing outwards, glue them into place. See the picture below these Instructions.Insert the Sliding Jaws with their Rails into the main partUse a rubber band to tension the Jaws32mm AdapterNo assembly required, just insert the adapter into the jaws. The pins on the bottom of the adapter need to slide into the jaws.25mm AdapterGlue the pins into the holes of the adapters, then proceed as in the case for the 32mm adapter. I hope that you find this handle to your liking and I wish you happy printing and happy painting!
With this file you will be able to print Miniature Painting Handle with your 3D printer. Click on the button and save the file on your computer to work, edit or customize your design. You can also find more 3D designs for printers on Miniature Painting Handle.
