Miniature oven
thingiverse
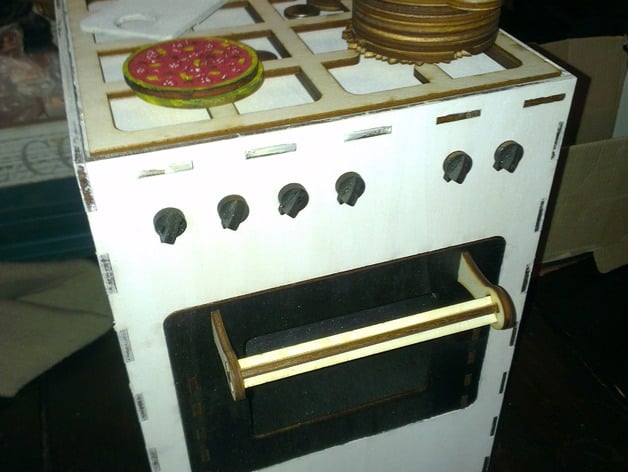
Given Away for Pre-Christmas Party Oven A miniature oven comes with accessories, ready to be given away at a pre-Christmas party. The oven has a turntable and knobs, along with an integrated light that allows you to see what's cooking inside. The oven also opens up for easy access. Accessories Include Two pizza-sized mini pies come equipped with various toppings: salami, pineapple, mushrooms, and bacon strips. You'll also receive a margherita, a plate designed for use in the oven, and a pan to cook with. Please Note This is not suitable for young children due to its fragile nature. Build Instructions These instructions were created using 4mm wood, resulting in 10 artboards, each measuring 20cm x 40cm. The key to successfully building this oven is patience, combined with trial and error methods. A Step-by-Step Guide to Assembly 1) Start by assembling the inner cube: begin from the bottom, working your way up to the top. The order of assembly is as follows: Inner Front -> Back -> Oven Plate Guides + Slide for Door -> Sides 2) Move on to assemble the outer cube: Begin with the battery compartment and attach it to the bottom of the oven. Next, install the knobs, making sure to reserve a space for the switch. Once completed, you can proceed with installing electrical components. Instructions to Connect Light Circuitry LED light connection instructions require some technical expertise but are easy once grasped. This includes using two batteries and one switch connected in series. Connection Methods Two different methods of connecting lights are possible: Tandem Connection: Connecting lights and batteries simultaneously for a daisy chain effect. Series Connection: Creating an alternating current by plugging the connections to the opposite direction for efficient operation. Interlocking parts of this model cannot be switched due to their designed shape. However, these instructions should still prove effective with minimal effort required. Tips to Complete Final Assembly Keep track of small interlocking pieces such as inner and outer teeth for proper fitting in your assembly order. Once both inner and outer pieces are constructed separately they have designated spots where only those will fit in properly not any other shape. This oven model also offers additional features including the opening mechanism comprising: Layer One: Front leg part on Inner cube Layer Two: Slider Placeholder And slider (which sits underneath placeholder). And (useless pieces) Cover which lies atop a piece
With this file you will be able to print Miniature oven with your 3D printer. Click on the button and save the file on your computer to work, edit or customize your design. You can also find more 3D designs for printers on Miniature oven.