Miniature Desktop Fan
pinshape
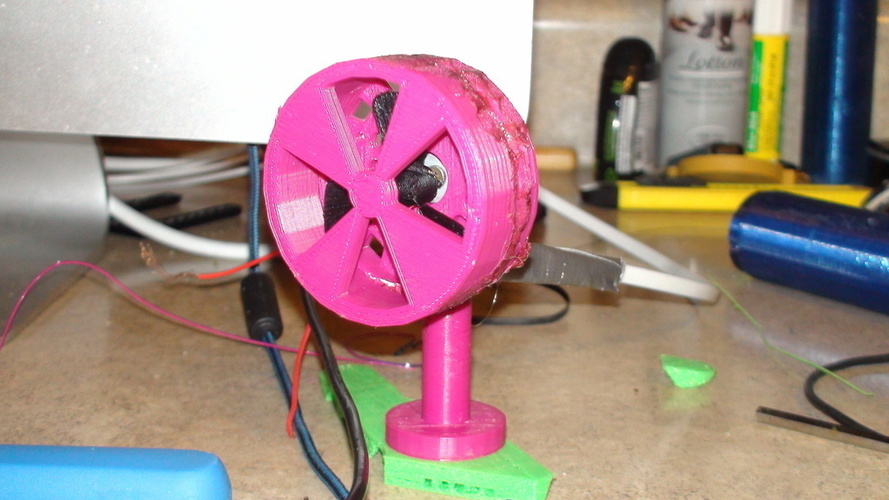
Human: Instructions for Making a USB Powered Fan Materials and sources: 1. Latching click button: https://www.amazon.com/uxcell%C2%AE-Horizontal-Latching-Button-Switch/dp/B0094FGKN8/ref=pd_sim_60_16?ie=UTF8&psc=1&refRID=GY3K3B75NJCNCWWV7WFB 2. DC motor: https://www.amazon.com/130-16140-12500RPM-Motor-Varistor-Smart/dp/B00JR6IY4M/ref=sr_1_10?ie=UTF8&qid=1474940305&sr=8-10&keywords=electric%2Bmotor 3. Super glue 4. USB charger (iPhone, micro USB, etc.) 5. Hot Glue Gun Instructions: Cut the tip off your charger and locate a black and red wire. Remove insulation from the tips of both wires. Insert the motor into its designated space, ensuring it is securely stuck in place. Twist, hot glue, or solder a wire to one metal prong on the latching button, then attach another small piece of wire to the other prong. Connect the black wire to the left tiny prong on the motor using hot glue and connect the red wire to the right little prong. Super Glue a fan blade onto the turning prong on the front and middle part of the motor. Secure all parts together using super glue or plastic welding, as shown in the picture or video. Plug in the USB charger and turn on the fan. FYI: The fan may rattle significantly, so place it on a mouse pad. Unfortunately, I was unable to upload my video to YouTube due to slow internet, but the fan works well when powered by a USB connection. Please share your creations!
With this file you will be able to print Miniature Desktop Fan with your 3D printer. Click on the button and save the file on your computer to work, edit or customize your design. You can also find more 3D designs for printers on Miniature Desktop Fan.