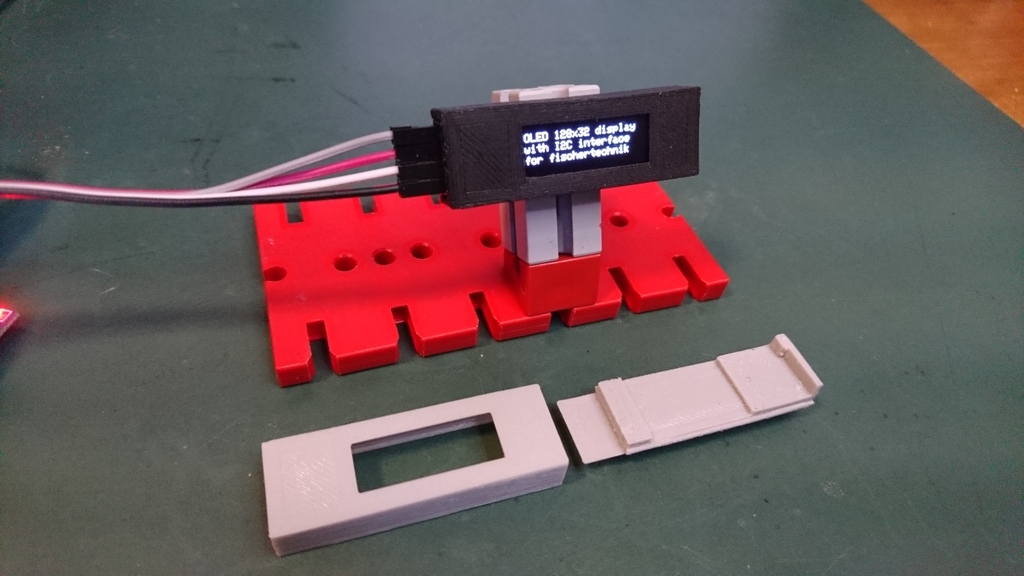
Mini OLED display for fischertechnik or standalone
prusaprinters
<p>An enclosure for the cute little <a href="https://www.ebay.com/sch/i.html?_from=R40&_trksid=m570.l1313&_nkw=128x32+oled+display+arduino&_sacat=0&LH_TitleDesc=0&_osacat=0&_odkw=128x32+oled+display">128x32 monochrome OLED I2C displays</a> with connectors for the <a href="https://www.fischertechnik.de/en">fischertechnik</a> construction toy system with a lean size of 45x15x7,5mm.</p> <p>The I2C connectors are labeled SD<strong>A</strong> SC<strong>L**</strong>5<strong>V</strong>G**ND. The bottom part also comes without fischertechnik pegs if you want a standalone version.</p> <p>You can find a similar case for the bigger 128x64 OLED displays <a href="https://www.thingiverse.com/thing:2542260">here</a>.</p> <p>Please consider leaving a "like" or posting your make as a token of appreciation for my work.</p> <p>Find my other fischertechnik designs <a href="/juh/designs">here</a>.</p> <p><a href="https://youtu.be/jkAN5dM5TOE">https://youtu.be/jkAN5dM5TOE</a><br/> <figure class="media"> <oembed url="https://youtu.be/hU7KIjeh6Fw"></oembed> </figure> </p> <h3> Print Settings</h3> <p><strong>Printer Brand:</strong></p> <p>Anet</p> <p><p class="detail-setting printer"><strong>Printer: </strong> <div><p>A8</p></div><strong>Rafts:</strong></p> <p>No</p> <p><p class="detail-setting supports"><strong>Supports: </strong> <div><p>Yes</p></div><strong>Resolution:</strong></p> <p>.1 mm</p> <h3> <strong>Filament:</strong> any PLA any <br/> <p class="detail-setting notes"><strong>Notes: </strong> </p><div><p>Only the bottom part (fischertechnik version) needs supports. I recommend printing it with the ft pegs upward, so you'll have a smooth surface around them.</p></div> Post-Printing</h3> <p><strong>Assembly</strong></p> <p><div><p>You'll need to bend the I2C connectors 90° to the side. To do so, move the black plastic part at the bottom of the connectors away from the pcb (see image) and press the connectors to a solid surface applying gentle force until it bends in a 90° position. Remove the black plastic part. Cut the excess parts of the connectors on the display side of the PCB (see image).</p> After that, just put the PCB on the bottom enclosure part and slide that into the main part, it should snap in place.</div></p> <p>Use a drop of super glue to fix the case permanently shut.</p> </p></p> Category: Construction Toys
With this file you will be able to print Mini OLED display for fischertechnik or standalone with your 3D printer. Click on the button and save the file on your computer to work, edit or customize your design. You can also find more 3D designs for printers on Mini OLED display for fischertechnik or standalone.
