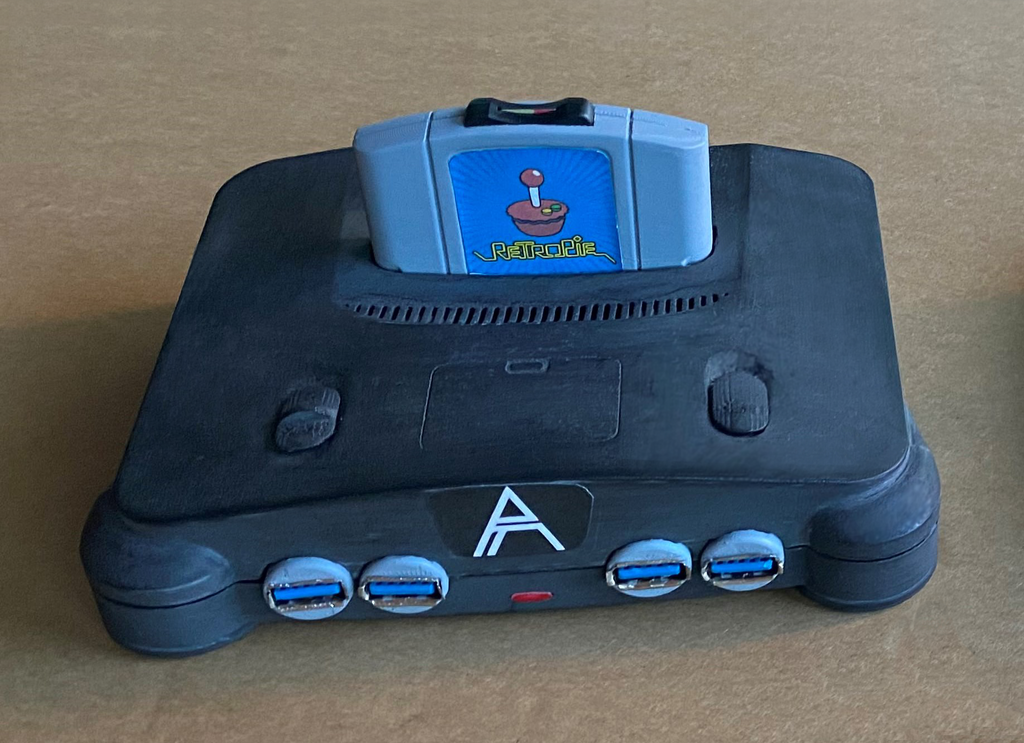
Mini Nintendo 64 - π64
thingiverse
My brother's birthday was just around the corner and I wanted to create something truly special that would also serve as a portfolio piece for my Industrial Design skills. We grew up playing the N64, and I wanted to breathe new life into my Raspberry Pi 3 B+ by repurposing it from a mere PiCam for my printer. I dived headfirst into research and discovered RetroPie, an amazing tool that allows you to run emulation on the Pi. This led me to search for a Nintendo 64 shell specifically designed for the Pi3. Elhuff's minimal solution was impressive, but I wanted to push the boundaries of functionality even further. Unfortunately, his design seemed to be the only decent model available, so I had to create my own from scratch. I downloaded Bruno Amaral's model of the N64 and tweaked it slightly to better suit my vision. His original design wasn't perfect, but I preferred its modern twist on the classic look. Next, I tackled the issue of a decent N64 cartridge to rest on top of the Pi. Unfortunately, there weren't any great Solid Models available, so I created one from scratch. Modeling the cartridge was a challenge in itself, but I managed to create a design that fit together seamlessly with the main console. The Power Button and Reset Button were designed to work perfectly with the actual hardware, ensuring a smooth user experience. If not, at least the controller ports would still function, and all the accessory ports would be located on the rear end for easy access. The Micro SD was cleverly hidden inside the cartridge, which snapped into place within the N64's top clamshell. A dash of superglue helped to secure it in place. I also designed tiny screws to thread into four posts, holding everything together with precision. The Raspberry Pi itself was secured to the lower shell using matching screws. Initially, I had planned to resin print the shells due to their tight tolerances, which would allow me to read the lettering clearly. My goal was to print them in clear resin and then dye them a lovely purple hue using shoe rubber dyes. However, my printer vendor couldn't meet my budget for resin prints. As an alternative, I decided to print the shells on a .2mm setting, with finer details being even better. My plan was to mold the shells using green sand, melt out the PLA, and then cast a clear polyurethane that resembled the Atomic Purple render. Unfortunately, time constraints got in the way of this ambitious project. If you're feeling adventurous, I'd love it if you could try your hand at creating the resin-printed shells and send me some pictures! I'll be happy to add them to this file, giving credit where credit is due. Here's what you'll need for this project: * Raspberry Pi 3 (I used the B+ model) * Micro SD ribbon extender * USB 2.0 extenders (4 in total, with shorter and thinner options being preferred) * Ethernet cable (shorter and thinner options are a must) * Ethernet Coupler (remove the clamshell for space-saving purposes) * Screws that fit into the posts (4 in total) * Screws to secure the Raspberry Pi to the bottom shell (4 in total) Optional hardware includes: * 30mm fan (I repurposed one from an old 3D printer hotend) * ON/OFF switch (I salvaged mine from an old RadioShack 4 AA battery housing) * Button (you can find these anywhere, or use an Arduino kit as a source) Software requirements include: * RetroPie * ROMs (EMUParadise has workarounds that can be found on Reddit to download ROMs using a user account) I'm a recent graduate with degrees in Industrial Design and Design Management. Feel free to check out this project, and more of my work, on my website: https://www.trevoravrett.com/
With this file you will be able to print Mini Nintendo 64 - π64 with your 3D printer. Click on the button and save the file on your computer to work, edit or customize your design. You can also find more 3D designs for printers on Mini Nintendo 64 - π64.
