Mini Mallet
prusaprinters
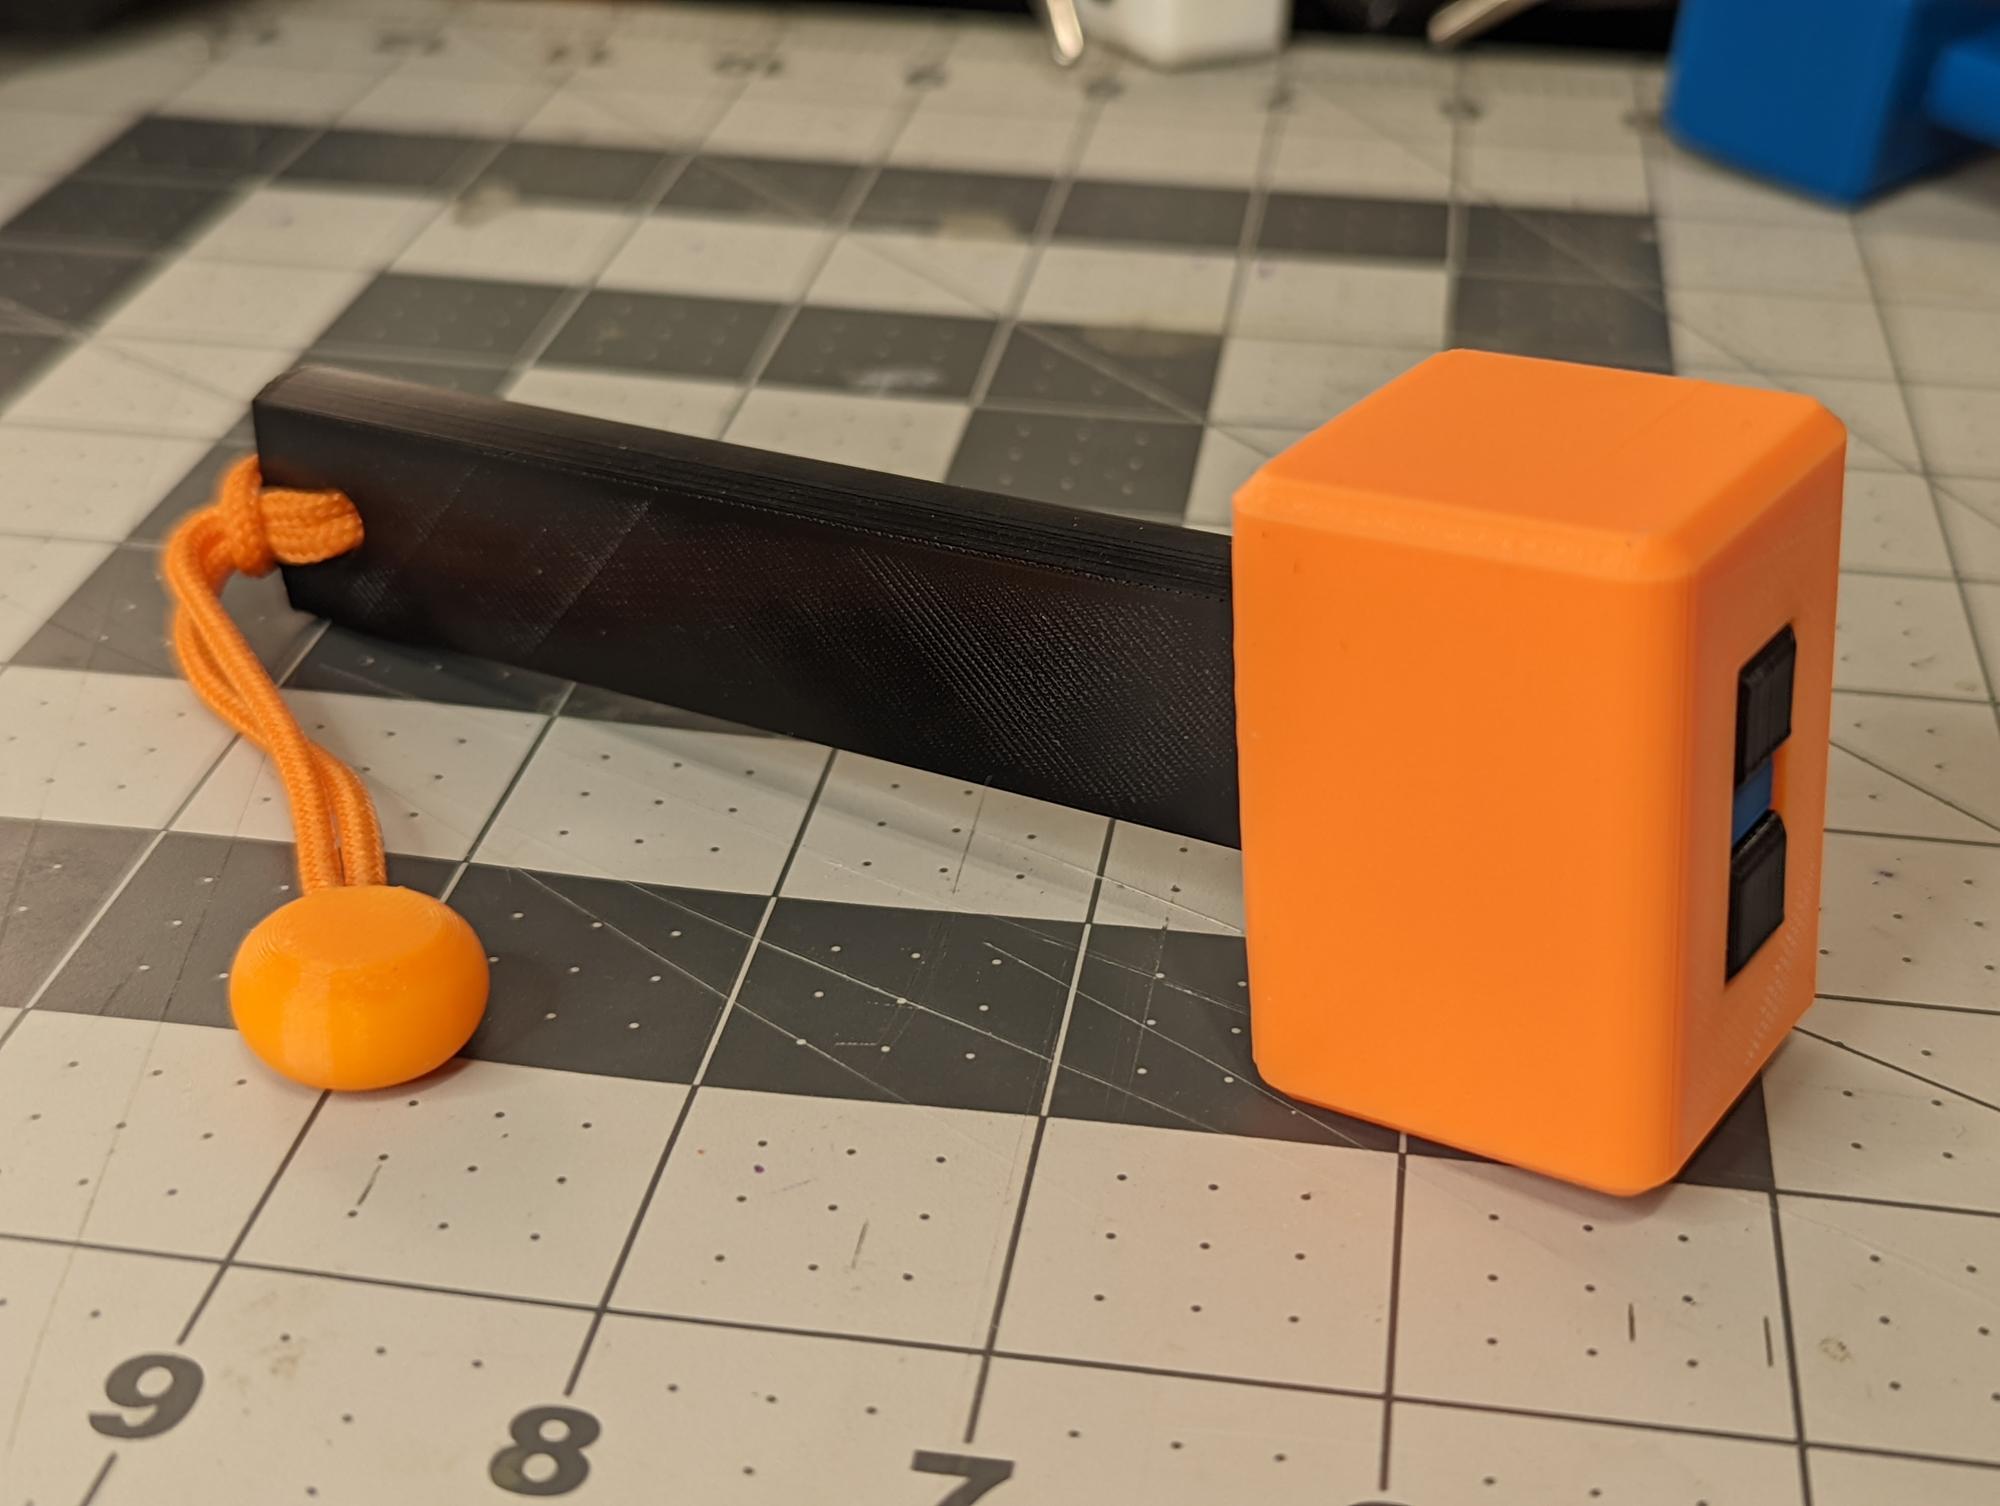
<p>The quickest way to remove prints from a PEI sheet is a quick, sharp blow from a hammer or mallet. I didn't want to use my actual metal hammer, so I decided to print one. Unfortunately, all of the models I found either required supports, needed glue, or had obvious weak points. So, I decided to create my own!</p><p>This light-duty mallet is designed to be reasonably strong, while remaining easy to print. First, the handle is printed with long layer lines, so it's resistant to snapping. Second, the prongs of the handle are fixed in place by the <strong>lock</strong>: this makes it <i>nearly</i> impossible to remove the <strong>head</strong> without damage. Third, the strength of the mallet is easy to increase by adding more shells. Finally, because this model consists of multiple pieces, you can customize the color scheme.</p><p>The mallet is meant for removing prints, assembling other prints, and maybe loosening a stuck part. It is <strong>not</strong> heavy duty or super strong! It is <i>extremely</i> important that you do <strong>not</strong> use this mallet on nails or other metal objects. It's plastic: it can deform, crack, shatter, or snap.</p><p><strong>Don't forget to like this model! If you print one, please share a make!</strong></p><p> </p><blockquote><h5>Eye Protection Warning</h5><p>Always, always, always use eye protection when using this (or any) hammer or mallet. Items can shatter, tools can chip, or debris can be launched. This can cause permanent eye damage or other bodily injury. The risk to your eyesight is not worth it: wear safety glasses.</p></blockquote><p> </p><blockquote><h5>Shatter Warning</h5><p>This mallet is made of plastic: it can chip, shatter, or break. Use caution when hitting any solid item! Do <i><strong>NOT</strong></i> use this mallet to hammer nails or hit anything extremely hard!</p></blockquote><p> </p><h4>Print Settings</h4><ul><li><strong>Nozzle Size</strong>: 0.4mm</li><li><strong>Layer Height</strong>: 0.2mm</li><li><strong>Vertical Shells</strong>: 4 for <strong>head</strong> and <strong>lock</strong>, 3 for <strong>grip</strong></li><li><strong>Top/Bottom Layers</strong>: 8 for <strong>head</strong> and <strong>lock</strong>, 6 for <strong>grip</strong></li><li><strong>Infill</strong>: >50% for <strong>head</strong>, 15% for <strong>lock</strong> and <strong>grip</strong> (see notes below)</li><li><strong>Supports</strong>: Absolutely not!</li></ul><p>Print one <strong>head</strong>, one <strong>grip</strong>, and one <strong>lock</strong>. The parts are already oriented correctly in the STL files.</p><p>Be sure to calibrate your e-steps and flow rate before printing!</p><p>The tolerance between each piece is 0.2mm, so you may also need to reduce your flow rate (mine was set to 97.5% and everything fits <i>perfectly</i>). This tolerance makes each fit very tight, but it also makes the mallet extremely difficult to disassemble (you don't want it flying apart, do you?).</p><p>The settings above will create a plastic shell of 1.6mm around the <strong>head</strong> and 1.2mm around the <strong>grip</strong>. I would not suggest going thinner unless you're making a decorative print.</p><p>The infill percentage of the <strong>grip</strong> and <strong>lock</strong> doesn't really matter. Increasing the infill of <strong>head</strong> will make the mallet <i>feel</i> more substantial and hit harder, but doesn't have any significant impact on overall strength of the mallet.</p><p>I printed the <strong>head</strong> and <strong>grip</strong> with PLA+ and the <strong>lock</strong> is PLA. Do not use filament that is overly flexible or brittle (silk, wood, etc.)!</p><p>For a more decorative <strong>grip</strong>, check out <a href="https://www.prusaprinters.org/prints/85382-mini-mallet/comments#comment-192245">Nusselt's make</a>. There's no top or bottom layers, so the infill is visible.</p><p>If you're considering adding a strap to the bottom of the <strong>grip</strong>, check out my <a href="https://www.prusaprinters.org/prints/71101-paracord-zipper-pull-charm">Paracord Zipper Pull / Charm</a>. The <strong>RoundBead</strong> option really complements the handle.</p><p> </p><h4>Assembly</h4><p>Assembly is made easier by using a hammer or mallet, but it's not required. And I do appreciate the absurdity of using one mallet to assemble another mallet...</p><ol><li>Insert the pronged end of the <strong>grip</strong> in to the hole in the <strong>head</strong>. The orientation of the <strong>head</strong> doesn't matter. The <strong>grip</strong> won't go in straight (perfectly perpendicular to the <strong>head</strong>), so simply "wiggle" it into place. Be sure it "snaps" when it's fully inserted.</li><li>Insert the <strong>lock</strong> into the top of the <strong>head</strong> between the prongs of the <strong>grip</strong>. This can be difficult to get started, so be patient and <i>carefully</i> apply more force. Once the prongs of the <strong>lock</strong> are no longer visible, you can safely apply more force to the <strong>lock</strong> until it's fully inserted.</li><li>Carefully hit things? I don't really know; these lists just look weird with only two entries.</li></ol><p>Please note that this mallet is not designed to be disassembled once the <strong>lock</strong> is in.</p>
With this file you will be able to print Mini Mallet with your 3D printer. Click on the button and save the file on your computer to work, edit or customize your design. You can also find more 3D designs for printers on Mini Mallet.