Mini lathe DRO Hack in under 3 minutes
thingiverse
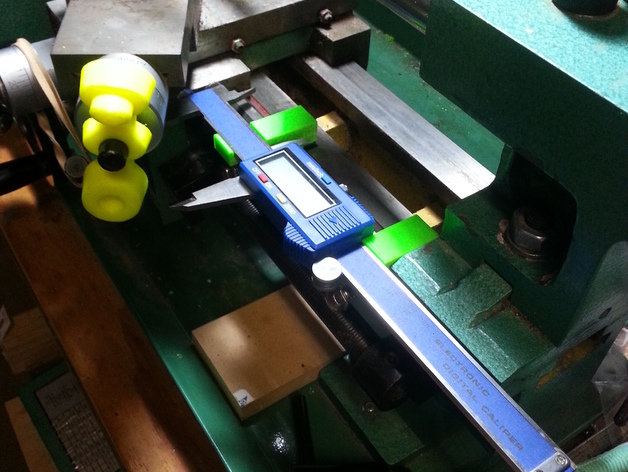
I wanted to start my knurling and thread cuts at precisely the same spot. Here's a straightforward, quick, non-destructive way to use an inexpensive digital caliper from Harbor Freight ($20) to make a functional (x axis) DRO for a Variable speed Central Machinery 7x10 mini lathe in under 3 minutes without altering anything except possibly this very lengthy sentence. By the way, the third file simply showcases how this design can be customized. Feel free to change it. Maybe add a 45-degree angled surface. Have fun. Principle of Design: Grip the caliper body between the two components and secure with the two 1/4-20 bolts (don't drill any holes in your lathe!). Capture the caliper's head with the rare earth magnets attached to the side of the cross feed. Procedure: Drill marked holes in the two 3D printed parts using a #7 drill bit (cradle and support) and tap them with 1/4-20 TPI threads. Place rare earth magnets on the cross feed (see image). Remove tailstock Slide the first "cradle" 3D part onto the "way". Slide the second "support" 3D part onto the way. Replace the tailstock and snug the "support" against it, tightening. Position the caliper between the two 3D parts (see image). Snug the cradle 3D part up against the caliper and tighten.
With this file you will be able to print Mini lathe DRO Hack in under 3 minutes with your 3D printer. Click on the button and save the file on your computer to work, edit or customize your design. You can also find more 3D designs for printers on Mini lathe DRO Hack in under 3 minutes.
