Mini HOTAS Gamepad 40
thingiverse
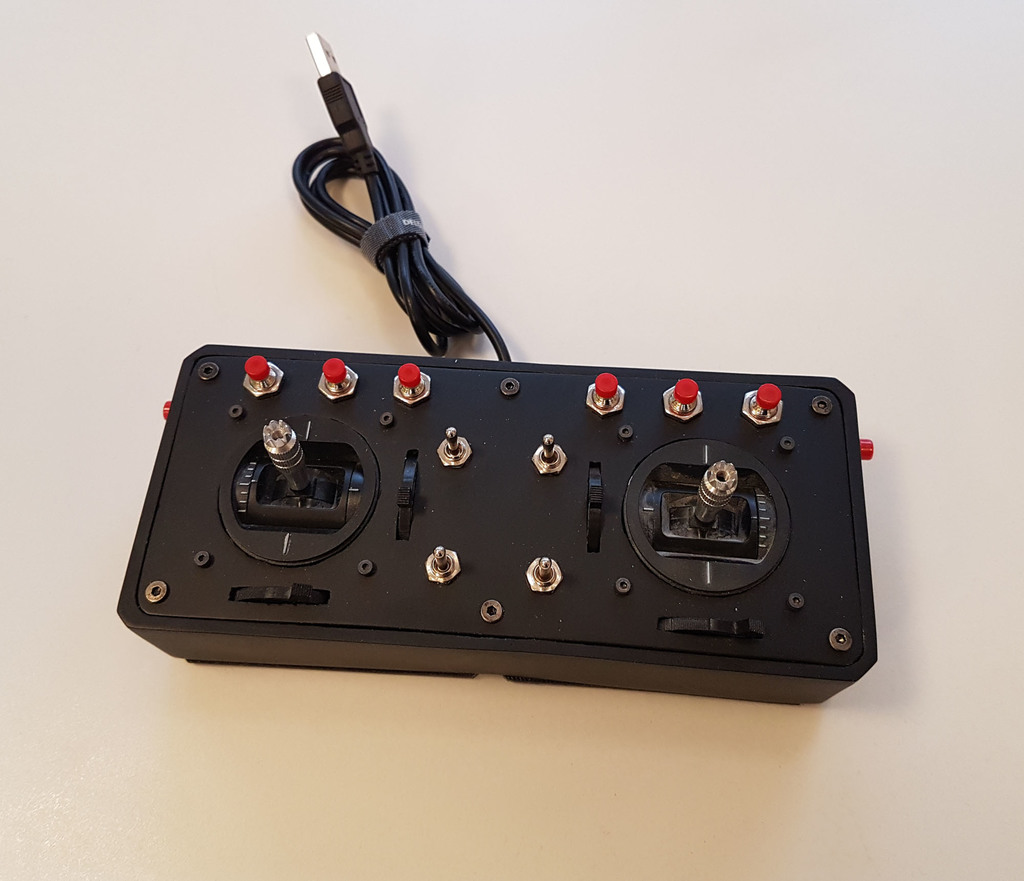
Traveling with a laptop and playing simulators is not a good combination, so while I missed my HOTAS setup back home I came up with the idea of building a mini HOTAS that's easy to take with me without taking up too much room. It connects directly to my computer via USB and uses standard drivers, eliminating the need for extra software. I disassembled an old RC transmitter and combined its gimbals with trim pots, some switches, and toggles. Everything is powered by a Leobodnar BU0836A 12-Bit Joystick Controller and matrix board, making it very easy to use and install. The distance between mounting holes is 40mm, which is why I named it Mini HOTAS 40. Here's what you'll need: * 2 gimbals with a CC of 40mm * 8 7mm momentary push switches * 4 3-way flip switches * 6 10x2mm rare earth magnets * 6 M3 screws * 6 M3 knurl nuts * A USB cable with an A-connector and open end, the length depending on your needs - for my laptop, I used a 60cm cable * A rubber grommet suitable for a USB cable * A zip tie * A BU0836A 12-Bit Joystick Controller (available at http://www.leobodnar.com/shop/index.php?main_page=product_info&cPath=94&products_id=219) * A BU0836A Break out Matrix board (available at http://www.leobodnar.com/shop/index.php?main_page=product_info&cPath=94&products_id=274) Note: I've also designed a larger version for CC45mm gimbals, which can be found on https://www.thingiverse.com/thing:2569465
With this file you will be able to print Mini HOTAS Gamepad 40 with your 3D printer. Click on the button and save the file on your computer to work, edit or customize your design. You can also find more 3D designs for printers on Mini HOTAS Gamepad 40.