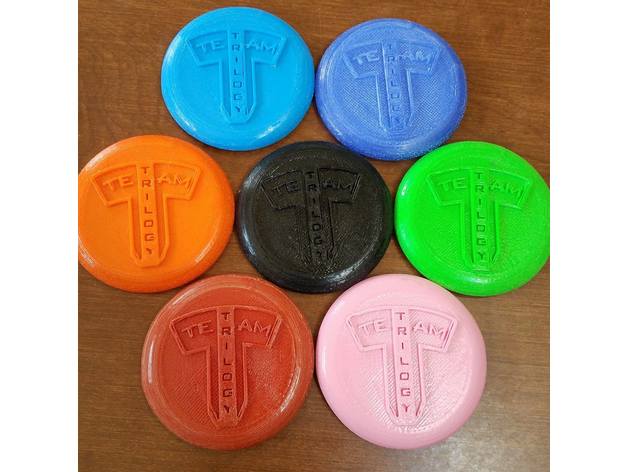
Mini Disc Markers
thingiverse
After scouring through online forums in search of a reliable Mini Disc model, I stumbled upon scans of oversized discs shrunk down to miniaturized versions. These miniaturized models came with their own set of problems - thin and flimsy walls, among others. As an avid disc golfer with a background in mechanical engineering, I decided to create my own design using Computer-Aided Design (CAD) software. Voila! Here's the result - a Mini Disc that closely resembles its actual miniaturized counterpart in both size and substance. The top part of the disc features a rounded curve, while the base has a straight line. Two different files are available, differing only in the underside of the disc. One version goes up to a 90-degree angle on the inside rim, while the other has a chamfered curve leading up to the bottom. If you have access to software like 123D Designer, you can easily merge your custom design onto the top of this model, creating an embossed Mini Disc (which is exactly what I designed it for). This design can be printed using any preferred filament, although I chose ABS and used an Acetone Vapor Bath to give them a smoother, shinier finish. If you print this design as is and would like to help me turn this into a business venture, please check out my GoFundMe page: https://www.gofundme.com/gobiggolittle Print Settings: Printer: Monoprice Mini Select Rafts: Doesn't Matter Supports: No Resolution: 0.4mm Nozzle Infill: 30% Notes: These settings worked well for me, and you can print this design with or without supports. If printing it blank, consider printing upside down for better results. I'm using Slic3r to create the GCode, with a 1.1 multiplier for the final extrusion to ensure all cracks and crevices are covered. I'm also using concentric infill settings for the top and bottom, along with honeycomb for the rest. Using ABS Filament: First Layer: Extruder Heat: 235 Heat Bed: 105 Other Layers: Extruder Heat: 230 Heat Bed: 100 Post-Printing: Sand, sand, and Vapor Bath - these mini discs turn out beautifully after some post-processing. After removing any raft pieces with a craft knife, I use a woodburning stencil transfer tool to melt the underside where fibers may be hanging down (printing without supports... could be remixed for dual extruder with water-soluble supports). Once smoothed, I sand the sides and top once with 100 grit sandpaper and then 220 grit or finer to smooth out the surfaces. Finally, I put the mini disc in an Acetone Vapor bath using the cold method (paper towels inside a large glass container) for 45 minutes. Once they come out, they still need a few minutes to dry and finish. Once dried, they have a beautiful shiny candy-coat that also helps solidify the outer shell for added strength.
With this file you will be able to print Mini Disc Markers with your 3D printer. Click on the button and save the file on your computer to work, edit or customize your design. You can also find more 3D designs for printers on Mini Disc Markers.
