MINI 13: The White Stripes
prusaprinters
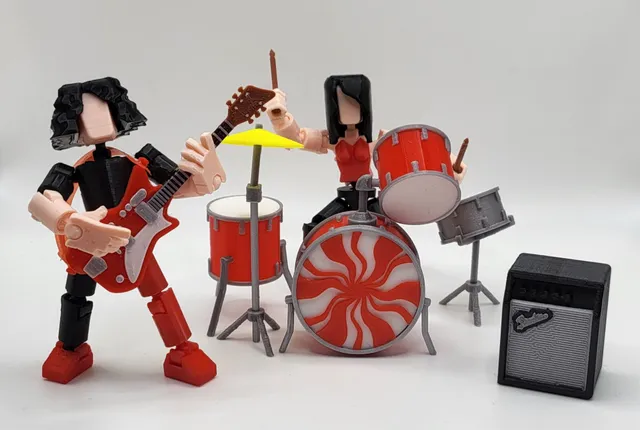
UPDATE 5/13/2023: As requested, I've added a mic and stand. You will need to print an extra Stand Tripod [x3].stl as well as the four pieces in the “Mic” folder. It's been a few days since I've uploaded anything so I hope this makes up for it. 🙏I may have gotten a little carried away with this remix. I had a lot of fun making Slash and I've been listening to a lot of White Stripes lately so I feel like this was just a matter of time. The outfits, hairstyles and gear were modelled using the Hardest Button To Button video as reference, with the exception of the Fender amp. That's from my Slash model.This design is meant to replace most of the Mini 13 armour. On top of downloading my files, you will still need to download the Mini 13 frame as well as mini13-armor-foot-2x.stl PRINTING:I highly recommend printing the Drum Kit at the absolute maximum speed of 50 mm/s. I printed mine at 25 mm/s and that worked good for me. For everything else, Guitar, Armour and Amp print perfect at 50 mm/s. The recommended layer height for everything is 0.12 mm. File names may include [x2], [x3] or [x4] which indicates if you will need to print more than one of each part (e.g. you would print 3 of the file Stand Tripod [x3].stl). To print everything as you see in the pictures, you will need to do filament swaps on the Guitar Body, Neck, Head, Strap and Amp. Using a layer height of 0.12 mm, those filament swaps will occur after layers 33 and 38 on the Guitar Body, layer 1 on the Guitar Strap, layer 12 on the Neck and Head and layers 17 and 20 on Amp 2. ASSEMBLY:The armour is assembled the same way a regular Mini 13 armour is assembled. Jack White's Airline Res-O-GlasThe guitar is very easy to assemble. The Guitar Neck-Head fits into the Guitar Body as seen in the pictures. If you're printing the separate Neck and Head pieces, they require glue to be held together. Meg White's Drum Kit The assembly of the drums isn't too difficult. Below is an assembly guide for the Bass Drum. The assembly of the Snare, Floor Tom and High Tom will be done in the same general way. Place a Bass Drum Skin over top of the Bass Drum logo.Fit Bass Drum Ring 2 over the skin and the logo.Gently slide Bass Drum into the ring/skin/logo assembly. Everything should fit nice and snug.Repeat with the other side. Fit Bass Drum Ring 1 over the other Bass Drum Skin.Gently fit the Bass Drum into the skin/ring.Attach the Bass Drum Legs to the Drum via two holes in Bass Drum Ring 2. The legs will likely need to be glued in place.
With this file you will be able to print MINI 13: The White Stripes with your 3D printer. Click on the button and save the file on your computer to work, edit or customize your design. You can also find more 3D designs for printers on MINI 13: The White Stripes.