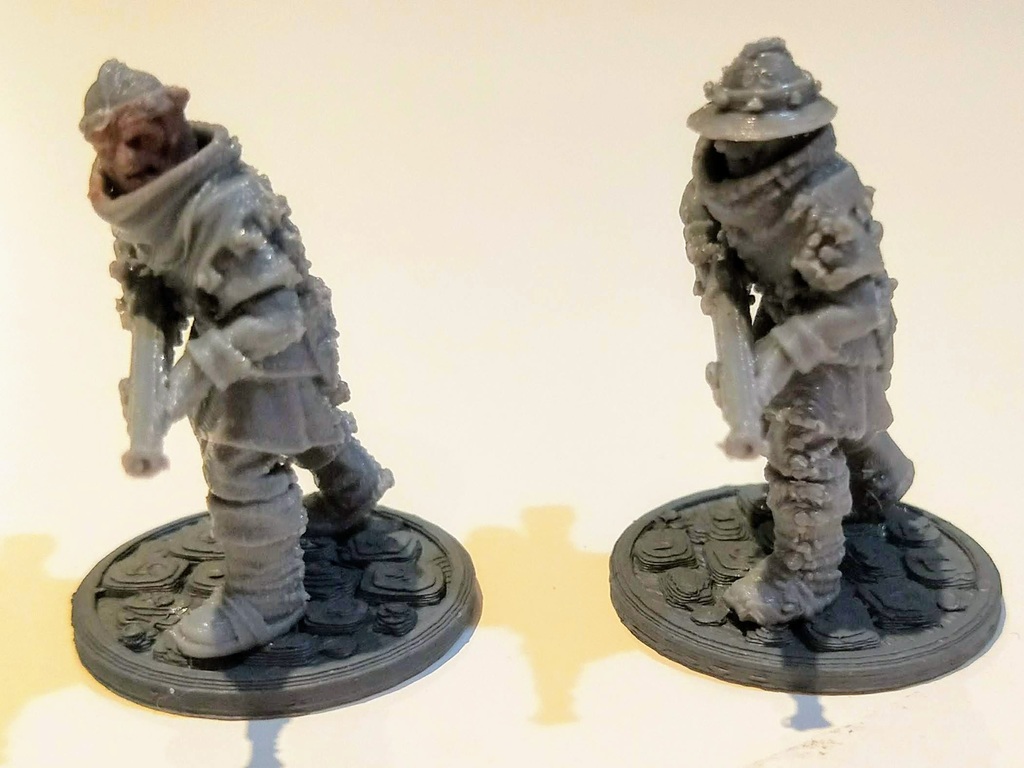
Militia Handgunner for FDM prints
thingiverse
You'll often hear people advising to lay a mini back at 45 degrees to avoid snapping the mini at its ankles, or keeping the detail area as "clean" as possible. However, it turns out that tilting is generally good, but it also means supports are required and this can interfere with detail. Therefore, it's not just a matter of pushing the mini over on its back by 45 degrees in your slicer of choice. The mini on the left was my first make base on the original stls, without any reorientation. The minis on the right is the third attempt, with supports on the least detailed side, and the helmet is what blew me away the most - a vertical orientation worked better than as it is oriented in the original stl. In fact, printing vertical with the helmet down gave the best result, but for printing a single head on its own, I needed a raft because the brim was losing adhesion. Note that when all three components are printed with a brim, a raft isn't needed, but YMMV. If you're just starting out printing minis on FDM printers, then it's worth the exercise of getting Harrowtale's original files and importing both his originals and my re-oriented files for comparison. This will give you a better understanding of how to orient your prints for the best results.
With this file you will be able to print Militia Handgunner for FDM prints with your 3D printer. Click on the button and save the file on your computer to work, edit or customize your design. You can also find more 3D designs for printers on Militia Handgunner for FDM prints.
