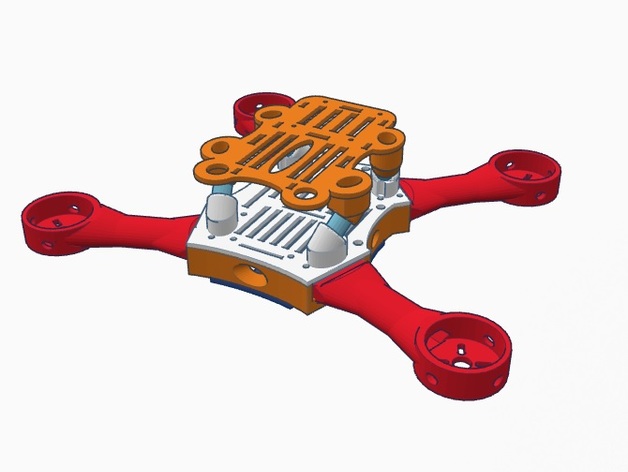
MIcroquad scrab
thingiverse
This micro quad is a specially designed creation to take your FPV experience to the next level and also capture high-quality video footage. Its arm design offers superior protection for motors by providing a sturdy resistance against impacts and shielding cables from damage. I've created two variations of this design: one accommodates 28mm motors with 5-inch propellers, while the other suits 24mm motors paired with 6-inch propellers. The Electronic Speed Controllers (ESC) are strategically placed within the body's interior, offering complete protection while ensuring a smooth air flow. The design features a minimal number of wires extending from the body: just battery cables, four signal lines, and a 5v Vcc cable. One of the standout features of this design is the expansive free vibration area located at the top. This ample space allows for easy placement of your naze32 (or similar), receiver, video transmitter, FPV camera, HD recording camera, and OSD module. Here's a captivating video showcasing this quad in action: https://youtu.be/sghRsG60mQE To assemble your micro quad, you'll need the following hardware components: * 16 M2x20mm screws * 4 M2x14 screws * 4 anti-vibration balls weighing between 50-65 grams (preferably blue or black from hobbyking) Please note that I've uploaded another thrilling video featuring this micro quad in action: https://youtu.be/7uF6bPYqLfo I'm also working on developing a micro-tri and a micro-hexa version of this design, which will be available for download shortly. Now that you have your printed components ready, let's move on to the assembly process: First, lightly sand the edges of the arms where they fit into the body. Then, place the nuts at the bottom of the middle body using soldering. You can opt for four screws securing all arms or two – I recommend using just two for added stability. Next, mount the middle body and top body to the arms, then screw them together tightly. Install your motors within the arms and connect them securely with the Electronic Speed Controllers (ESC). Place the anti-vibration balls in the top plate and fasten it securely to the main body. Before adding the bottom cover, insert a Velcro strap between the top plate and the main body to keep the lipo battery secure during operation.
With this file you will be able to print MIcroquad scrab with your 3D printer. Click on the button and save the file on your computer to work, edit or customize your design. You can also find more 3D designs for printers on MIcroquad scrab.
