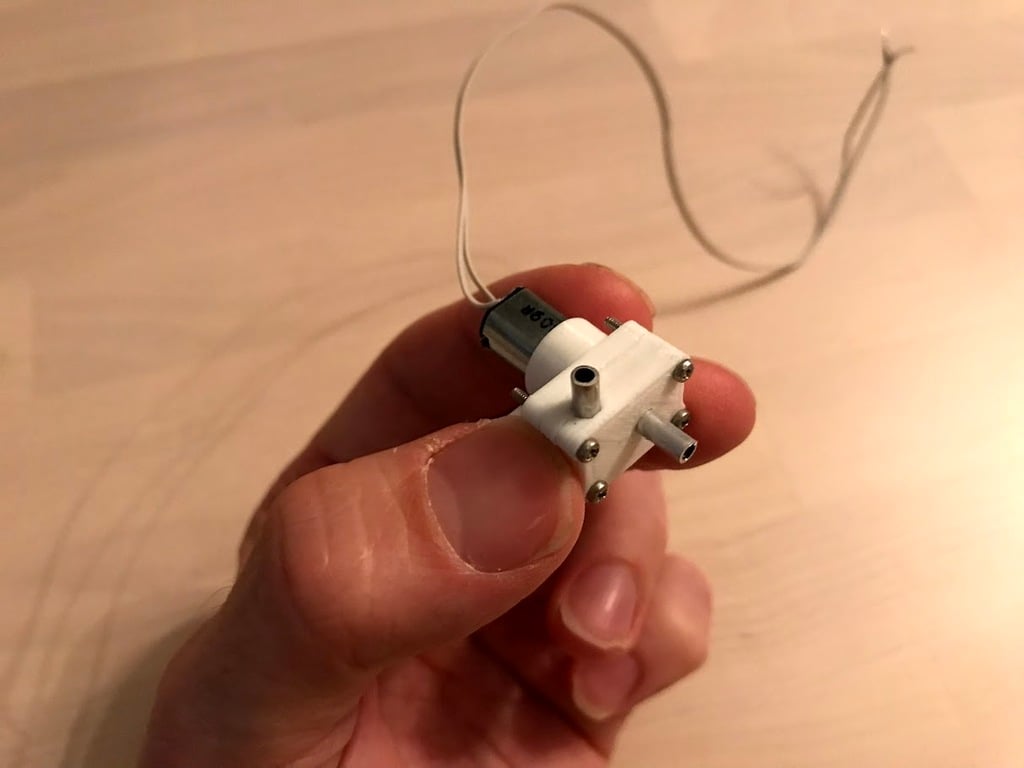
Micro water pump
thingiverse
Here's a small side project I'm working on for my combat boat 90. The project can be seen here: http://depronized.com/2018/01/16/the-combat-boat-90-project/ Ironically, a cooling water pump for the motors proved to be the hardest part of the whole project! There are basically 3 problems with a micro pump design. 1. Water surface tension. At this scale, the water surface tension prevents the water from coming into the inlet unless some suction force is applied, and the impeller isn't capable of generating enough suction. However, I've increased the inlet hole diameter and intend to place the pump below water line so hopefully those two factors will make it work. Printing of a second prototype is in the works. 2. Centrifugal wheel friction. If the wheel spins free and touches surrounding parts it can "weld". This can be prevented by a very careful alignment of the impeller so that it doesn't touch the surrounding. A way is to place a piece of paper between the pump house and the impeller. 3. Leakage through the motor. Even with a tight fit of the motor shaft through the housing, water still gets into and through the motor. This could be overcome by some kind of gasket around the motor shaft, for example using a piece of thin rubber band. I started out with a gear pump, but couldn't get it tight enough to generate any pressure. Next up was a centrifugal pump like this one, but with a faulty design. I also tried a micro piston pump with a 5mm diameter piston, but I couldn't get the one-way membranes to work good enough, even though the piston/crank-mechanics actually worked. Finally now I have a centrifugal design that produces a lot of pressure and seems to do its job. Next thing is to install it in my Combat Boat 90. The pump is made for a 10 mm DC-motor, much like this one: https://www.ebay.com/itm/Mini-N10-Dual-Shaft-Motor-DC1-5V-3V-10000RPM-Micro-10mm-DC-Motor-Hobby-Toy-DIY/192179138575?epid=843752697&hash=item2cbec4f00f:g:5z4AAOSwcgNZDUp- But with only one shaft. You can search ebay, there are lots of 10mm DC-motors but keep an eye out for the RPM, it should be as low as possible which means higher torque. Instruction Hardware needed: 1pcs 10mm DC-motor. 4 screws. CA glue. Melt glue. Drill bit. Fine grit sand paper. Vice. Step 1: Mount the motor in the motor housing. Make sure that the shaft can spin freely, for example by connecting a battery to verify. If it can't turn, enlarge the hole with a drill bit. Step 2: Solder wires to the motor. READ STEP 3 FIRST! Step 3: The two holes in the motor cover can either be used as one hole for each cable, but it's even smarter to rout the cables through one of the holes and use the other to fill the excess space in the motor cover with melt glue! Step 4: Slide the motor cover over the motor and glue it to the main housing using CA. Fill the end with melt glue, this prevents water form coming out this way, and hopefully keep it out of the motor also. Time will tell.... Step 5: Mount the impeller. Use a piece of paper that you cut a lid in and slide it in between the impeller and the housing, this ensures optimum gap. Use a vice to press the impeller onto the shaft. Step 6: Make sure the motor can spin freely. You will now be forced to sand the impeller blades until the guidehouse+cover can fit ontop without the impeller snagging. This can be done by connecting a battery to the motor and using a fine grit sand paper. This proceedure is the reason that screws are used to secure the guidehouse and cover to the main body, you will most likely be forced to unscrew them a couple of times and trim the impeller before you get it to work properly. Step 7: Attach the connector tubes. 10mm is a suitable length and use a vice to press it/them in place. The angled version is made not to have a input connector, it's meant to be places right at the water source. Step 8: Once the parts can be screwed together with the impeller still turning freely, it's time to make sure there are no leaks in the housing. There probably is, so you can use melt glue to cover the outside of pump house. Voila! The pump is ready for use!
With this file you will be able to print Micro water pump with your 3D printer. Click on the button and save the file on your computer to work, edit or customize your design. You can also find more 3D designs for printers on Micro water pump.
