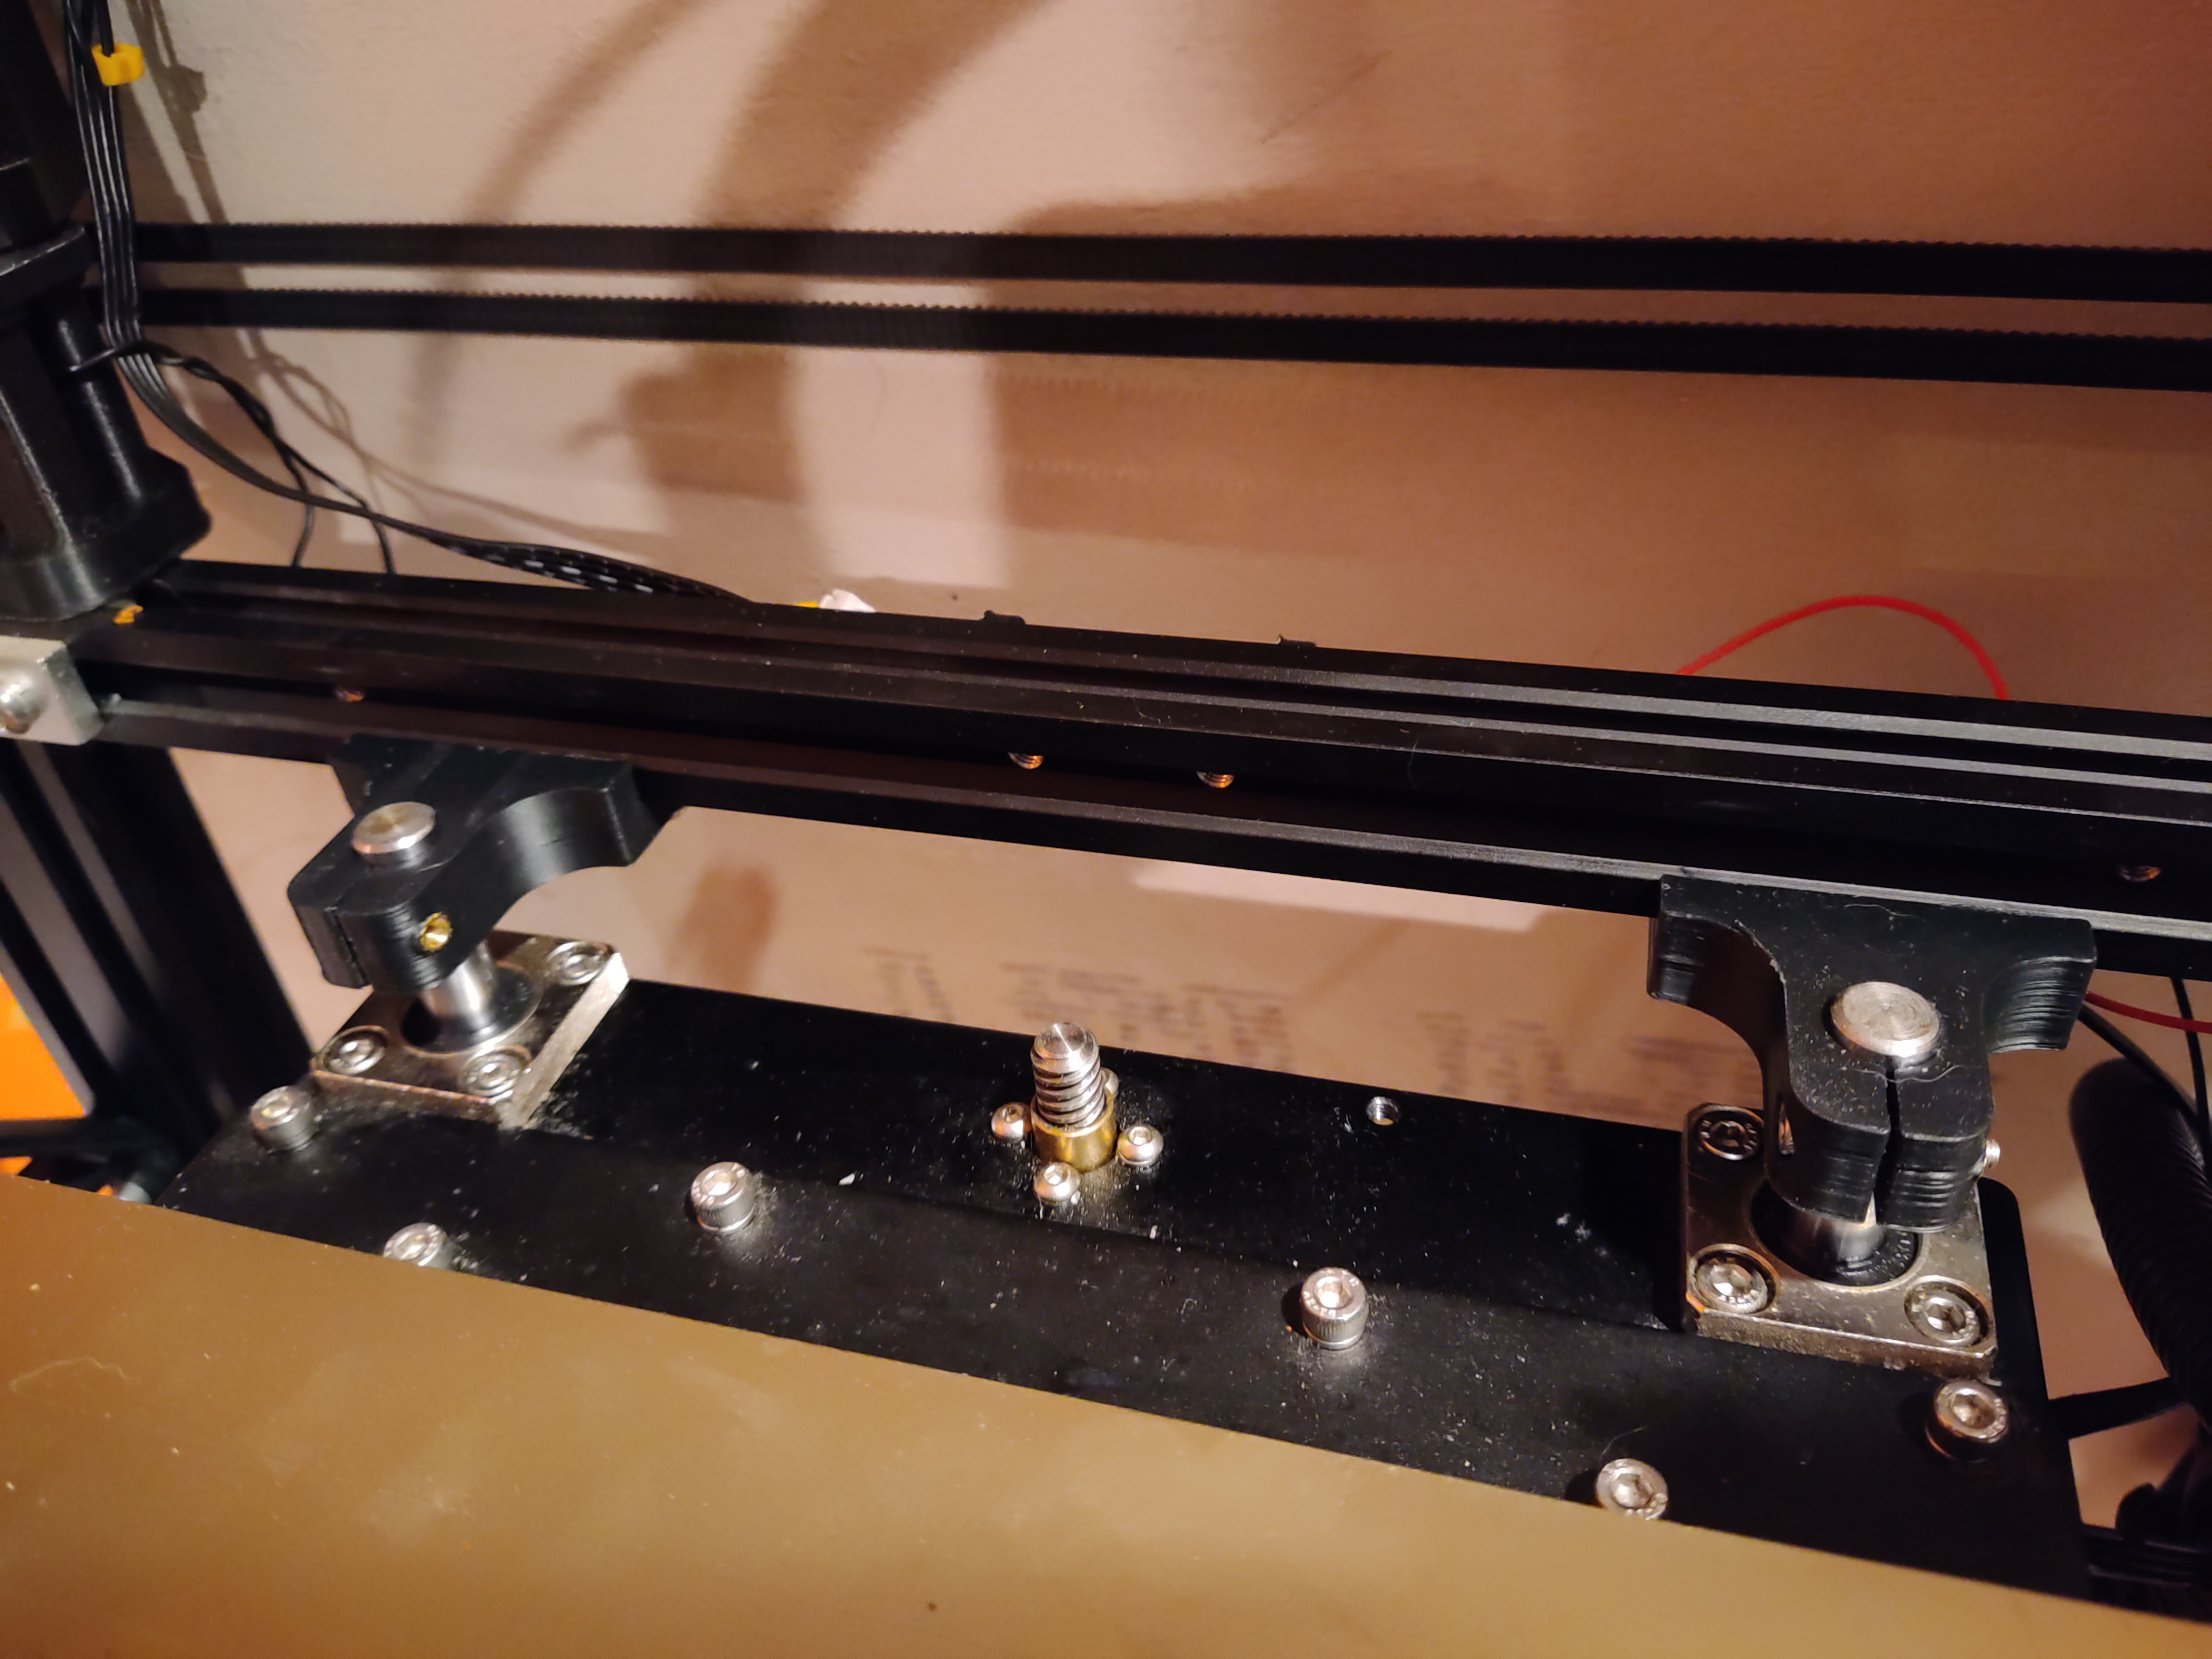
Mercury 1.1 EVA Ender 5 Maximum Y brackets
prusaprinters
<p>These brackets allow you to get the maximum Y travel possible on the ender 5 frame. When converting an ender 5 to the ZeroG Mercury1 with the EVA tool head, some Y travel is lost because the rear mounted fan hits the Z guide rod brackets.</p><p>To maximize Y, you must first remove the unnecessary top & bottom 2020 extrusions that the ender 5 Z guides and stepper are mounted to. They can be mounted directly to the rear frame. This gives you 20mm more travel. </p><p>Then use these printed brackets to replace the upper Z guide rod brackets. They mount to the bottom side of ender 5 frame extrusion. The guide rods can drop down a bit as well. Now the EVA can travel all the way back to ender 5 frame. Reset your end stop and this will give you 275mm x 275mm travel.</p><p>I've included two versions, one uses a heat set insert and the other a nut. </p><p>Required hardware:</p><p>Four M5x10 or 12 screws to mount to frame</p><p>Two M3x 16 for the clamp</p><p>Two M3 heat set inserts or nuts</p>
With this file you will be able to print Mercury 1.1 EVA Ender 5 Maximum Y brackets with your 3D printer. Click on the button and save the file on your computer to work, edit or customize your design. You can also find more 3D designs for printers on Mercury 1.1 EVA Ender 5 Maximum Y brackets.
