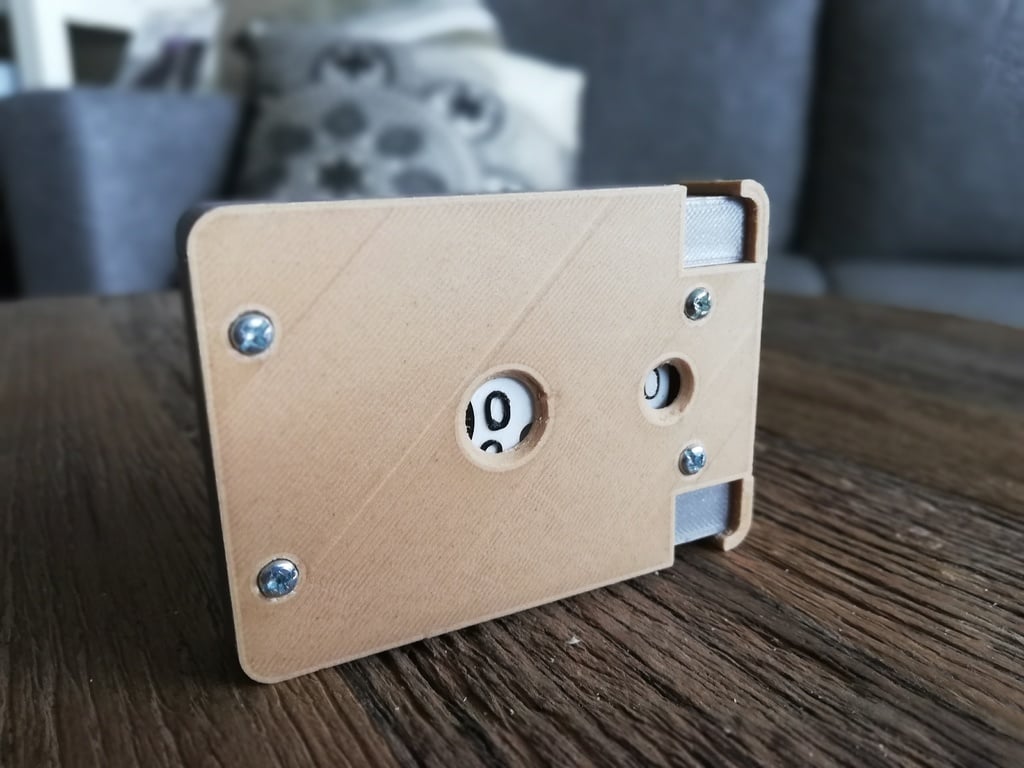
Mechanical Tally Counter 1.0
thingiverse
####NEW MODEL!\r\n*** * See the Mechanical tally counter 2.0 here: https://www.thingiverse.com/thing:4588203***\r\n-------------------------------------------------------------------------------------------------------------\r\n\r\nThis is my go at a tally counter! I decided to over-engineer it from scratch, leaving out any unnecessary complexity.\r\n\r\nOriginally designed as a life counter for the card game "Magic the Gathering", this model has the same dimensions as a magic-card so you can store it with your favorite deck in its deckbox.\r\n\r\nYou can either count by pressing the plus and minus buttons, or set the number using the crank.\r\n\r\nFollow the link to see the counter in action:\r\nhttps://youtu.be/BBNwuClSkp8\r\n\r\n-------------------------------------------------------------------------------------------------------------\r\n###READ BEFORE PRINTING!###\r\n* First of all, this is a non-commercial print, which means you are not allowed to sell files or prints of this model.\r\n\r\n-------------------------------------------------------------------------------------------------------------\r\n\r\n####PRINT SETTINGS\r\n1. Print all components in the orientation they come in to minimize support and maximize part strength.\r\n2. All components are designed to be printed in PLA, although other materials like ABS or PETG can also work.\r\n3. Support materials are only required on "0-Digit wheel", "Plus Button cap", "Minus Button cap", "Case" and "Lid".\r\n4. The "digit wheels" are designed to be layered with two different filament colors, which makes the digits stand out more.\r\n\r\n-------------------------------------------------------------------------------------------------------------\r\n\r\n####NON-PRINTED PARTS\r\n- This project needs two additional springs, specifically 9x35 mm springs, although it can be a bit of trial and error to find the right one.\r\n- You will need 4x m3 nuts and 4x m3x12 screws for this project. If you live in 'murica and can't find metric fasteners, you can either modify the model or glue the lid to the case.\r\n\r\n-------------------------------------------------------------------------------------------------------------\r\n\r\n####ASSEMBLY\r\n- Watch the video below on how to assemble the counter.\r\n- Make sure "+ cap" goes to the left button and the "- cap" goes to the right button. If the press fit isn't good enough, use a dab of super glue.\r\n- Fully assemble the counter before inserting the nut-caps, they are there to hide the ugly nuts and should be flush to the case back.
With this file you will be able to print Mechanical Tally Counter 1.0 with your 3D printer. Click on the button and save the file on your computer to work, edit or customize your design. You can also find more 3D designs for printers on Mechanical Tally Counter 1.0.
