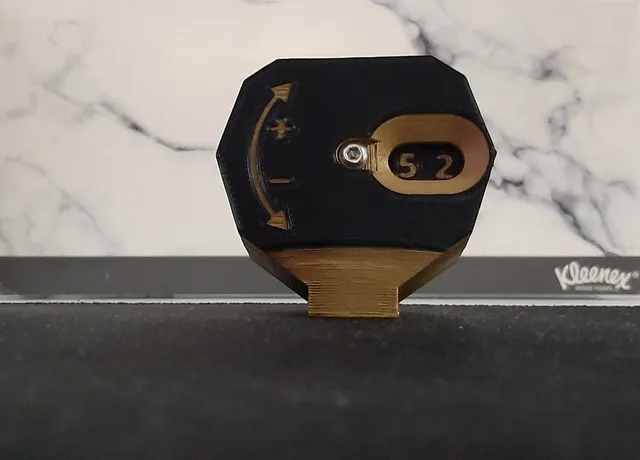
Mechanical Life Counter - M3 Hardware
prusaprinters
TypesType 1:Stand. Ring gear access from top.Body - TopBody - BottomType 2:No stand. Ring gear access from top and bottom.Body 2 - TopBody 2 - BottomGears:Universal. Work with both the above versions.…Hardware1x M3 x 16mm Button Head screw1x M3 x 10mm Button Head screw (8mm will also work here)1x M3 Nut1x M3 Nylock Nut1x M3 Washer (7mm outer diameter, 0.6mm thickness)If you are in Australia, I get my hardware here: https://www.thefastenerfactory.com.au/…PrintingNozzle: 0.25 mmQuality: 0.15 mmFirst layer height: 0.2 mmPerimeters: 3Infill Density: 10%Supports: YesOverhang Threshold: 10°Support on build plate only: YesBrim: Not requiredMaterial: PLAColour Change Layer: 0.35 mmImportant: For the model to work it must be printed at the 0.15 mm resolution.Additional print settings can be found in the attached file: ‘MLC PrusaSlicer Print Settings.txt’Recommended Print Layout:Planet gear oriented with 8 teeth on print bed (chamfered edge facing up),Sun & Ring gears oriented with numbers facing print bed.…AssemblyStart with the base part (i.e., Body - Bottom),Place the M3 Nut in the slot on the base,From the back of the base screw the M3 x 10 mm Button Head screw into the M3 Nut (avoid overtightening),Place the Planet gear on the extruding screw thread (8 teeth with chamfer facing down),Place the Ring gear on the base,Try to align a number with where the view slot will be.Place the Sun gear on the base,Again, try to align a number with where the view slot will be.Place and align the M3 Washer over the hole on the Sun gear,Place the top (i.e., Body - Top) onto the base (Don't snap it in just yet),From the top screw the M3 x 16 mm Button Head screw into the base,Now snap the base and top pieces together (Note that some force may be needed),Place the M3 Nylock Nut in the slot on the back of the base and screw the M3 x 16 mm Button Head screw into it (go until just tight then rotate back (i.e., counterclockwise) a quarter turn).Note: the number divider is a purely aesthetic design inclusion and can be removed via the use of flush cutters.Warning: disassembling the top and bottom pieces can weaken the snap-fit joint. Do only if absolutely necessary by removing the M3 x 16 mm Button Head screw and gently squeezing the sides of the base while pulling the top.…Design File available in OnShapehttps://cad.onshape.com/documents/2ff4f7ef90a1a17ac3f4be57/w/fb2c94175fad5534ec2c67eb/e/e95471ed800bd5ddf7ebaf10…Changelog07/02/2024Change: New design added.12/02/2024Changes: Updated Base (V1.1) and Ring Gear (V1.1) with new tolerances. Added .step files for gears.13/02/2024Changes: Fixed issue with Ring Gear (V1.2).17/03/2024Changes: Optimised version added (V2.0). Extensively tested by myself and JediRick. New version without stand added.---If you find any issues or have any recommendations on how to improve the design, don't hesitate to leave a comment.
With this file you will be able to print Mechanical Life Counter - M3 Hardware with your 3D printer. Click on the button and save the file on your computer to work, edit or customize your design. You can also find more 3D designs for printers on Mechanical Life Counter - M3 Hardware.
