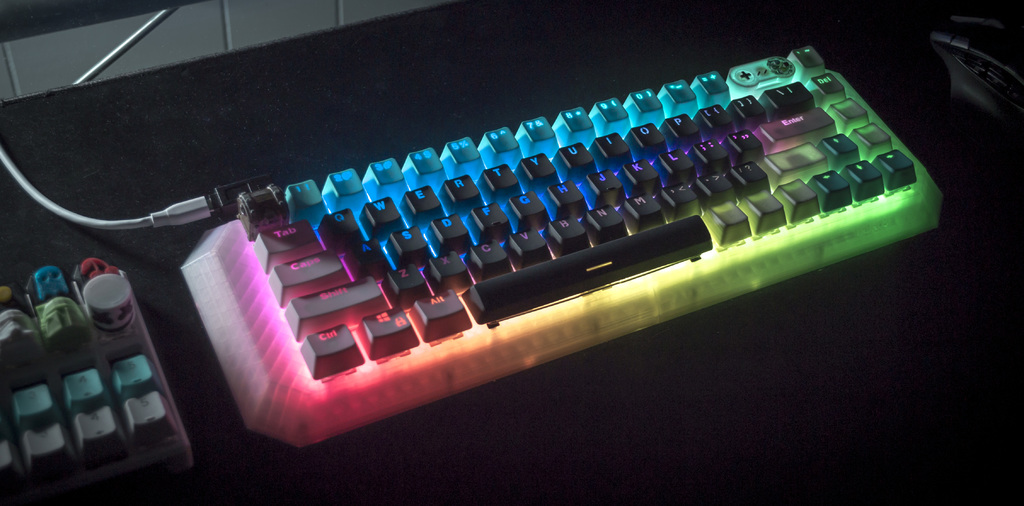
Mechanical Keyboard - Tada68
prusaprinters
<p>In my search for a 3D Printed keyboard case, I came across the WhiteFox by @Matt3o. He has many build threads and videos that are extremely useful and has inspired me to try my hand at hand-wiring my own from scratch.</p> <p>I loved his WhiteFox build and design but was more interested in a Tada68 layout. This is a remix of his brilliant board with my ideas for a unique, custom keyboard. Also included are the "non standard" keys you will need for this layout.</p> <p>Here is the layout of the Tada68:</p> <p>For this build I went for the cheapest mechanical keyboard I could make. To achieve this you will need patience because you will have order some parts on eBay or AliExpress from China. Heres what you will need:</p> <p>Teensy 2.0 - $11 (or buy a knock off for ~$6)<br/> Mini USB cable - $5<br/> Rubber feet - $4-6 (or print them if you have TPU)<br/> Hardware - $4<br/> Standard "OEM" Keycaps - $8-10 (for single color)<br/> 70 - Cherry MX style switches - $10 (MX Blue clones)<br/> 100 - 1N4148 Diodes - $3<br/> 3 - Costar plate mounted 2u stabilizers - $4<br/> 1 - Costar plate mounted 6.25u stabilizer - $2<br/> Thin wire - ?<br/> Solder + Iron - ?<br/> Patience - ?</p> <p><strong>Added a how to add firmware via EasyAVR including all files for this same layout on my other keyboard here:</strong> <a href="https://www.thingiverse.com/thing:3478494">https://www.thingiverse.com/thing:3478494</a></p> <p>Enjoy and post your makes!</p> <p><em>If you found my Things useful, treat me to a cup of coffee by using the PayPal button below :)</em> Buy me a cup of coffeeBuy me a cup of coffee $3.00 USDBuy me a massive cups of coffee $5.00 USDGive me a caffeine coma $10.00 USD<strong> Update 1: Added v2 of Bottom Right Panel that holds in the teensy for a better fit. Also added v2 of the Left Side of the keyboard for a bigger and better fitting opening for the teensy microcontroller. Everything should now fit without modification.</strong></p> <h3> Post-Printing</h3> <p><strong>Here are the parts you need to print as well as hardware, teensy, and keys. The two chassis pieces (I have a Creality Ender 3 that prints 220x220mm max so it had to be split) to make up the main body, the back plates, some dove tails, and a few non standard (OEM) size keys for shift, page up/down, and Alt, FN, Cntr.</strong></p> <p><strong>This is where the Teensy 2.0, the micro controller that will power the keyboard, gets tucked away.</strong></p> <p><strong>The panel on the bottom has a tab that holds the teensy in place</strong></p> <p><strong>Threading in the hardware into the PLA is actually really easy. Just be gentle and don't over tighten the screws.</strong></p> <p><strong>Finally, the diodes, and the "NewGiant" Blue (Outemu blue clones) switches came.</strong></p> <p><strong>You need to glue the chassis together and use the dove tails to make the two pieces into one. Take your time here and make sure everything is aligned. Then, insert the switches.</strong></p> <p><strong>Here is a wiring diagram I made. Take your time planning at this step as small mistakes could take a long time to undo. I would also go ahead and Google "EasyAVR" and get your hands on a hardwired.py example so you can start creating the firmware for your custom keyboard.</strong></p> <p><strong>Time for some hand wiring! This is my first time soldering more that a few wires. So, please keep that in mind...</strong></p> <p><strong>The rows done!</strong></p> <p><strong>And now the columns. The green row wires in this photo are soldered to the pins of the switch but actually needed to be soldered above the diode to work. I fixed this issue shortly after this photo.</strong></p> <p><strong>And here is the teensy all wired up to the rows and columns.</strong></p> <p><strong>The back panels and the feet are on. I actually had to move the feet around a bit to get it to be perfectly level. Its a 3D Print after all.</strong></p> <p><strong>Here's the finished keyboard! So excited to have it wired and working. I used EasyAVR to program the teensy. The next step is to figure out some backlighting. I'd love to use an LED strip to light up the case. :)</strong></p> <p><strong>Got an LED strip working via QMK!</strong></p> Category: Electronics
With this file you will be able to print Mechanical Keyboard - Tada68 with your 3D printer. Click on the button and save the file on your computer to work, edit or customize your design. You can also find more 3D designs for printers on Mechanical Keyboard - Tada68.
