Mechanical Calculator Credit Card
prusaprinters
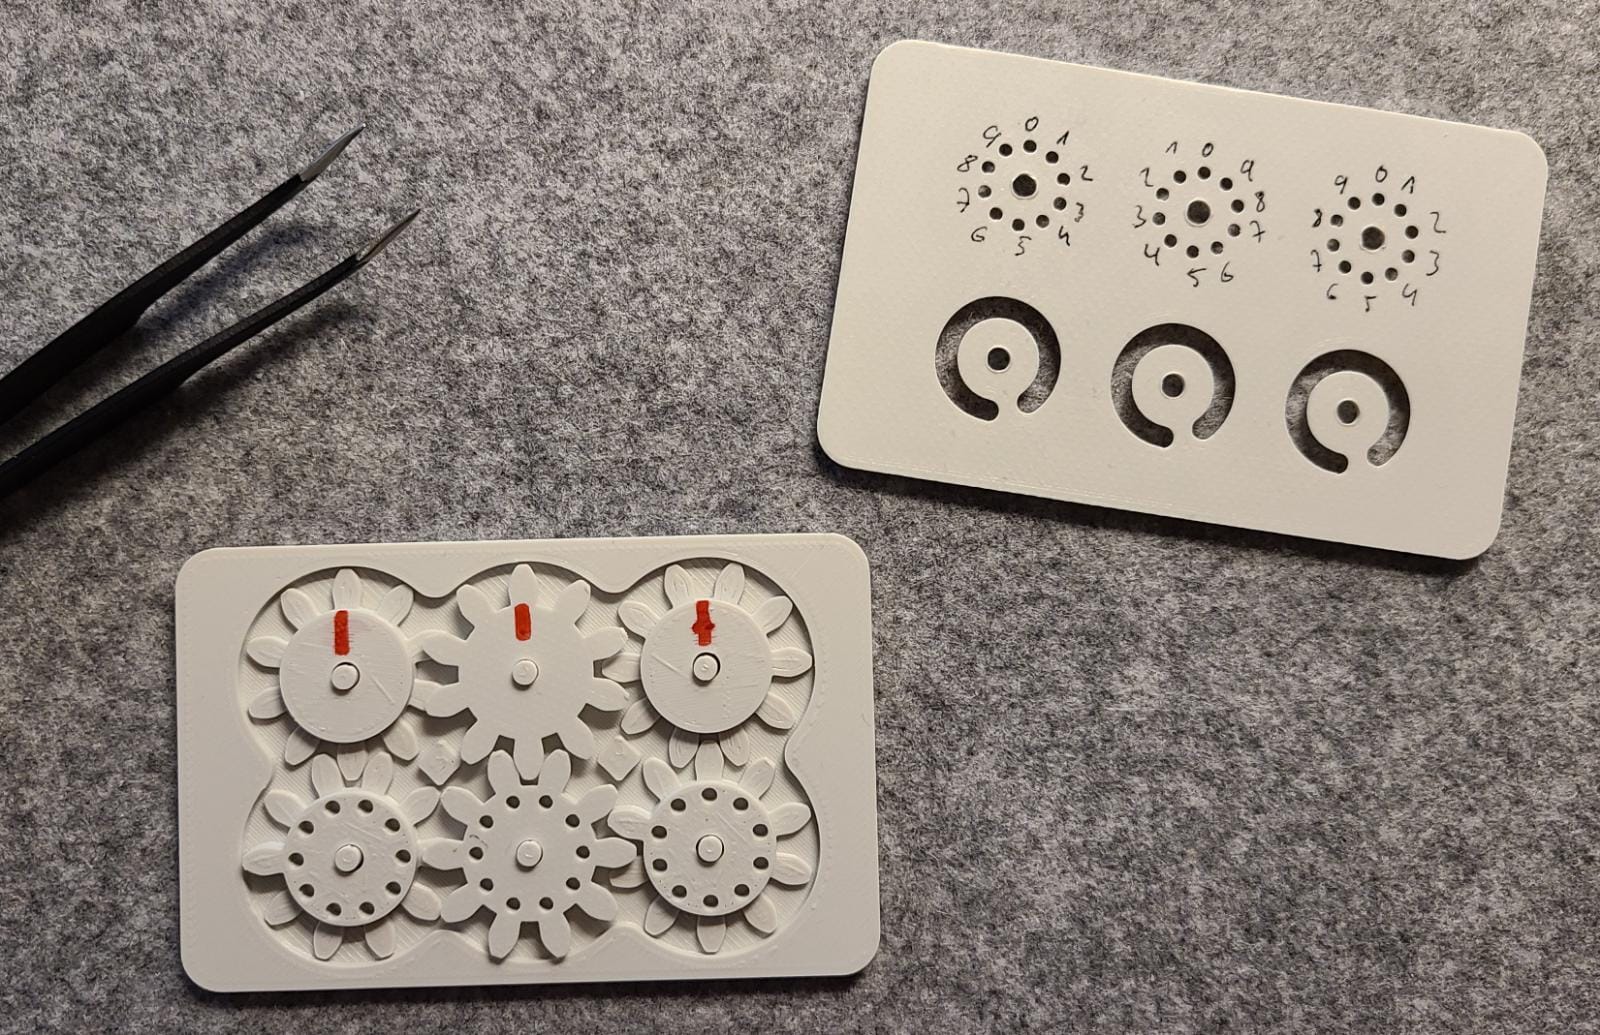
<p>Hello,</p><p>this is an early version of my mechanical calculator.</p><p>It has the dimensions of a credit card and is 4 mm high. So you could even carry it in your wallet.</p><p> </p><p><strong>How does it work?</strong><br>I have designed two-stage gears. The first stage has the full ring gear (10 teeth). The second stage, however, has only one tooth. This means that if you turn one gear wheel 10 times, the next one only turns 1x, and so on. It is very similar to a tally counter, only that you can set the individual numbers and that it is very thin/flat.</p><p><strong>How do you use it?</strong><br>If you look at the calculator from the front, you see the 3 "displays" at the top and the control units underneath. Every control unit and the display above it always belong together. The display shows the current number with a dark background. If you turn the corresponding wheel in the control unit either clockwise or counterclockwise by the desired number, the display changes. As soon as you reach "10", the display jumps back to "0" and the display next to it on the left to "1", so that you see "0" "1" "0" (=10) on the display. In this way you can easily add and subtract numbers.</p><p><strong>What do you need besides a 3D printer?</strong><br>A ballpoint pen or tweezers to be able to turn the wheels in the control element. Also a felt-tip pen is useful to label the gears or the displays.</p><p><strong>How do you assemble it?</strong><br>This part will be added when I have found out what I need to pay attention to in order to ensure proper functioning. So far I would suggest to arrange the gears as they are shown in the pictures, the placement of the gears is important regarding the side with only one tooth. I will write proper instructions as soon as I had the time to do so.</p><p><strong>What will be improved on the calculator?</strong><br>Sometimes the gears jam if you don't place the calculator flat on a table, I will solve that. Also, it can happen that the next display does not jump one number further but 2 or 3 if you turn too quickly. I will install some kind of stop mechanism here. The two halves of the calculator are currently only loosely connected to each other, I will also improve this. And I will add proper numbers to the 3D file.</p><p>If you have any suggestions on how to make it better feel free to leave a comment or just shoot me a message. I really appreciate any help or ideas! :-)</p><p> </p><p>If it does not work for you please leave a comment or shoot me a message instead of just posting a 1 star review, I'm sure there is no problem that can't be solved.</p>
With this file you will be able to print Mechanical Calculator Credit Card with your 3D printer. Click on the button and save the file on your computer to work, edit or customize your design. You can also find more 3D designs for printers on Mechanical Calculator Credit Card.
