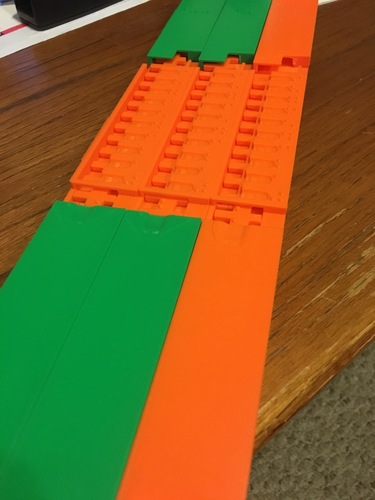
Mechanical Braille Calculator
pinshape
This tactile calculator is designed for elementary school students who are visually impaired. It's an adaptation of the Addiator calculator, which used a stylus and metal sliders to do addition. The calculator is designed to be used completely by sense of touch, with both braille numbers and indentations to guide the user's fingers. The calculator is modular, allowing one to add and remove place value columns as needed. To see the calculator in action, watch the video below. In researching calculators for students who are visually impaired, I noticed that most available calculators give audio feedback. While these calculators are extremely beneficial for students, their reliance on audio can make it difficult for them to be used in a noisy classroom setting. Additionally, it's crucial for students, especially younger elementary school students, to work together and talk to each other while doing schoolwork to build social skills. An audio calculator can get in the way of this process. This mechanical calculator allows visually impaired students to communicate with their peers without the distraction of trying to listen to an audio cue. As a bonus, the calculator enables students to learn about place value in a tangible way. Each modular unit can be used on its own, and students can learn about why one needs to carry a set of ten to the next column, gradually adding place value columns as their math skills progress. Construction: Glue "Bottom Lower" to "Bottom Upper." Glue "Top Lower" to "Ones's Top Upper." (Repeat for other place value columns. "Top Upper" files are included for the 1's, 10's, 100's, and 1000's columns, all written in braille.) Place a small amount of glue on the tab located on the sort side of the bottom section. Insert the tab into the slot closest to the 0 braille marking on the "Middle" piece. Once the glue from steps 1-3 has dried, insert the "Slider" into the top of the "Middle" piece with the braille facing up and the shorter cross bars underneath the overhang on the "Middle" Piece. Slide the "Slider" all the way down. Place a small amount of glue on the tab located on the sort side of the top section. Insert the tab into the slot closest to the 9 braille marking on the "Middle" piece. Once you have assembled multiple place value columns, you may choose whether or not to glue them together. Instructions for Use: One's column only example 1. Place the calculator on a flat surface with the 0 label closest to the user and the place value label away from the user. 2. To enter the first number, find the first addend on the right side of the "Middle" section and follow the guide slot to the left until your finger falls into a slot in the "Slider." 3. Slide your finger towards you until it reaches the horizontal bar. 4. Find the second addend and repeat the process above. 5. Starting at the bottom of the device, slide your finger up until you find the guide slot. Follow the guide to the answer window and the sum can be felt in braille. Carrying 6. If you need to carry, make sure that you have enough place value modules attached to the calculator. 7. You will be given feedback by the calculator if you need to carry. As you slide a number towards you, the slider will stop before you reach the horizontal bar. If this happens, without lifting your finger, slide the slider away from you as far as possible. You will then feel an opening to the left side, follow the path to the left, up, and back down as far as possible. As you do this, you will feel the slider in the next place value column move by one spot. Design Process The calculator was based on the Addiator (http://www.vintagecalculators.com/). I modified the mechanism so that it would fit large braille numerals and be able to be used with your fingers rather than a stylus. My first iteration of the device did not have the guide slots positioned correctly for carrying, which I fixed on the second version. After testing the calculator with a large number of calculations, I noticed that there was a problem when carrying if there was a large number in the next column as the slider had no more slots to grab. The newest version of the file has added a rung to the "Slider" to fix this problem.
With this file you will be able to print Mechanical Braille Calculator with your 3D printer. Click on the button and save the file on your computer to work, edit or customize your design. You can also find more 3D designs for printers on Mechanical Braille Calculator.
