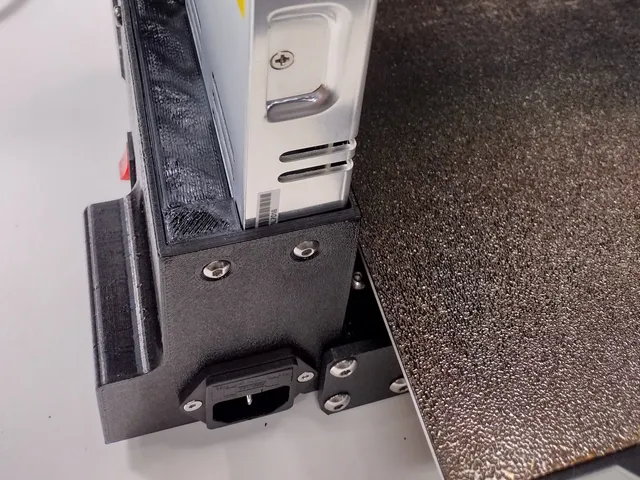
Meanwell LRS-350 PSU cover For Mk3S/+ Prusa with rear AC/Mains
prusaprinters
This is a remix of https://www.thingiverse.com/thing:3082178 which was designed for the discontinued Meanwell NES-350-24. I like the design for its simplicity, rear-facing AC/Mains receptacle, and integrated cable-tie slot but the model was not compatible with the newer slim Meanwell units as is. Why upgrade the PSU?Prusa includes a 250W PSU. When heating up the heatbed and extruder from room temperature, the actual load on the PSU exceeds 300W and often approaches 325W. You can test this for yourself with an AC/mains power meter.The PSU can run reliably at this wattage for a short period of time, but the internal components age far more quickly under these conditions reducing reliability, and the overall PSU efficiency plummets.By upgrading to a 350W PSU, not only does the PSU efficiency improve, but the PSU will last longer since the components won't heat up as much. The only drawback with these higher-rated power supplies is that they include cooling fans which can be noisy under certain conditions. Most models have built-in fan speed controllers which switch off the fan at idle and vary the fan speed according to the PSU load. Compared to the original cover design by sneaks, I've changed the following:thickened upper PSU mounting area to accommodate 30mm “slim” PSUs such as the Meanwell LRS-350-24 and RSP-320-24 (RSP is similar to LRS models but with quiet PWM fan speed control, active PFC for improved efficiency, and full range AC/Mains input instead of 120v 240 switch)moved the power switch closer to the AC/mains receptacle for simpler wire routingadded relief lines near the AC/Mains socket so you can bend and snap out a piece of the bottom cover to ease power-panic PCB fitmentsimplified filets/chamfers for quicker printingadded stiffening strutadded cutout for z-axis motor wires Required hardware:3x M4x8mm or M4x6mm Flat Screws (Mount PSU to Cover) (M4x10 is too long)4x M3 Square Nuts (3x Bottom / 1x Cover)1x M4x10mm Button Screw (Mount PSU to MK3 Frame upright - can use one additional screw if an additional hole in drilled into the frame)4x M3x6mm Flat Screws (Mount Bottom to Cover)2x M3x10mm or 2x M4x10 Cap Screws (Mount Cover to MK3 Frame Y extrusion - size depends on which T-nuts are slotted into the extrusion)2x M3x10mm Flat or Button Top Screws (Mount AC/Mains receptacle to Cover)2x M3 Stop Nuts (Mount AC/Mains receptacle to cover)1x 4" plastic cable tieMany nuts and screws can be reused from the original PSU cover or from the spare parts kit. Recommended print settings:0.25mm3 perimeters15% infill0.6mm nozzle (0.4mm nozzle OK)no supportsturn off thin-wall detectionPETG filament Install process:You need to connect all the wires for AC/Mains, power panic pcb ,etc. before screwing the PSU or cover to the main chassis. Once you have wiring mostly in place, test that the printer turns on properly with heat bed and extruder. Then bolt PSU to the cover and rotate it into place, then fasten the assembly to the chassis.
With this file you will be able to print Meanwell LRS-350 PSU cover For Mk3S/+ Prusa with rear AC/Mains with your 3D printer. Click on the button and save the file on your computer to work, edit or customize your design. You can also find more 3D designs for printers on Meanwell LRS-350 PSU cover For Mk3S/+ Prusa with rear AC/Mains.